First, the bad news: If you’re thinking about using ChatGPT to generate social media posts so you can copy and paste them into Instagram and call it good, trust me when I say you’re setting yourself up for massive frustration – not only with ChatGPT, but with your results on social media.
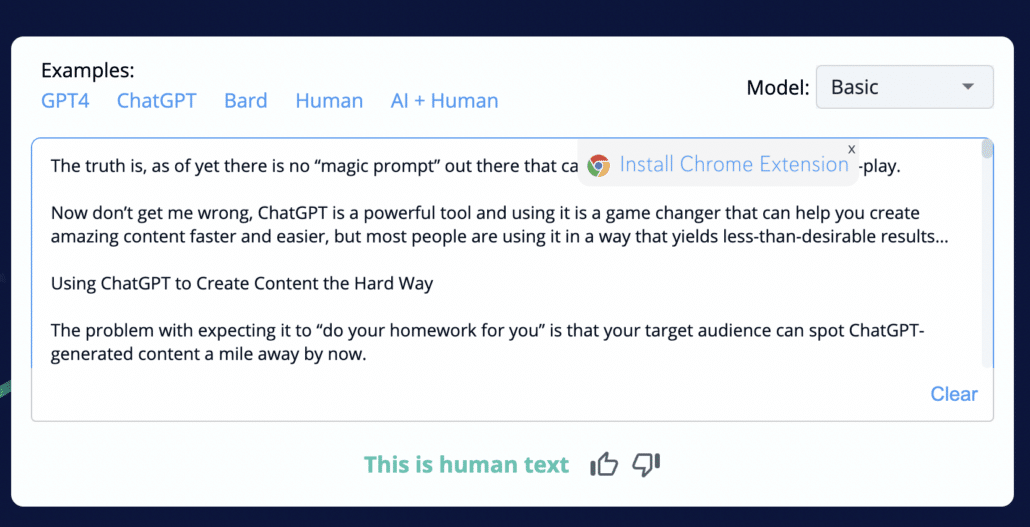
The truth is, as of yet there is no “magic prompt” out there that can make this process truly plug-and-play.
Now don’t get me wrong, ChatGPT is a powerful tool and using it is a game changer that can help you create amazing content faster and easier, but most people are using it in a way that yields less-than-desirable results…
Using ChatGPT to Create Content the Hard Way
The problem with expecting it to “do your homework for you” is that your target audience can spot ChatGPT-generated content a mile away by now.
Studies have shown that humans can predictably detect ai-generated content more than half of the time and while ChatGTP generates human-like text, it’s not authentically human. There’s just a little something-something missing that it isn’t able to capture yet and it’s why ai-detection tools can tell you whether your content is human text.
At the very least, you’ll want to spend time putting your captions into your own tone of voice when using it for something your audience will read like an instagram caption.
Even more important: AI tools aren’t responsible for your social media strategy. It’s still up to you to know why you’re posting this or that and how it relates to your customer’s journey. ChatGPT can only follow your instructions and if you’re not careful, you might wind up creating content that doesn’t support your business goals.
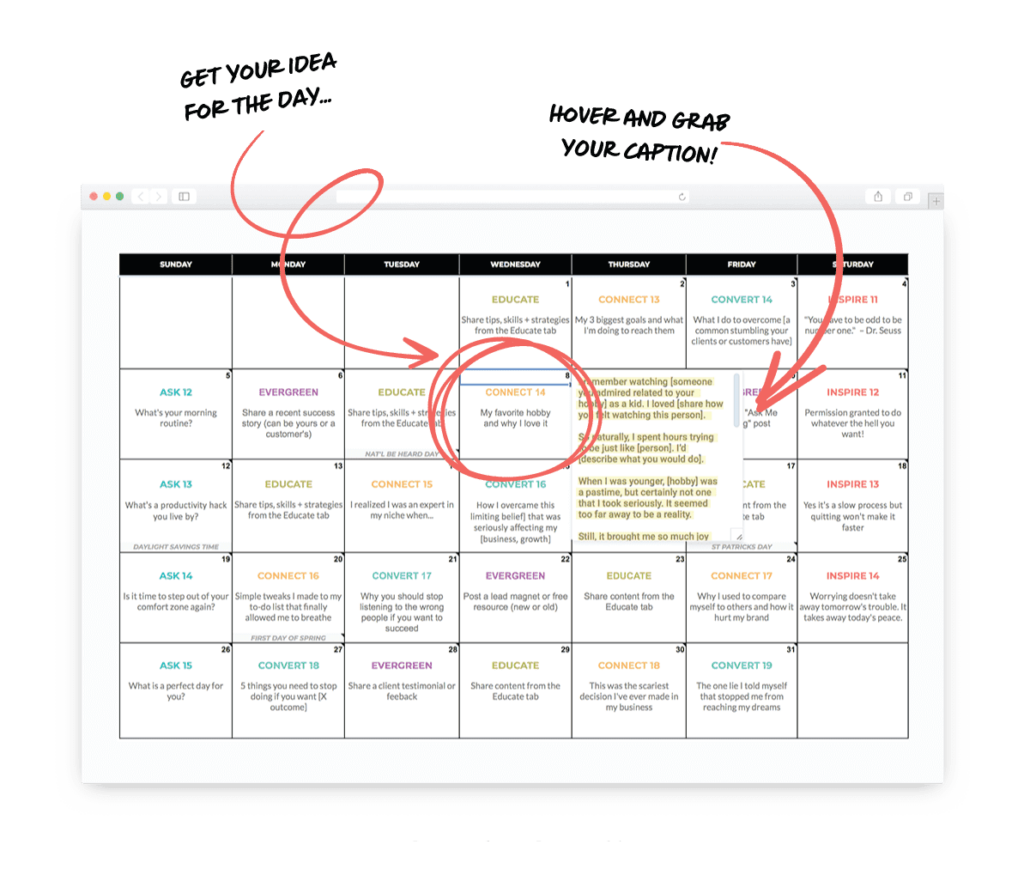
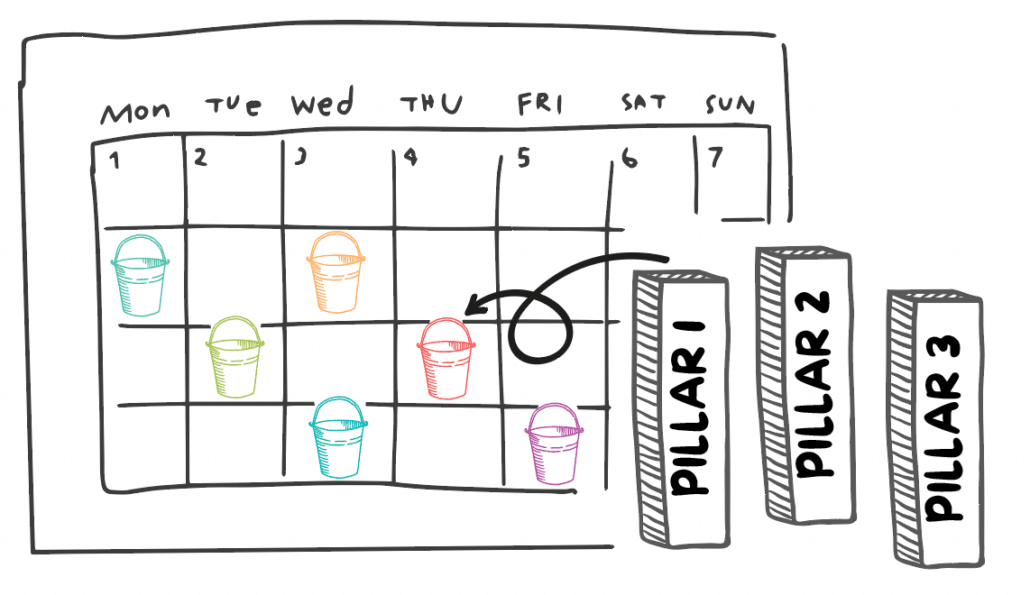
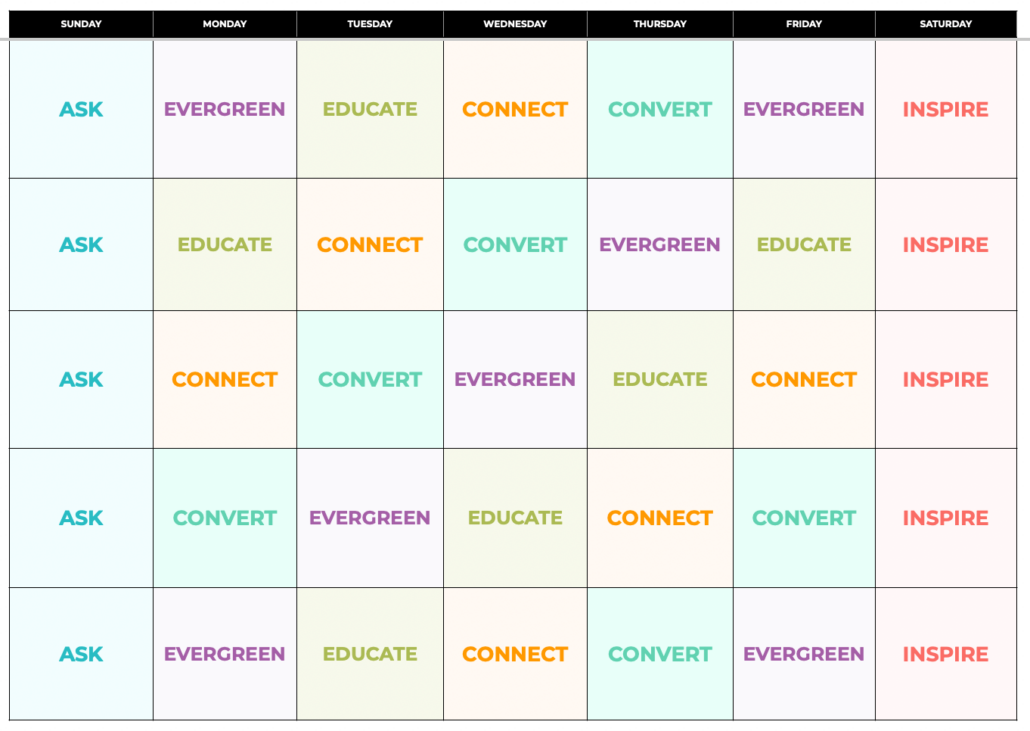
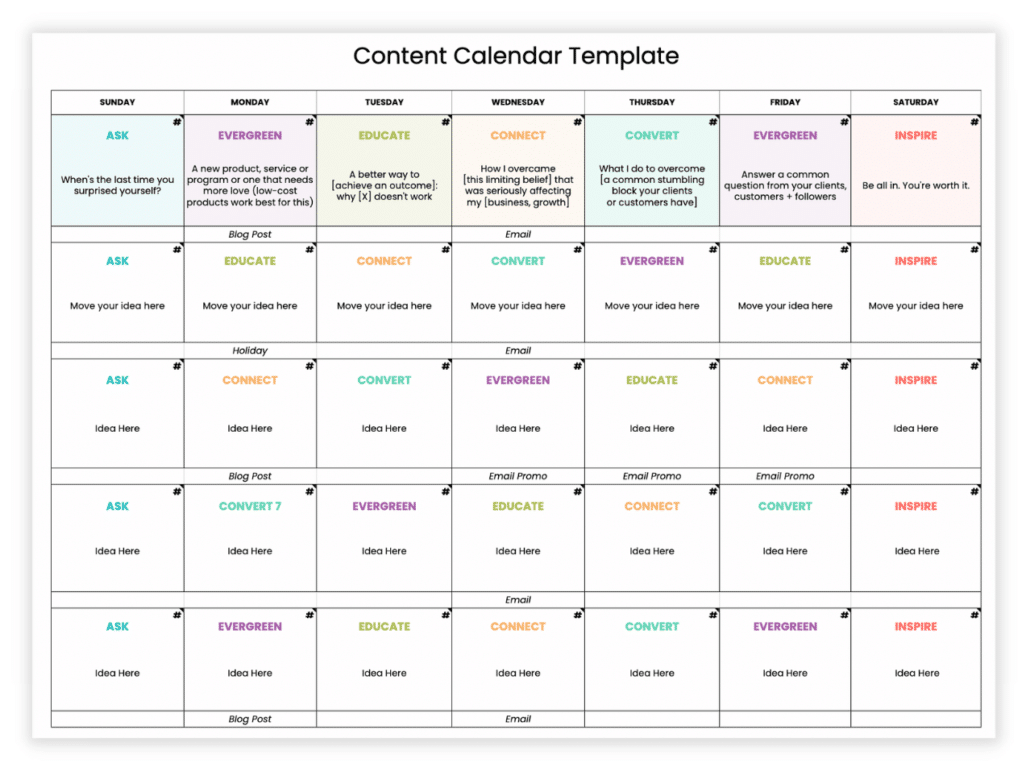
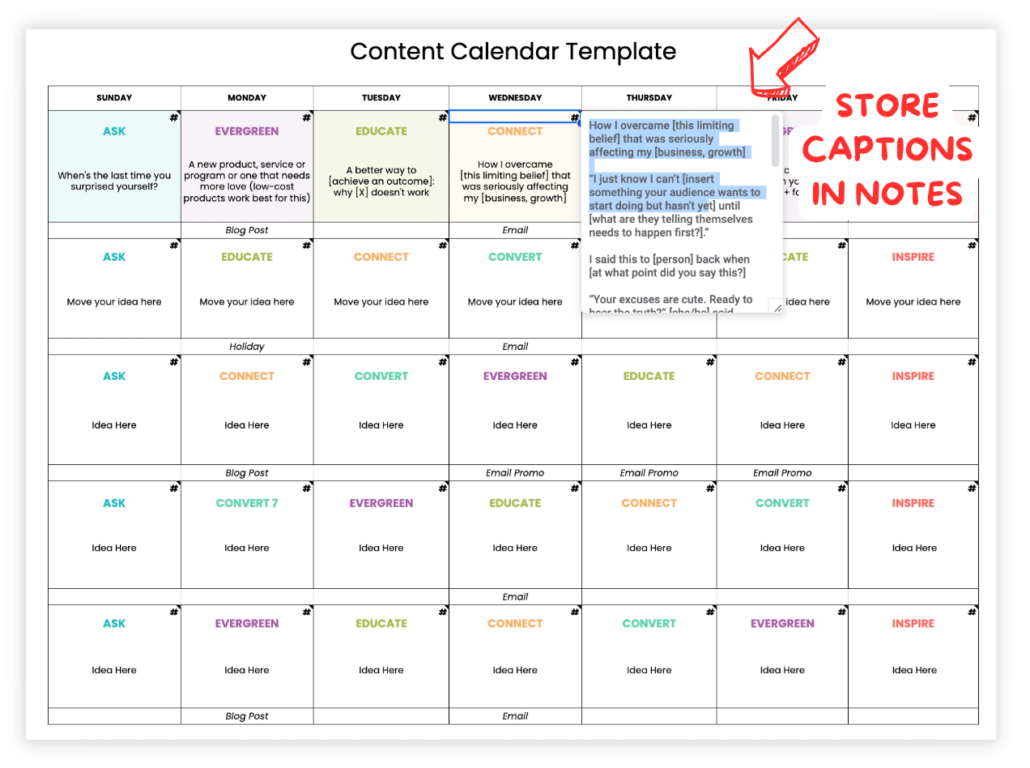
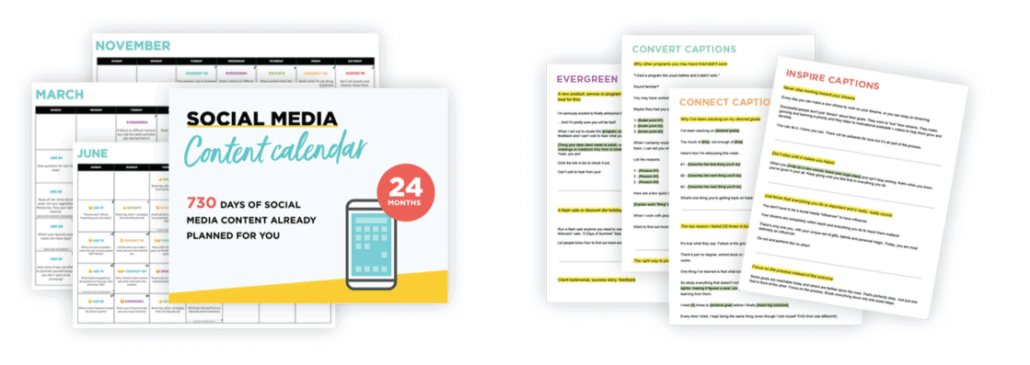
Most small business owners can’t afford the luxury of hiring a social media manager to figure all of that out for them, so if you’re creating your own content, save yourself a lot of trial and error by following best practices using a content plan that’s already laid out for you in a social media content calendar like this one.
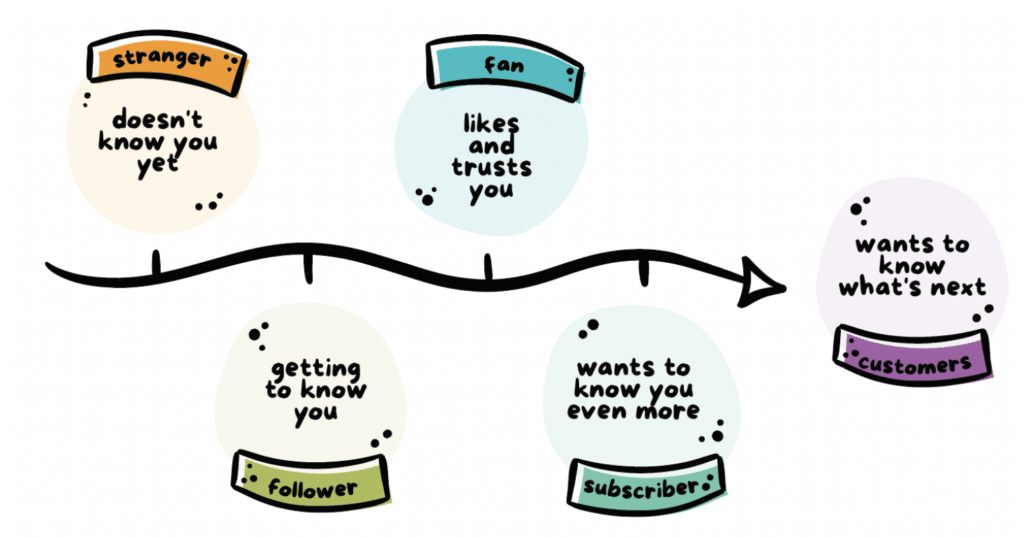
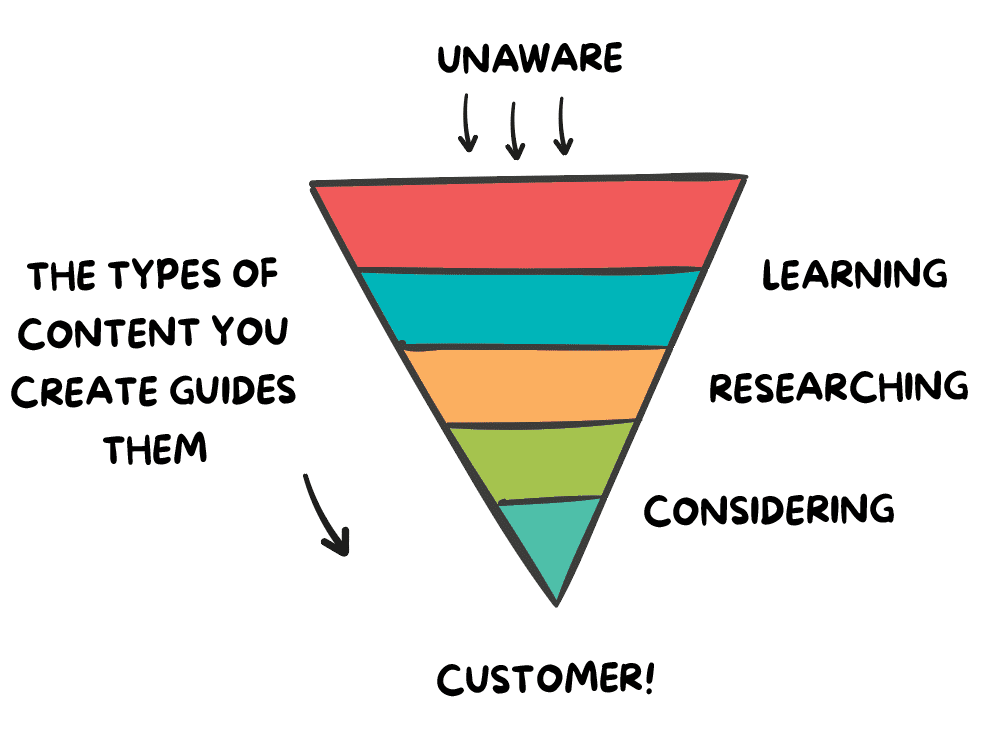
It’s when you know which types of social media posts you need in order to guide people from “just browsing” to buying that creating content for social media starts to really pay off.
But ChatGPT doesn’t consider any of those things when you’re just prompting it to create a social media post for you. It’s like throwing spaghetti on a wall and hoping something sticks.
And even with the best social media prompts (I think I’ve tried them all by now!), ChatGPT can easily go down bizarre rabbit holes and waste tons of your time before failing to deliver what you need.
If after a ChatGPT session you feel like it would have been faster/easier/better to write it from scratch, it’s a bit of a false economy.
Now the good news…
What we’re going to do today is take a bit of an unconventional approach to using ChatGPT to level up your social media game by using a strategy most social media marketers aren’t telling you about…
This is a chat gpt technique we’ve been using consistently for the better part of a year with predictable, time-saving, and quality results.
We’re talking “WOW, this is so much better than I expected!” results.
So for now, forget about finding a specific chat gpt prompt that’ll “finally work” and take a look at how we’re…
#1 Use ChatGPT in combination with Caption Templates
If you’re looking to speed up content creation for social media (and who isn’t!), the biggest secret is to never start from a blank page.
It’s that blank page of doom that really gets you when you sit down to create content – trying to come up with an idea out of thin air and then finding the right words to express it …
Before you know it, half your morning is already over.
Caption templates, on the other hand, are a starting place. They help you leapfrog over that uncomfortable beginning and get right into the process.
Specifically, caption templates that are written by humans who
- Understand the customer journey and what you need to be sharing
- Know how to properly structure a post so it keeps your audience’s attention, and
- Prompt you to share insights and stories your audience needs to hear
This not only saves you time, but it helps you to get results from your social media content.
Sure, you still have a bit of manual work to do to adapt them for your niche, but this is where ChatGPT really shines. Caption templates can be used as ChatGPT templates.
By providing ChatGPT with a caption template instead of a prompt, you’re less likely to get results that sound like a robot – requiring you to either edit the heck out of them or spend a bunch of time fighting with ChatGPT to get it to sound like something you’d say.
Together, caption templates and ChatGPT are a powerful combination!
Think of it this way…
ChatGPT is a helping hand for taking human-written templates and turning them into engaging posts that are relevant for your niche topics and unique-to-you.
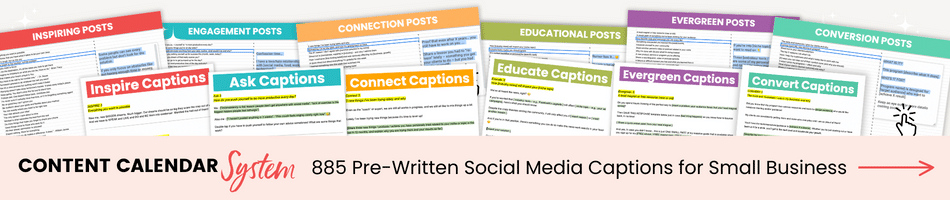
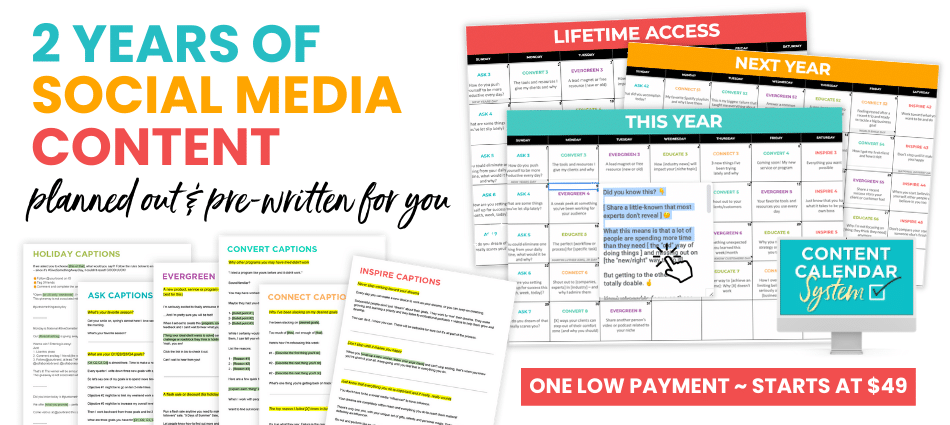
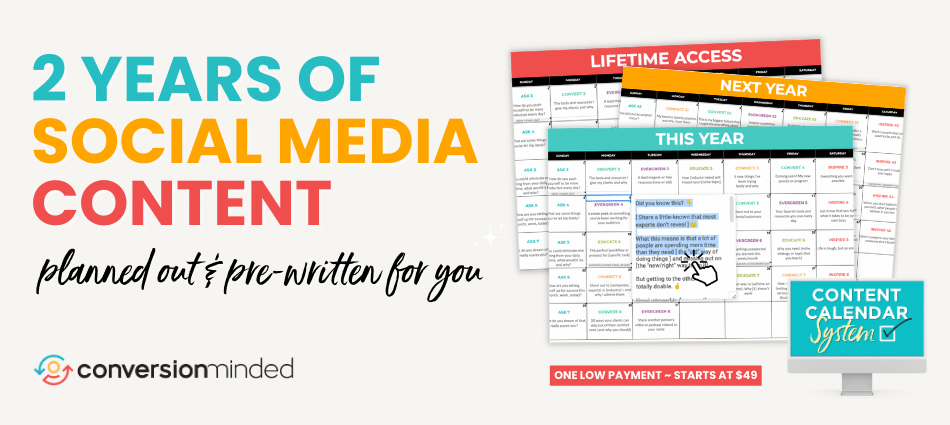
By the way, you can get 885 human-written caption templates inside the Content Calendar System all planned out with the perfect mix of content all businesses need to be sharing for 2 full years and for one low lifetime price.
How to use ChatGPT with Caption Templates
The prompts you’ll need to execute this method works in three steps:
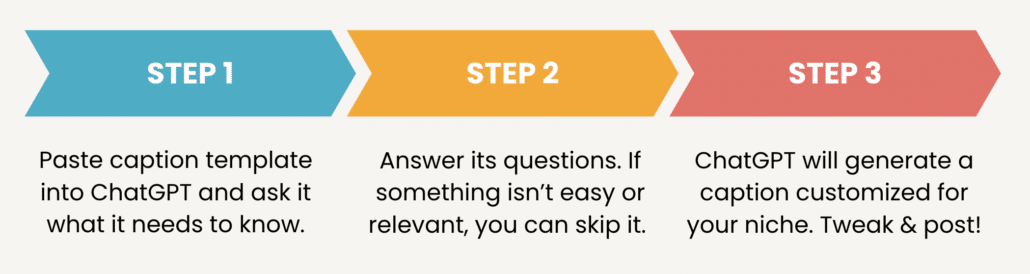
STEP 1: First, provide ChatGPT with the caption template and then ask it what it needs to know (about you, your topic, your business, your audience, etc.) in order to customize it for your niche.
STEP 2: Answer its questions and provide it with relevant information. Skip over anything that’s not relevant or if you’re struggling to provide an answer. Don’t worry about grammar or perfection.
STEP 3: ChatGPT will then generate a customized caption for you that will work for your specific niche and all you need to do from there is tweak it and post it to social media.
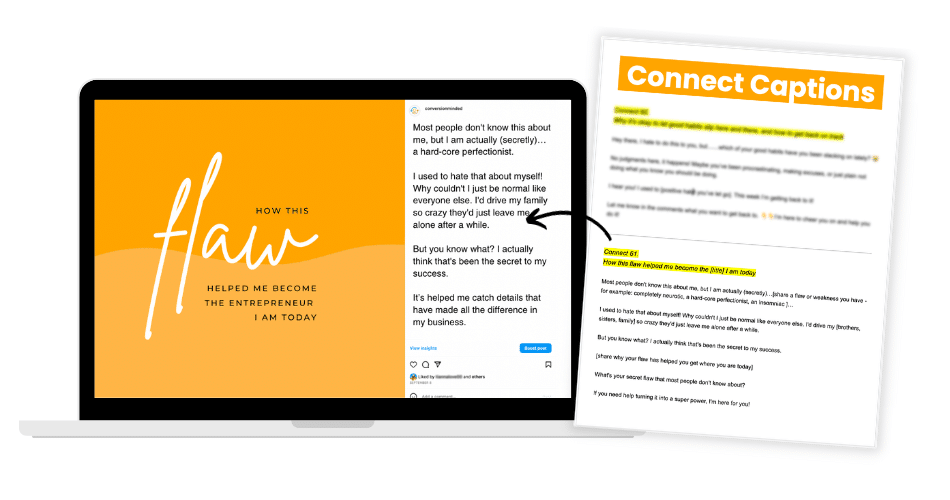
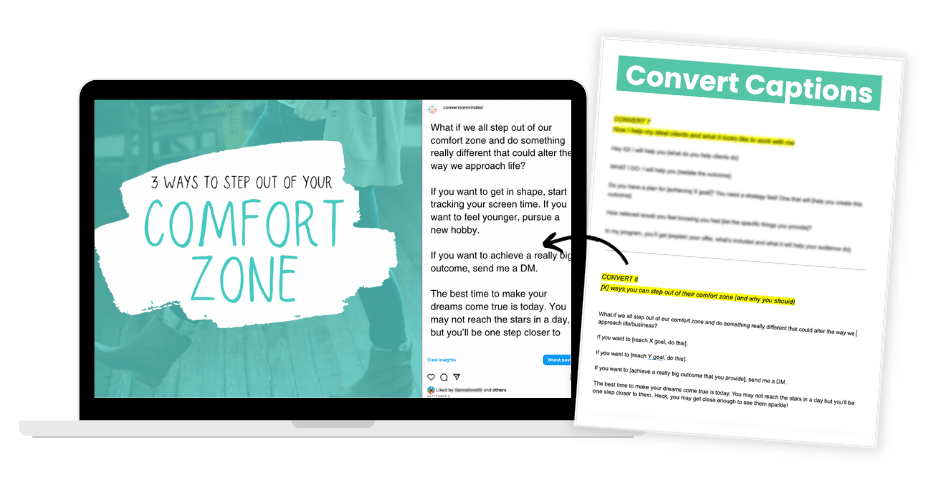
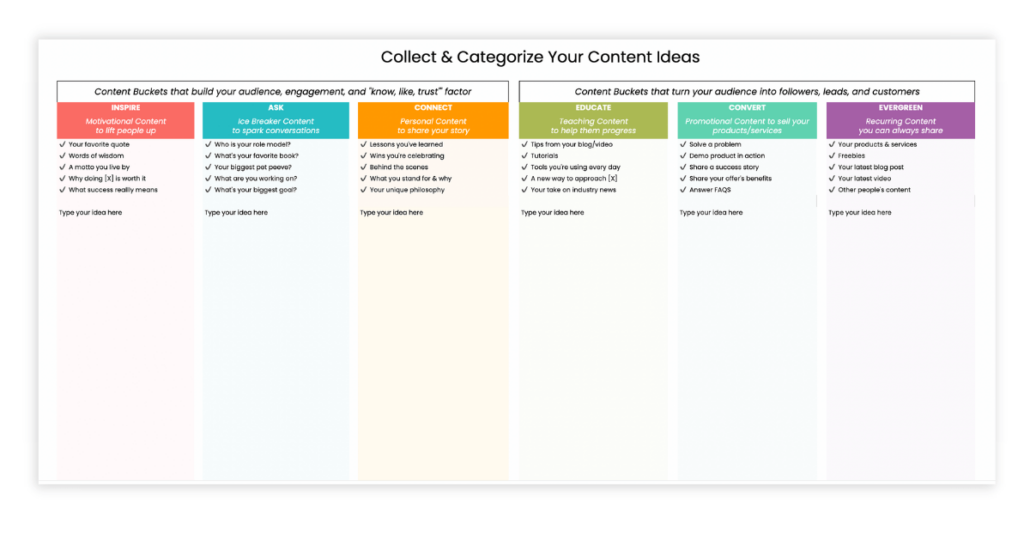
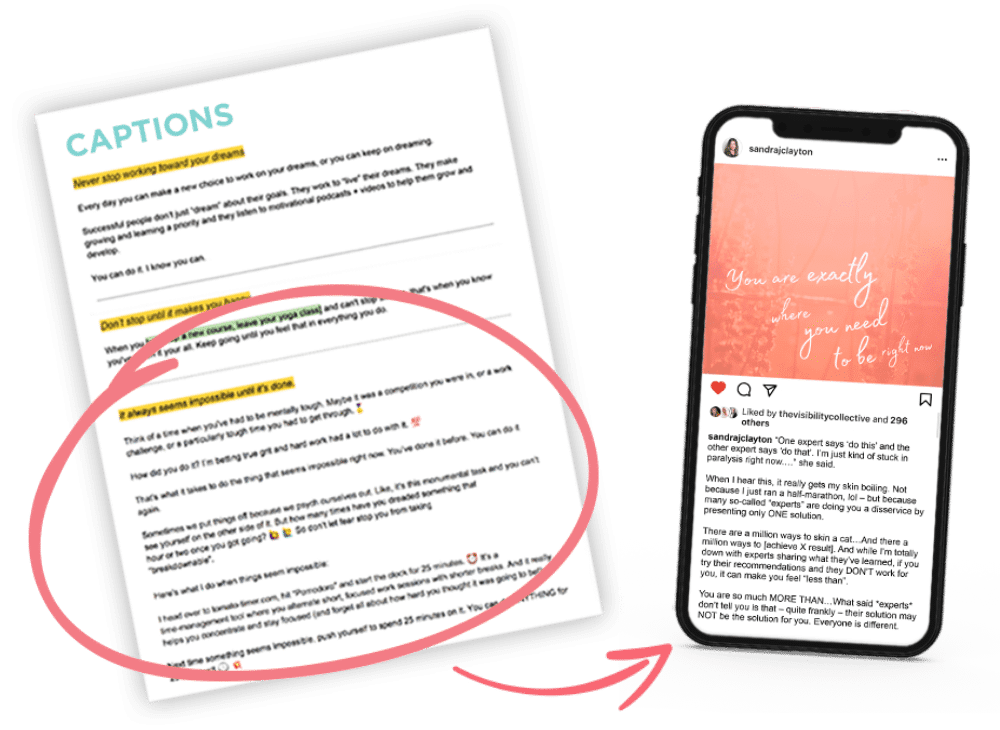
Let’s do an example from the Content Calendar System so you can see this in action! We’ll use this caption from the “Connect” bucket:
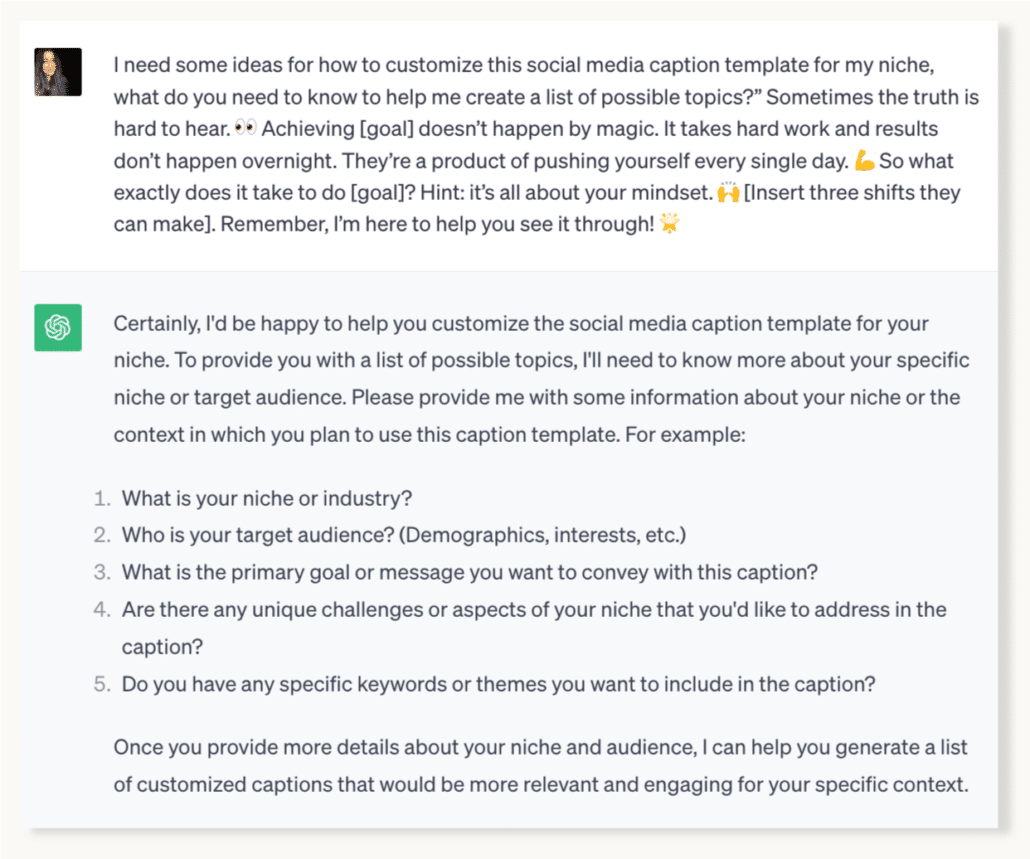
The words in bolded brackets are your writing prompts where you fill in information relevant to your niche. But ChatGPT is going to help us with that!
We’ll use this prompt:

Now you’ll answer its questions and it will customize the caption template for you.
The reason why this is so helpful is that rather than prompting ChatGPT, you’re giving it a starting point so it can prompt you to provide it what it needs to make a social media post that’s relevant for your brand.
The cool thing is, the more you do this, the easier and faster it will get if you store your responses in a “seed text document” for future chat sessions. (We’re going to go into more details on this in the next section so stay tuned.)
Back to the example…
Let’s say you’re in the fitness and nutrition niche and your responses to ChatGPT’s questions look like this:
- Niche/Topic: Fitness and Nutrition
- Outcome: Helping people achieve their weight loss goals and lead a healthier lifestyle.
- Personal Story: “The first time I realized I was an expert at helping people achieve their weight loss goals was when I lost 50 pounds myself. I experienced firsthand the challenges and triumphs, and I knew I could use my experience to guide others.”
- Keywords: Weight loss, healthy living, fitness
- Tone/Style: Motivational and supportive
- Call to Action: “If you’re on your own weight loss journey and have questions or need guidance, feel free to reach out. I’m here to help you achieve your goals!”
- Highlight: Your love for healthy cooking, workout routines, and nutrition tips.
Let’s paste those into ChatGPT and take a look at the resulting caption:
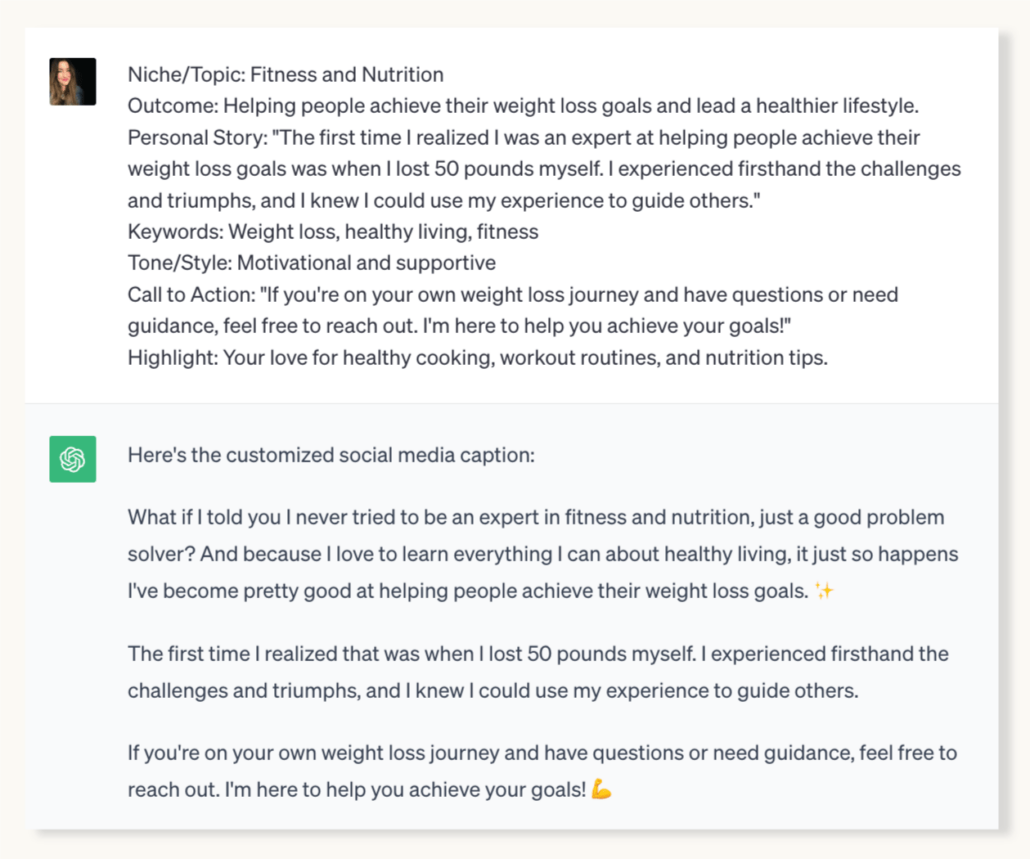
Pretty cool, right? It sounds human rather than stiff and robotic and your caption template is adapted without you needing to even come up with creative ideas for what to say.
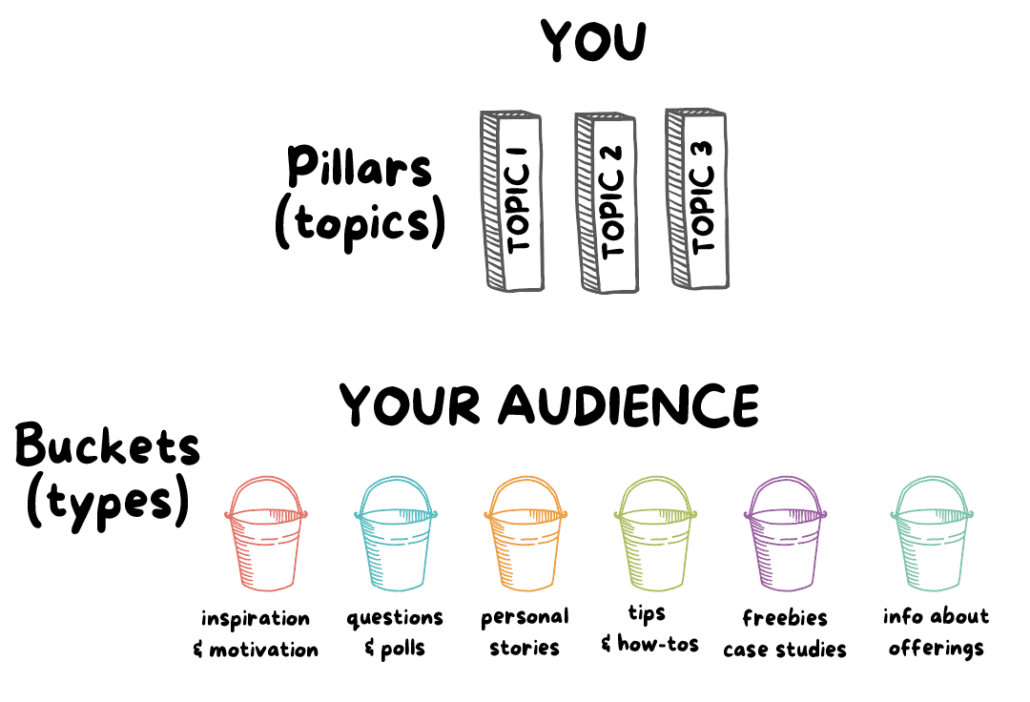
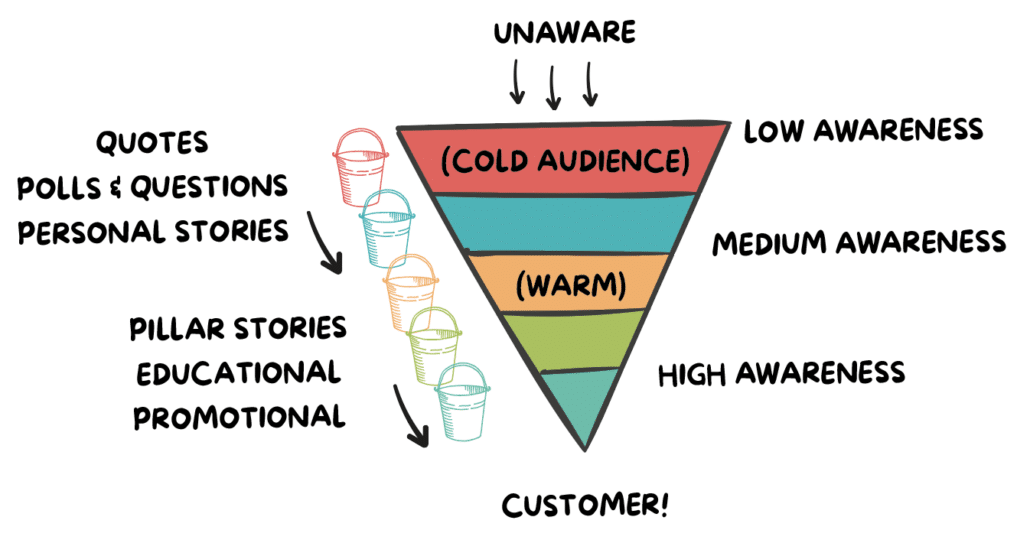
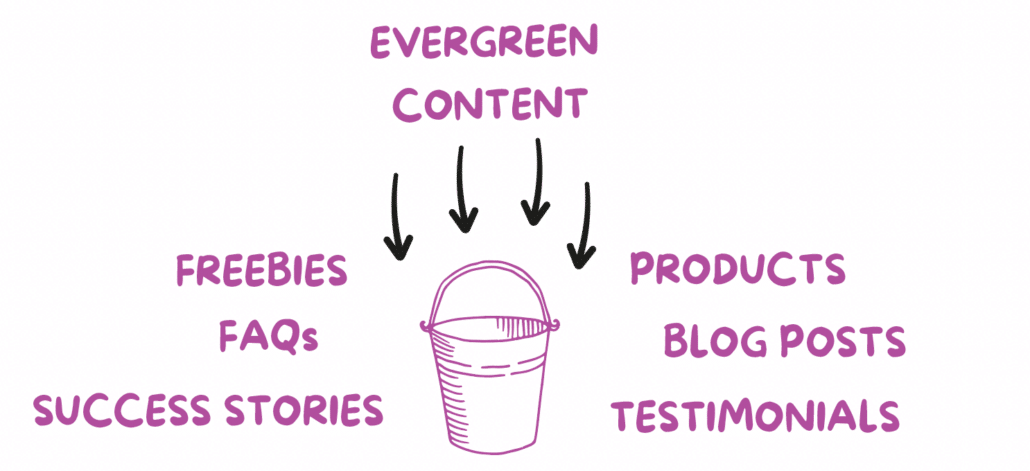
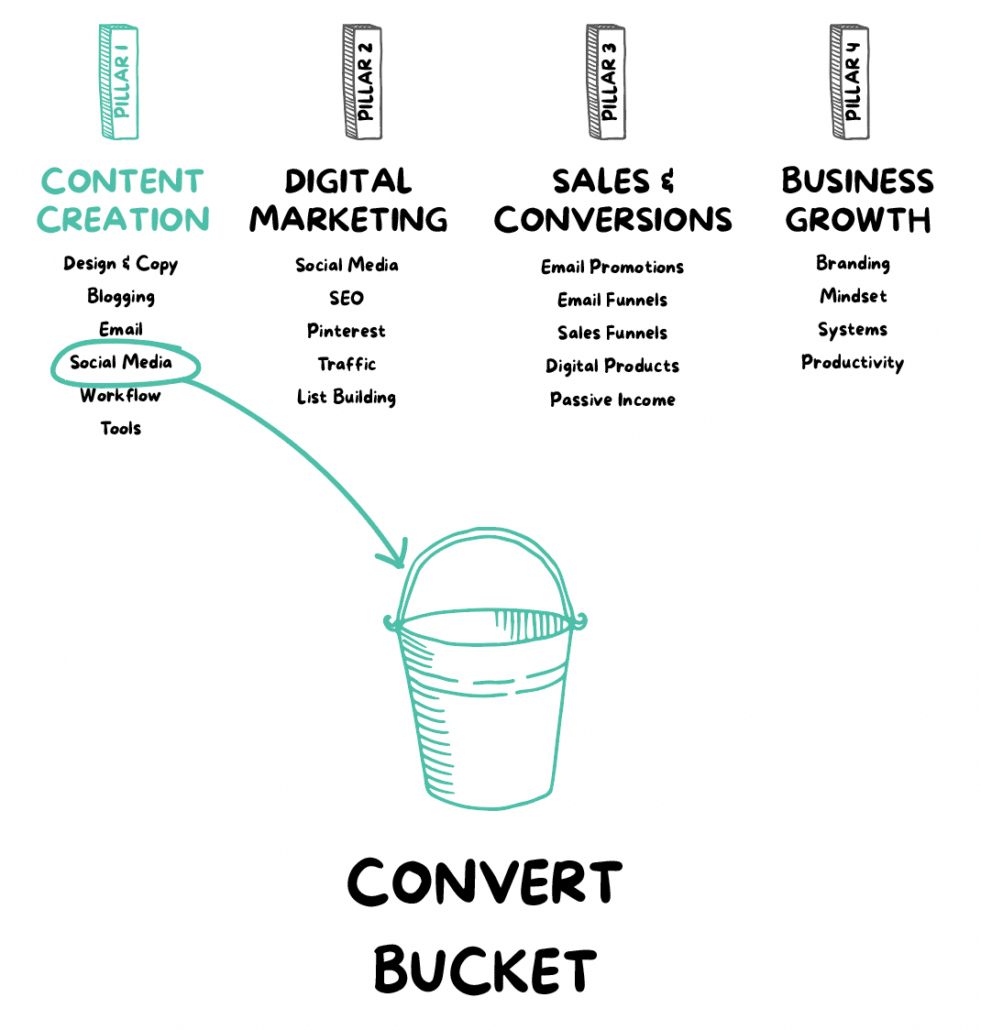
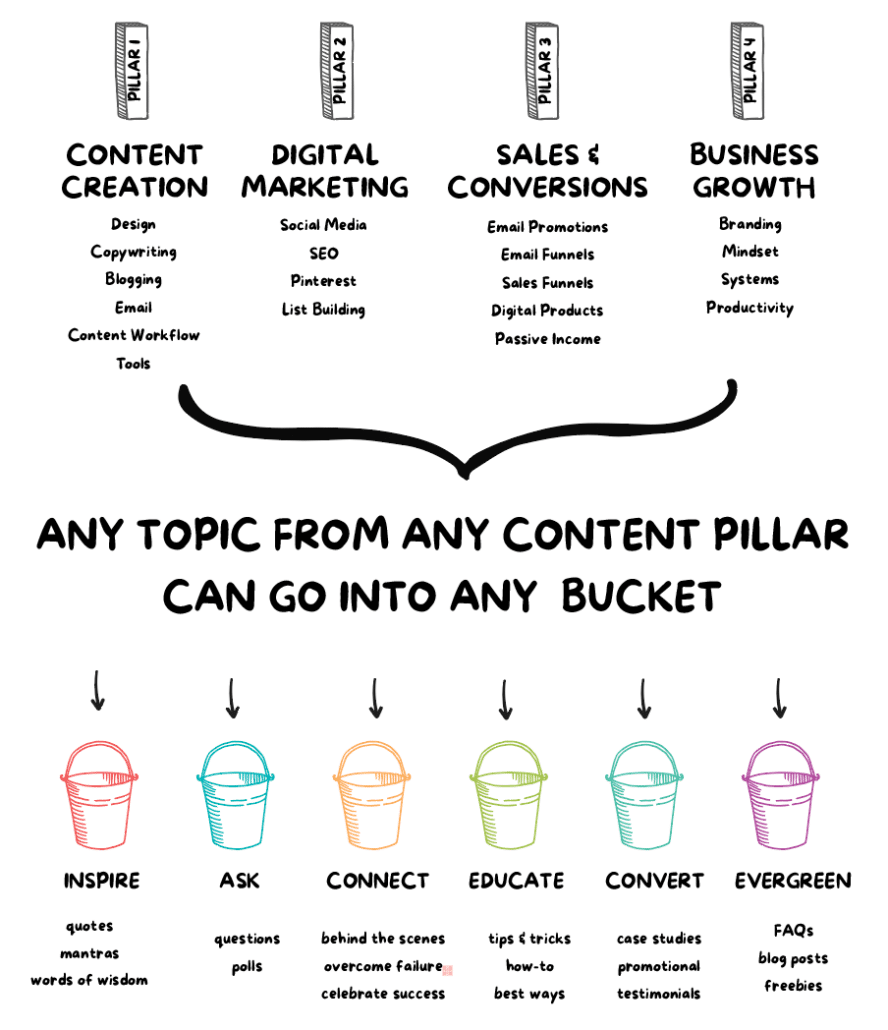
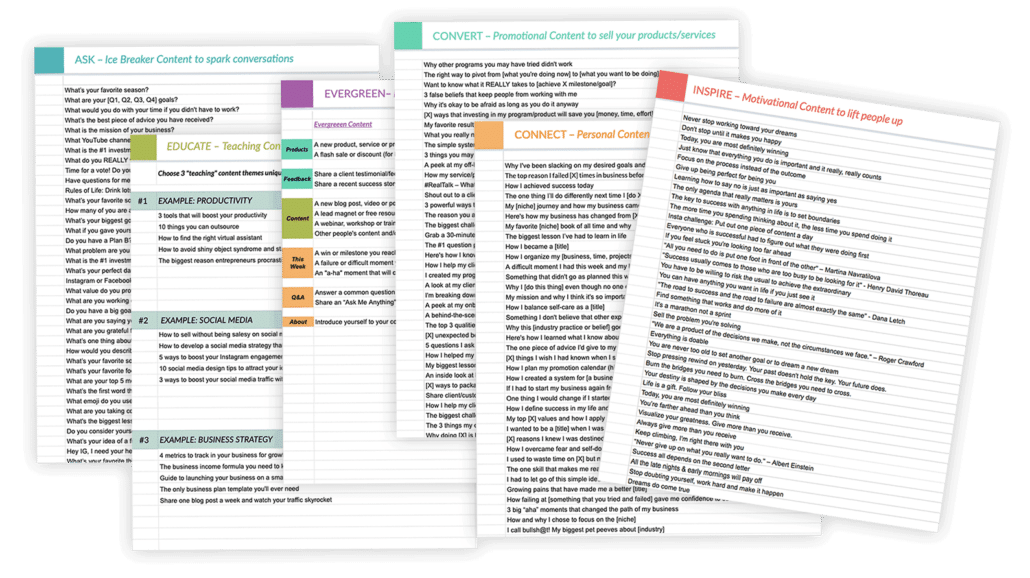
And, it’s following a proven content strategy. “Connect” content is one of the six buckets all small businesses need to be sharing and includes personal stories your audience needs to hear in order to build up your know/like/trust factor (that leads to sales).
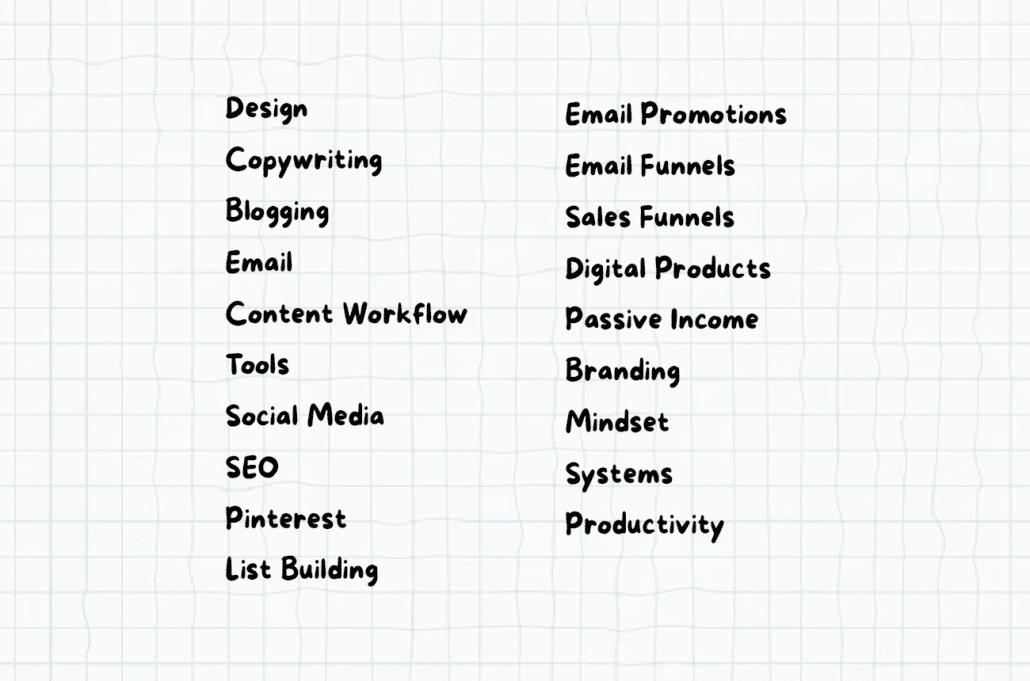
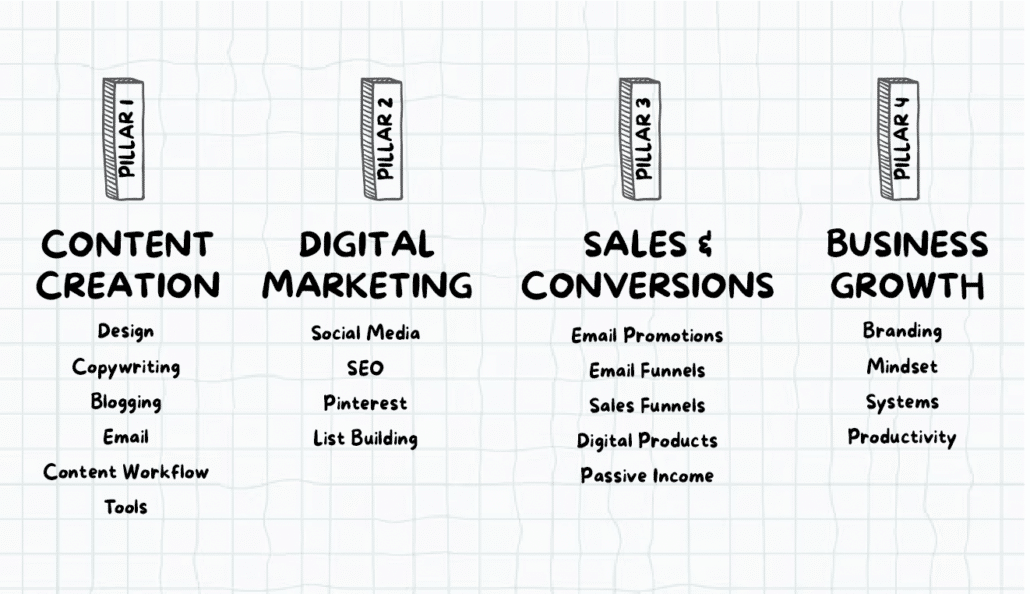
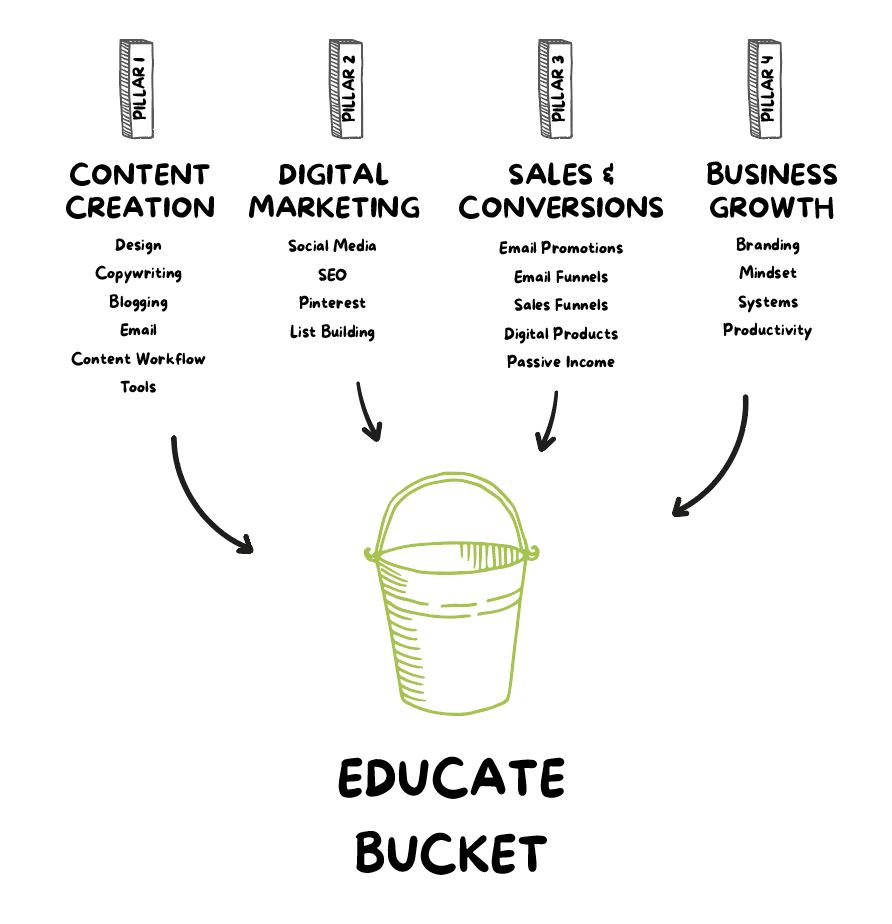
Further reading: For more information about the other types of content you need, check out our Using Content Pillars for Social Media post.
If it’s not 100% perfect at this point, keep in mind this entire process takes only a few seconds. The result is predictably a pretty solid rough draft and tweaking it is much faster than starting with the blank page of doom!
Now let’s do something completely different and use as our example a product-based business…
- Niche/Topic: Eco-friendly and sustainable home products
- Outcome: Helping people transition to a more sustainable and eco-friendly lifestyle by offering a range of products that reduce environmental impact and promote green living.
- Personal Story: “My journey to becoming an expert in sustainable home products started when I noticed the overwhelming amount of plastic waste in our daily lives. I felt a strong urge to make a difference, and that led me to source and create products that could help others reduce their ecological footprint.”
- Keywords: Eco-friendly, sustainable, green living
- Tone/Style: Professional and educational, focusing on the importance of sustainability.
- Call to Action: “Explore our range of eco-friendly home products to take the first step towards a greener lifestyle. Visit our website for more information and to make a positive impact on the environment.”
- Highlight: The range of products, their eco-friendly features, and the commitment to a more sustainable future.

As a reminder, we’re on step 2 so we just need to submit these responses to ChatGPT…
Two completely different niches, two completely different results. Isn’t that awesome?
Before we move on: Notice that it added some relevant hashtags there at the end of the post. Be advised that ChatGPT doesn’t do a very good job at hashtags despite what it may tell you, so you always want to look them up by searching for them on Instagram to see if there’s an audience for those hashtags. Chances are you’ll want to swap them out or add your own.
Further reading: You can get more free copy and paste captions just like this over in this blog post if you want to give this “1, 2, 3 method” a try today!
Tweaking your final caption and making it “yours”
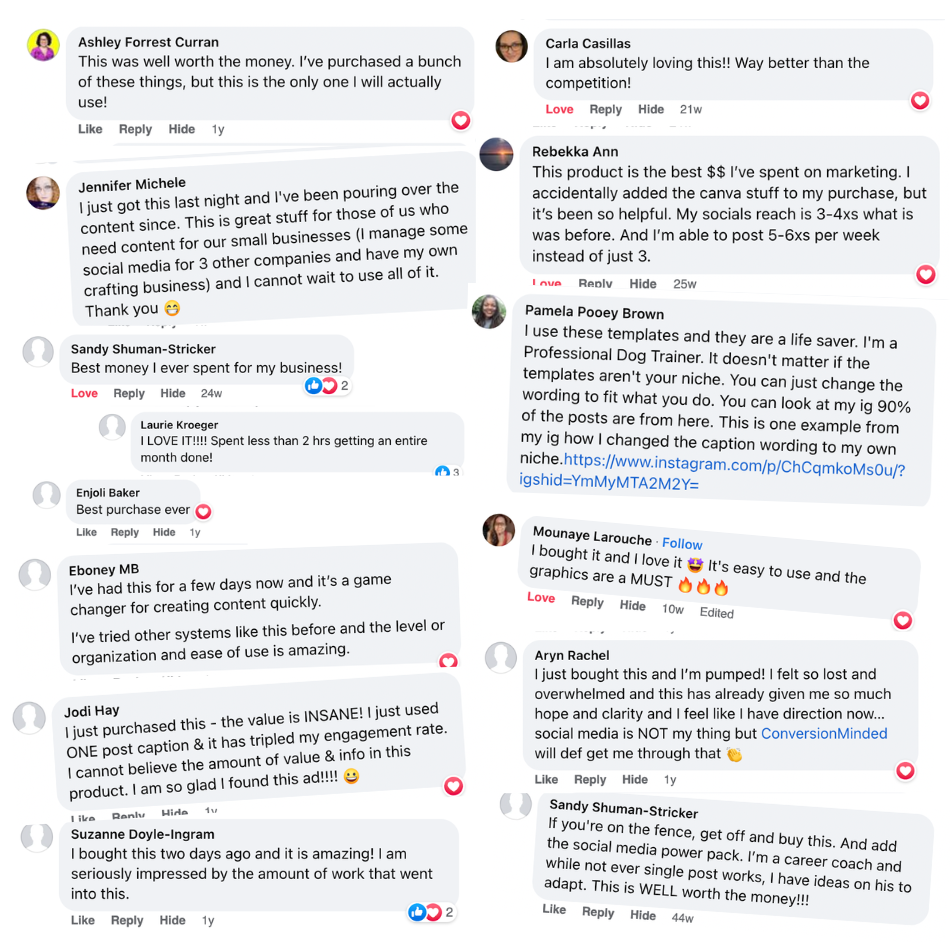
At this point you might be wondering if it’s okay to have a social media post that sounds similar to someone else’s post… I wondered about that too in the beginning, but I’ve been using the Content Calendar System caption templates for 2 years now and our social media content consistently generates engagement, leads, and sales.
First, the chances that anyone will notice a similarity are astronomical.
Secondly, remember that the entire point of this exercise is to help you stop wasting time spinning your wheels feeling stuck on what to post and what to say. Editing and tweaking is exponentially faster than writing from scratch and you can do that to your heart’s delight.
You can even use a tool like WordTune to help you create variations for your draft captions. ChatGTP is terrible at fine-tuning and it starts to lose the plot, but AI tools like WordTune are designed to help you perfect your copy one line or one paragraph at a time.
Use ChatGPT to generate topic ideas
There’s one more prompt you’ll need in your toolkit for those times when ChatGPT asks you to provide a particular topic before it can adapt your caption template. What if you don’t have a topic?
In this scenario you’re going to use ChatGPT to help you generate relevant content ideas for your post!
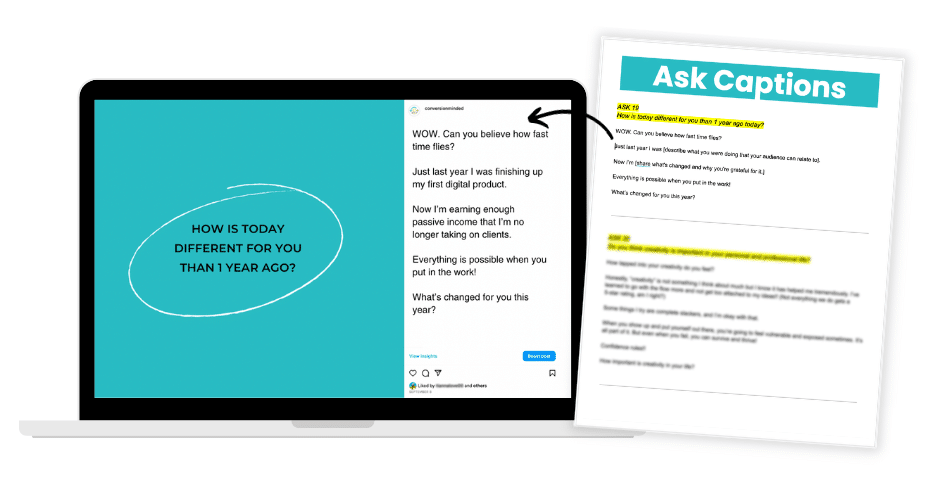
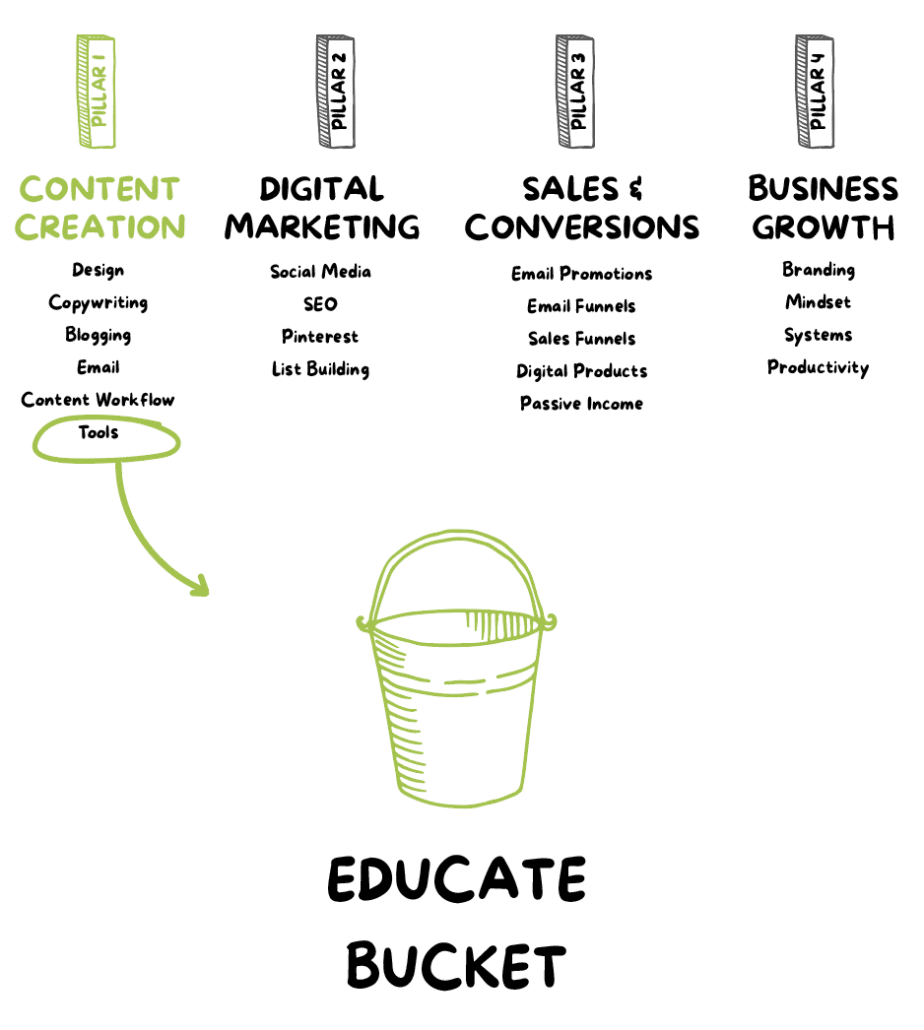
This time let’s use an example prompt from the “EDUCATE” bucket…
This time I’m feeling lazy so I’m not even going to answer all the possible questions, I’m just going to tell it about our niche and our target customer and see what happens…
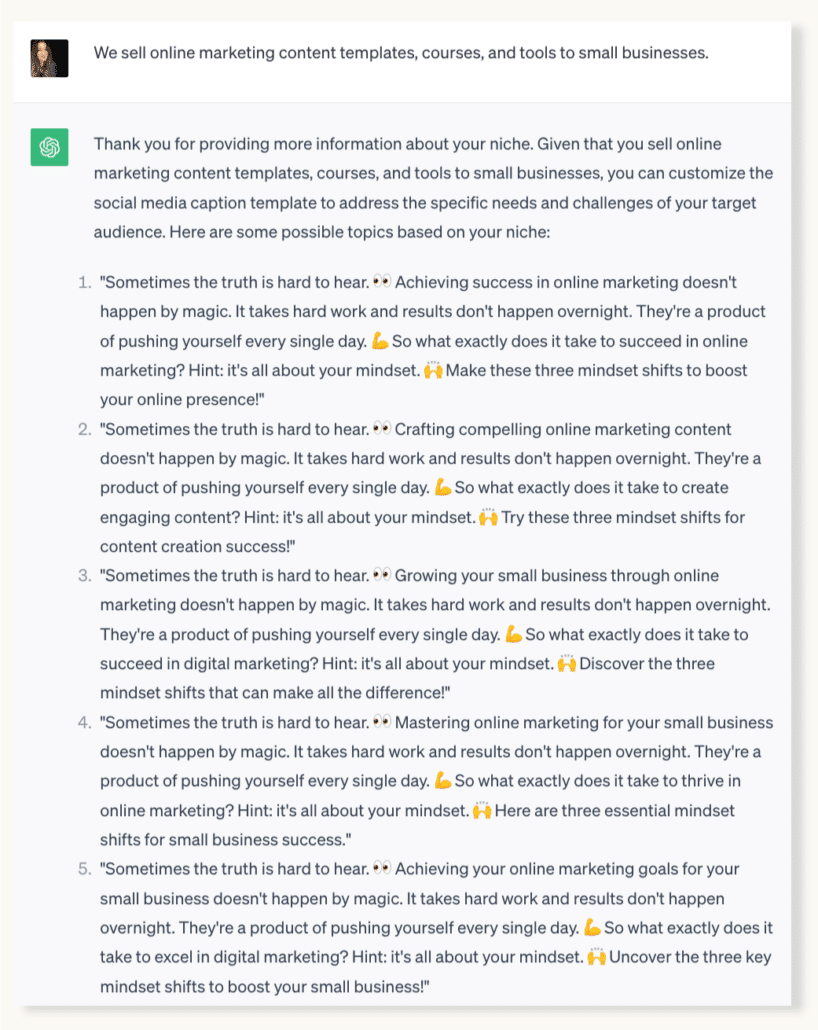
In this scenario, it generated 5 unique ideas I can use as “hooks” I can use to customize the caption template that are appropriate for my niche and target customer.
A lot of the time, that’s all I need and then I’m off to the races and can quickly finish customizing the caption template. Or, we can prompt ChatGPT to finish it for us…
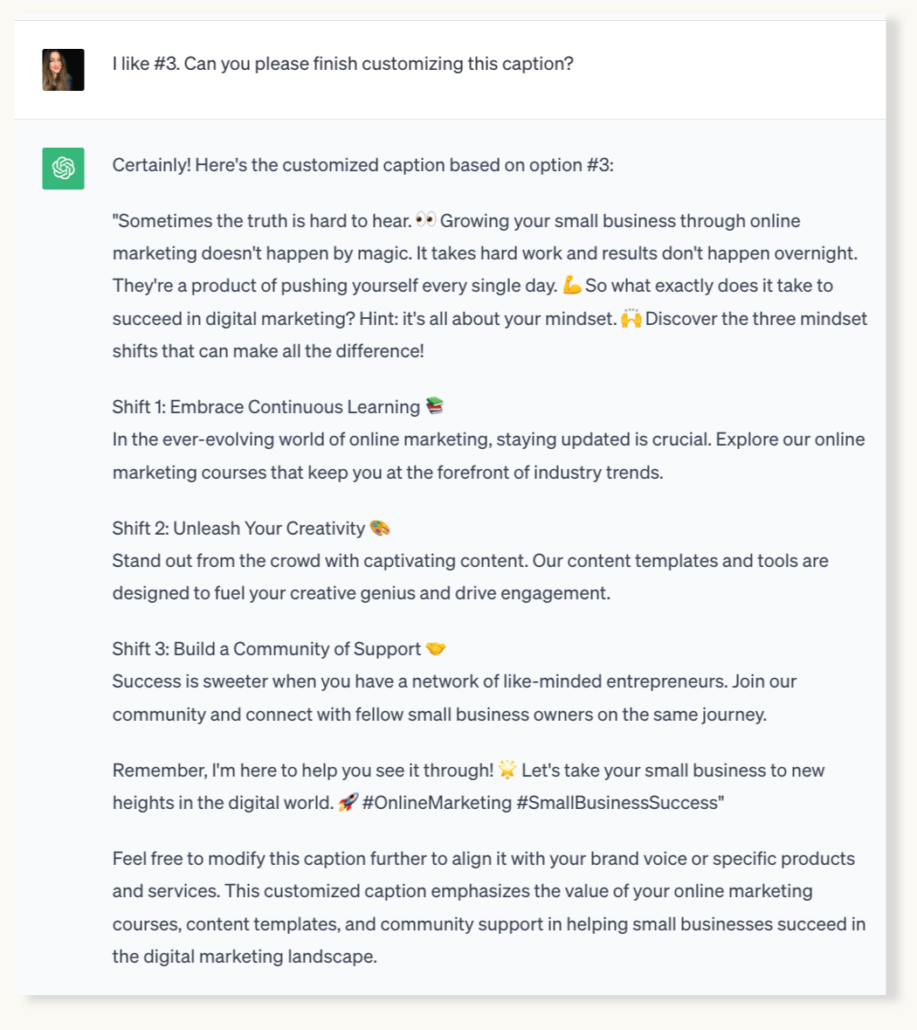
I’m happy with its suggestions, so what I would do at this point is just copy and paste it into a Google doc or my social media scheduler and tweak it so it sounds like me… and that’s it!
Easy as 1, 2, 3!
Hopefully these examples give you a glimpse of how much smoother the process goes when you’re using caption templates with ChatGPT instead of taking your chances with random prompts.
You may still need to tweak your final caption in your own writing style for best results, but you would need far more editing if you weren’t using human-written templates as a starting place.
The final result sounds authentic, and it’s unique to you because you’re directing the substance of the post, but you’ll avoid sounding like you’re just posting generic ai-generated content.
Now let’s set you up to streamline your workflow even more and circle back to the “seed text document” technique I mentioned earlier…
#2 Keep a Seed Text Document for a Super Fast ChatGPT Workflow
As I mentioned earlier, the above process will go faster the more you do it if you store your responses to ChatGPT’s questions in a seed text document. So let’s start by defining…
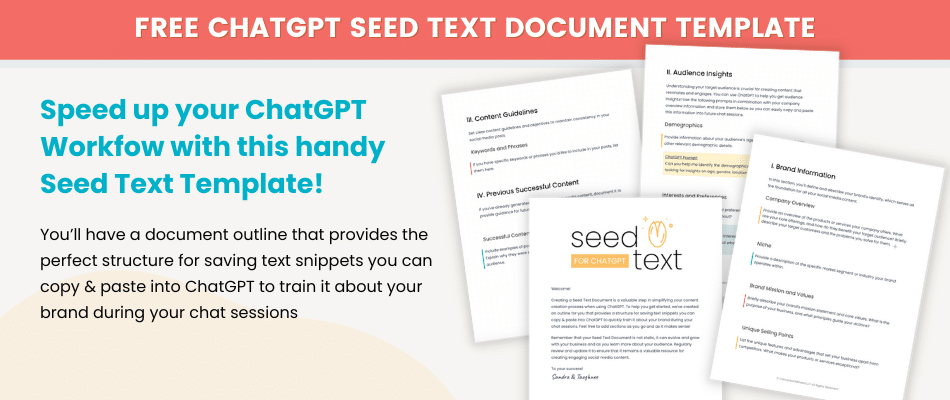
What is a Seed Text Document?
A seed text document contains text snippets about your brand, your target audience, content guidelines, the topics you stay focused on, the products and services you sell and so on.
This information can be copied and pasted into ChatGPT to quickly train it on the information it needs in order to help you create content that’s relevant to your business. Think of it like a creative brief that AI can use to produce content tailored to meet the unique voice and needs of your brand.
Why you should maintain a seed text document if you use ChatGTP for content creation:
Consistency: The seed text document helps you articulate your brand’s voice, tone, and values so all content aligns with your brand identity across all social media platforms.
Efficiency: Storing your brand information and audience insights in a seed text document enables ChatGPT to quickly generate content without the need for repeated explanations or references.
Targeted Content: By storing demographics, interests, and pain points in your seed text document, ChatGPT can create content that resonates with your target audience, leading to higher engagement and conversions.
What goes in a Seed Text Document?
This is the part where you may start to groan because it feels like homework (or maybe that’s just me?). But you don’t have to do this all at once!
The important thing is to have a document handy so you can store snippets of text that you know you’ll need to repeat again when using ChatGPT.
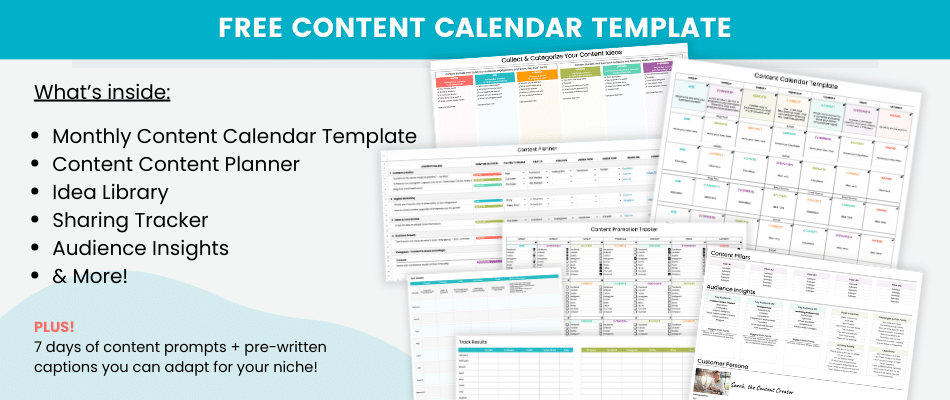
Before we get into the nitty gritty, grab our free Seed Text Document Template here.
Information about Your Niche: You’ll want to describe your business generally – what you sell, who you sell to, what industry you’re in, etc.
Brand Guidelines: You’ll also want to store things like your brand’s mission, values, unique selling points, your brand’s personality, and brand voice.
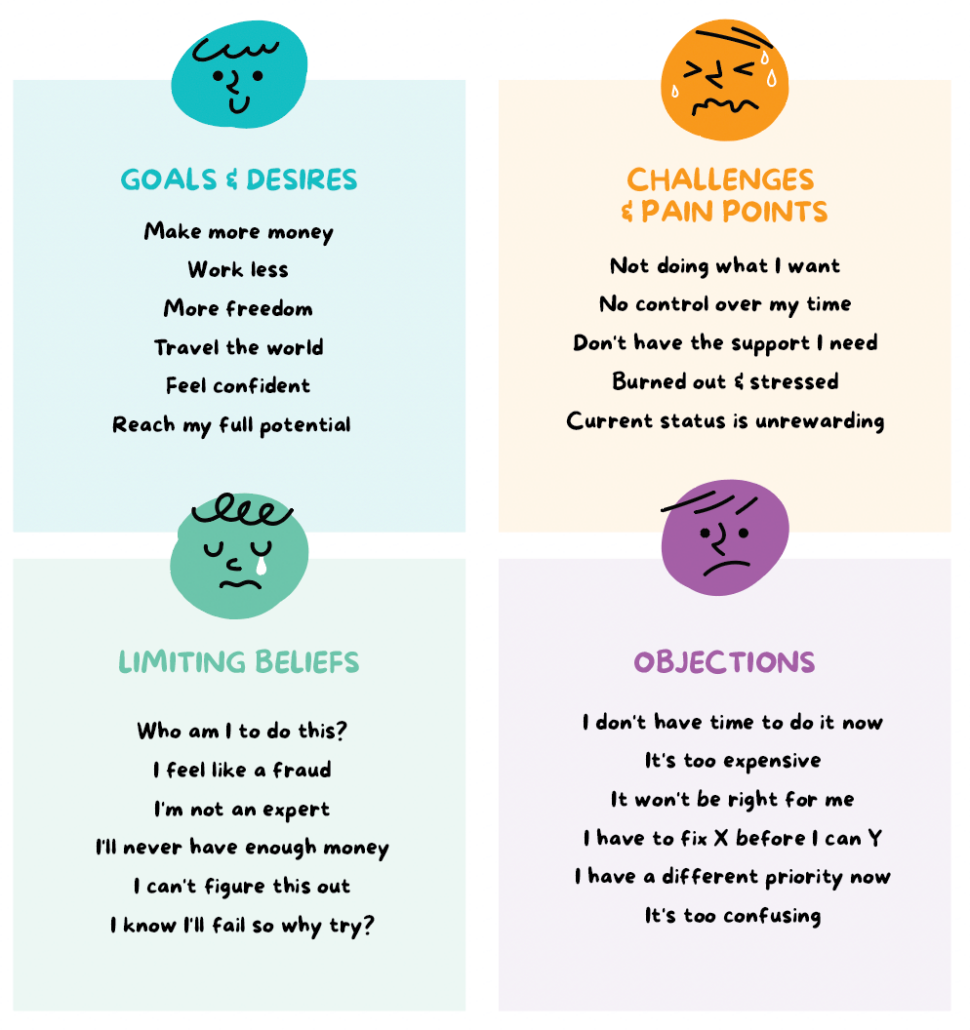
Audience Insights: Things like demographics, interests, problems, limiting beliefs and objections your audience has. The better you understand your audience, the more compelling and relatable your content will be.
Content Guidelines: Specify any content guidelines you have. For instance, if you have a list of keywords you’d like to include in your posts, or specific topics you focus on, include them in your seed text document.
Previous Successful Content: If you have existing content that has performed well on social media, include examples in your seed text document. This can help ChatGPT understand the style and tone of content that resonates with your audience.
And here’s something cool: you can use ChatGPT to help you create these snippets of text! It can take your rough thoughts and polish them up and even help you get clarity about your brand.
Nobody but you and ChatGPT is going to see this stuff so it doesn’t need to be perfect. This is an “organic document” that will grow and become more useful over time as you add more things to it.
Now you’ve got a pretty solid method for creating authentic, human-sounding content and a way to make the process lightening fast!
That’s a wrap!
Now you have a way to use ChatGPT to create social media content faster and easier without sounding like everyone else copying & pasting directly from ChatGPT.
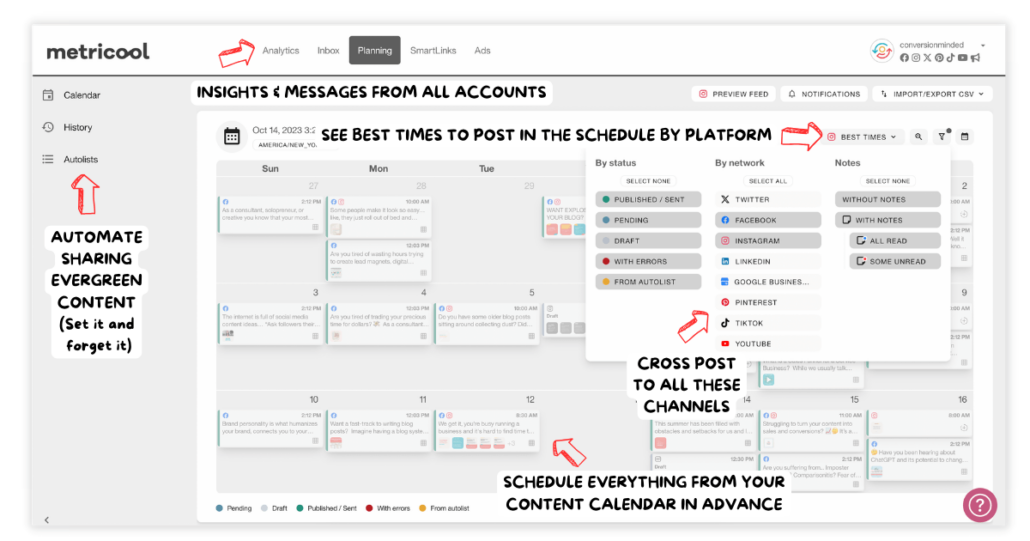
With the help of ChatGPT and caption templates, you can create effective posts for all the various social media platforms to attract potential customers and reach a wider audience. In this post we’ve focused on Instagram posts because that’s our social media “home base,” but we also repurpose them as Facebook posts and schedule them at the same time using Metricool. (affiliate link)
And you can bet your bottom dollar you’ll be able to work just as fast but with a better outcome!
We’re all just learning the ropes incorporating ChatGPT in our workflow, but I hope this has inspired you to think outside the box to find better ways to use ChatGPT to enhance social media presence – authentically and strategically.
While ChatGPT may not be “quite there yet” in terms of automatically generating the perfect social media posts, it’s still an incredibly valuable tool you can use for various tasks to help you make your content creation process much easier and more effective.
And that it’s possible to use content “helpers” like caption templates and AI together to create original content that sounds like you and helps you get your brand message out there.
I wish you much success with your social media efforts! Before you go, be sure to check out our copy & paste caption templates to test drive the this technique today, and grab a copy of our ChatGPT Seed Text Template below.
You might also enjoy: