
You want to know the #1 question people ask me?
How do I get more traffic?
And when I hear that question, what I really hear you saying is How do I get more traffic so that I can build my business?
Now, you may not think of images when it comes to getting more traffic.
Me? Images are the FIRST thing I think of…specifically, Pinterest images.
So today, I’m sharing six Pinterest image tips to help you create pins that boomerang your traffic and get more people to your website.
1) Start with the right image sizes.
When it comes to Pinterest image sizes and dimensions, the image width is a breeze: aim for the 2026 standard of 1000 pixels wide for high-resolution clarity.
The pin height is where things can get tricky because Pinterest is trying to squash those super long pins that hog up the feed.
First, what hasn’t changed?
The standard Pinterest image size is still a vertical pin at a 2:3 ratio (2x width : 3x height). Here are some examples of these dimensions:
- 600 x 900px (Pinterest recommends)
- 735 x 1102px (Canva’s preset size)
- 1000 x 1500 px (the recommended 2:3 aspect ratio for optimal distribution).
A good rule of thumb is to aim for 1000 x 1500 px. This 2:3 aspect ratio ensures your pins distribute optimally across the platform without being truncated or hidden behind a ‘close-up’ click.
Don’t worry if you’re using a design tool with a preset size that’s different. Just make sure the ratio is 2:3.
Next, what HAS changed?
Pinterest likes square pins now. This is one of those changes I’m excited about because it means that we can share Instagram posts to Pinterest.
Want to know how?
Tap the three dots at the top right of your Instagram post, then select Share > Copy Link and head over to Pinterest. Choose the board you want, and you’re done.
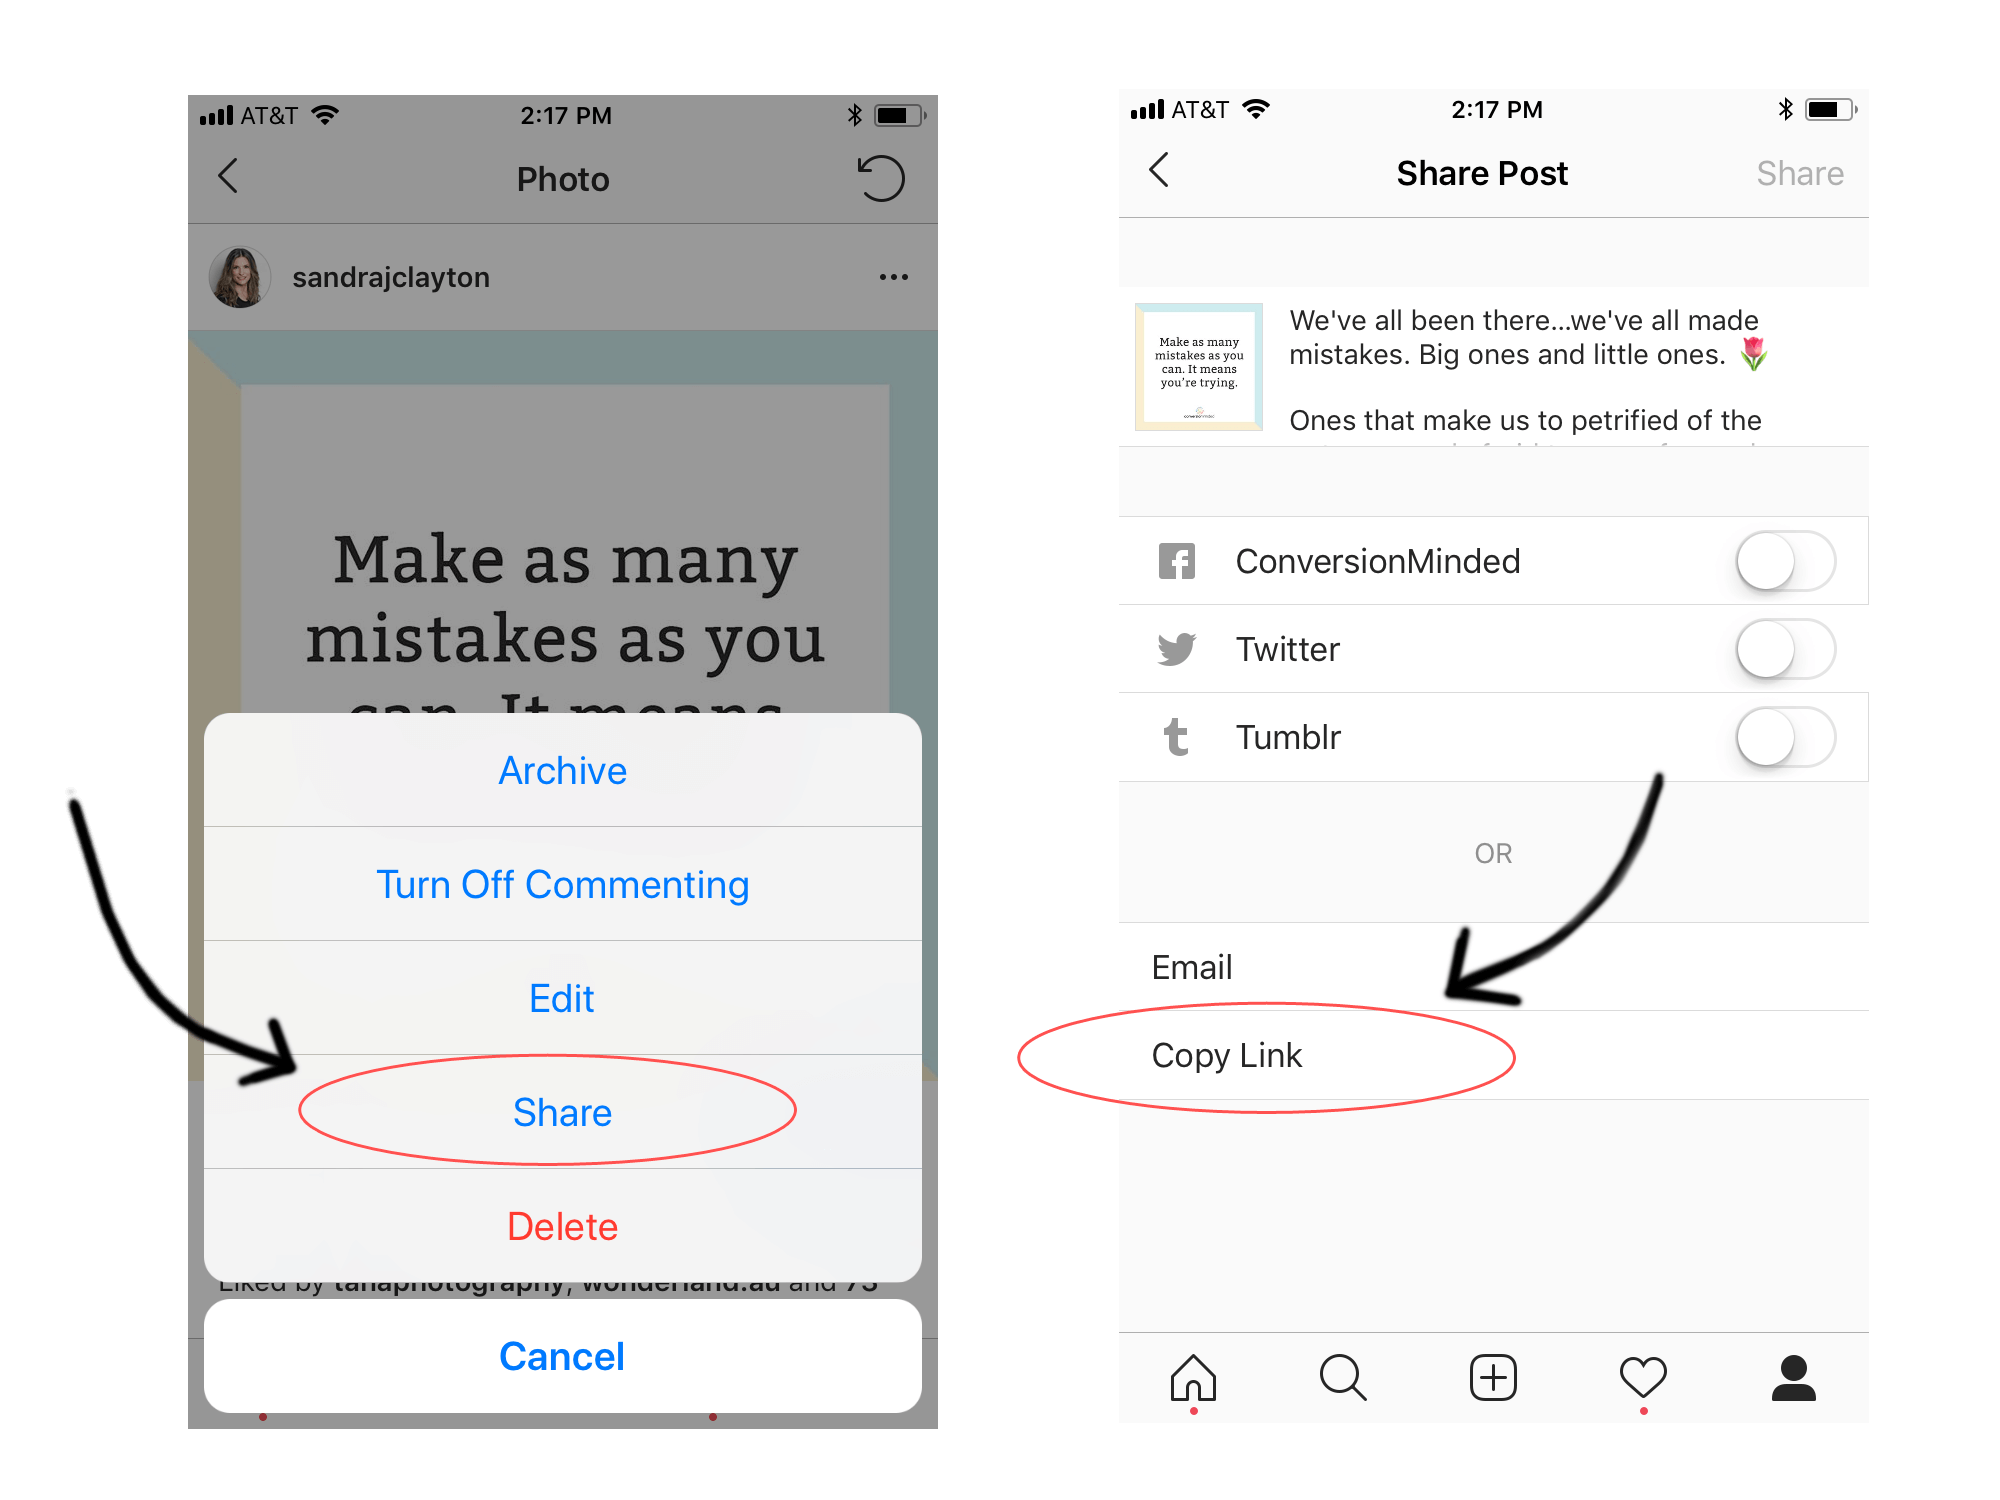
#HEADSUP Pinterest will use the first few (130 or so) characters from your comment as the pin description. You may need to modify or optimize the pin description after you share it.
Also, the pin URL will link back to Instagram, which is wonderful if you want to grow your Instagram following and engagement. If you’re like me and share blog posts on Instagram, make sure you redirect the URL to your blog post.
What about infographics?
I say keep using them! My longer pins drive waaay more traffic than the standard size. The only thing I’m changing moving forward is the height, which leads me too…
Recommended pin sizes
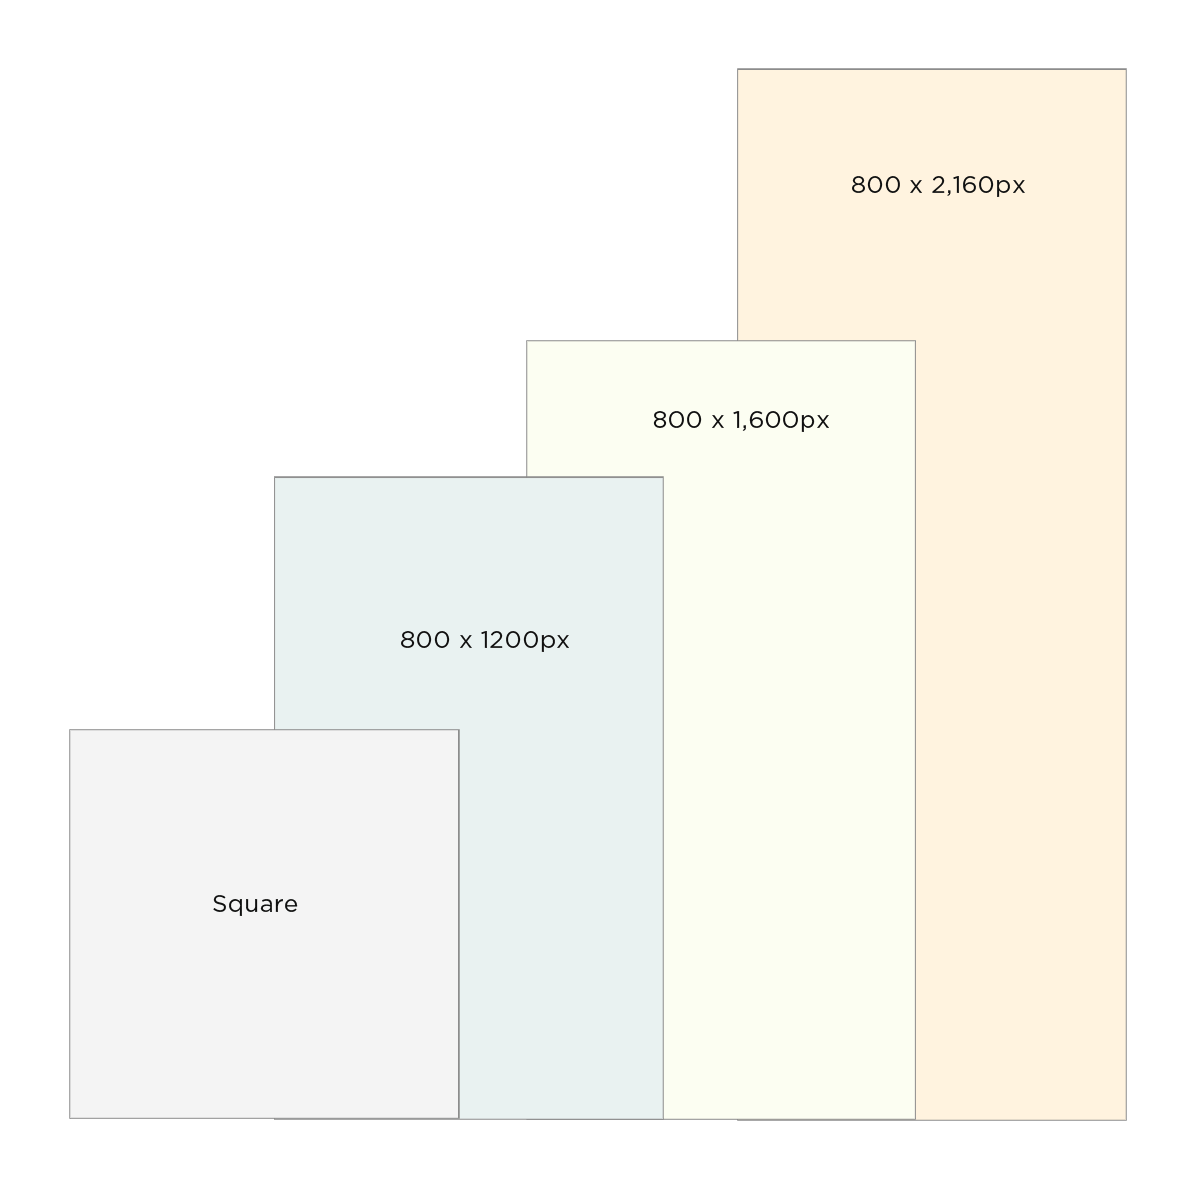
Here are the pin sizes I’m experimenting with right now:
- Square – 1:1 ratio
- 800 x 1,200px — 2:3 ratio
- 800 x 1,600px — 1:2 ratio
- 800 x 2,160px – 1:2.7 ratio
Anything longer than 1260–2061 px risks being hidden behind a ‘close-up’ click, which can hurt your click-through rates.
And here’s what those sizes look like in comparison:
Just so you know, those last two are arbitrary.
Even though the SmartFeed is working hard to squash longer pins, my longer infographics still drive the most traffic to my blog. I’ll keep creating them, but I’ll be watching my analytics…
Pins taller than 1260 pixels may be truncated or cropped in the feed, especially on mobile. What this means is that the bottom of your pin, including your branding and URL, will only show when someone clicks to a close-up.
2) Use color purposefully.
For the most part, yellows, reds, and oranges tend to stand out and get more clicks than blues and greens.
Now, if your brand colors are blue or green, you can still make your pins pop. The trick is to “train” people to click on certain colors, which I cover in detail in this post: How to Choose Colors That Will Make Your Brand Stand Out.
When I started designing pins, I chose dark background colors with white text on top, like this:
Once I changed my color palette to peach and cream, my pins performed much better. Looking back, I think those darker pins looked depressing and got lost in the feed.
Same thing happens with blue: it just gets lost.
Not sure which colors to use?
Here’s an idea: Look at pins and boards outside your niche.
Let’s say you’re a fitness coach. Instead of looking at fitness boards, look at travel boards. If you’re a life coach, look at sewing boards.
The reason is that if you look at pins within your industry, you may be drawn to a pin simply because you have an attachment to the title or image.
But if you look at pins that you have ZERO interest in, you can be more objective. For example, these are pins from a parenting board:
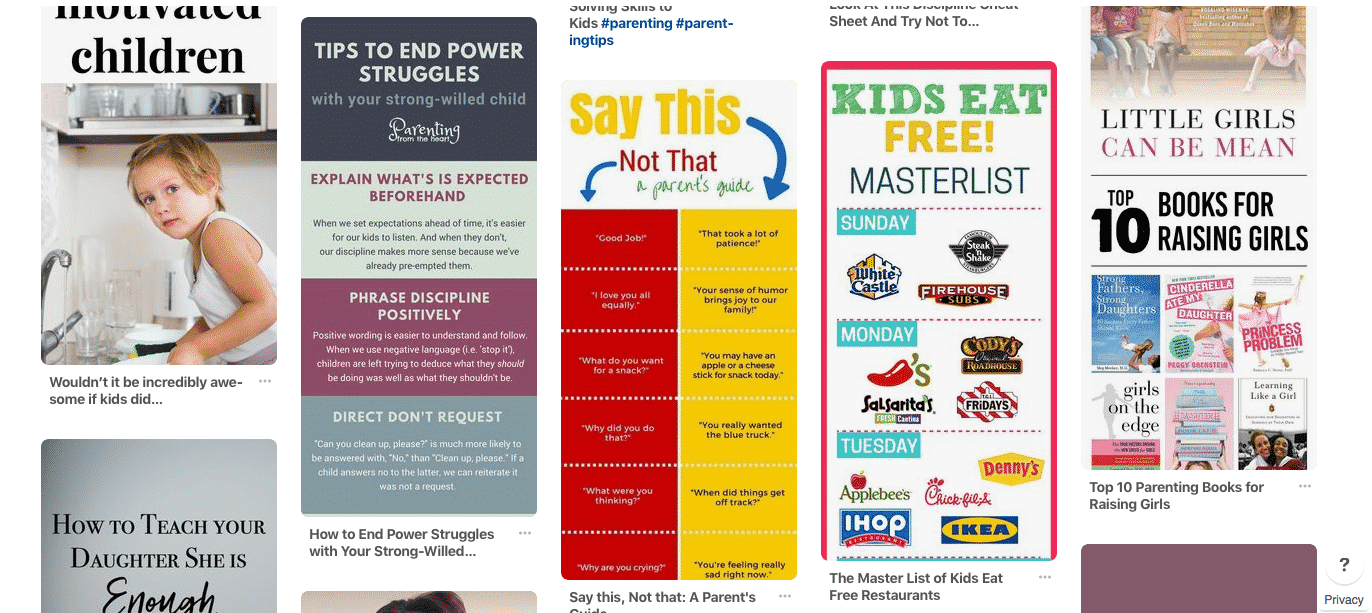
Since I’m not interested in this topic, I’m able to separate pin colors from pin titles. The colors in the middle jump out at me, how about you?
Even if your brand colors are green or blue, be creative and find a way to add contrast colors that pop.
Heck, you may even fall in love with those contrast colors and decide to rebrand! If that’s the case, make sure you learn more about The Build My Brand Toolkit. It may be just what you’re looking for!
3) Limit the number of fonts.
Here’s the deal with fonts…
Don’t go crazy with them, choose just two. I recommend a sans-serif font for your main font and one other contrast font.
Pro tip: Use your contrast font strategically.
It’s tempting to want to use every cool font you find, but please don’t! The whole point of fonts is to give readers a visual hierarchy of elements. You want to make sure that they know what to focus on.
Your contrast font should help people make sense of the text.
For example, I created a pin a while back with the title 100 ways to market your business. I used a contrast font for the word “market” because it’s a verb and I wanted people to visualize themselves marketing their business.
Just try not to waste your contrast font on throw-away words like how, and, or in.
Other pro font tips:
- Make sure your pin is easy to read on mobile devices.
- Choose simple, bold fonts that stand out.
- Choose a font family with multiple weights for variety. Open Sans and Roboto are both good choices.
Don’t just design for desktop; check your pins on your phone before you hit publish. Data shows that at least 65% to 80% of your traffic now comes from mobile devices. If your fonts are too small or the text is obscure, users will keep scrolling. High-resolution, bold font overlays are now a non-negotiable standard for 2026.
Psst… I break down all these steps in detail in this video:
4) Use text overlays.
This one’s a biggie. I still see many people posting pins without text overlays, which is a newbie thing to do and not a big deal. That said, it’s something you want to move away from.
Use a tool like Canva, PicMonkey or Photoshop (step #6 below) to add text to your pins so that people immediately know what they’re about.
Pinterest is different than Instagram.
Grammers love to get lost in beautiful images that paint a picture and tell a story. For this reason, getting clicks on Instagram largely comes down to the image.
Pinterest is different.
People look for ideas on Pinterest…they either want to know how to do something or where to buy something.
So if you have a “how-to” blog post about growing a garden, make sure you add text to your pin so that people know why they should click. Try to use only words that will make people want to click (if you need to, shorten the title).
Here’s why this matters:
When you create text overlays that are **designed for clicks**, you can lead people to action.
Let’s say I’m a crafty girl and want to make a wreath. I search for “wreath diy” and right there I see this gorgeous pin:
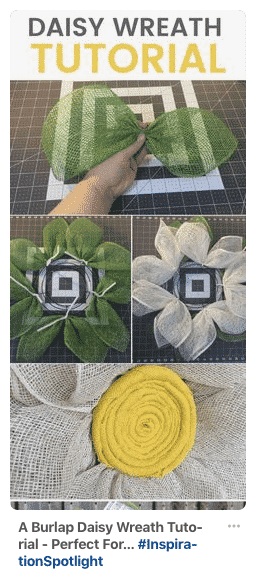
And I like this pin because I’m ready to make a wreath and this one looks stunning. Plus, I know it’s a tutorial and I can picture myself following the steps to create a beautiful wreath.
The more you can tease people with tips or advice like this, the more you can draw them into your content and over to your website. If you’re stumped here, ask yourself:
What text would make ME want to click?
If you follow only one step in this post, make it this one! It’s a game-changer.
5) Use images that reflect your brand.
A good image can make the difference between clicks and crickets. There’s no room for so-so on Pinterest.
Make sure your pin image reflects your brand and helps people understand how it fits in with their lives.
For example, let’s say you sell handmade belts.
Instead of putting your belt on a dress form, put it on a live model and be creative. Add accessories and other props so that when people see your Pinterest image, they can’t help but click.
Of course, you don’t have to use images in your pins. If you’re a blogger, coach, or consultant, a simple pin with text and graphics may be all you need.
Whatever you do, make sure the photos you use don’t compete with your text. I used to try to squish my text on the left or right of a photo and get it to fit just right.
Big waste of time! I finally gave up on this style after I couldn’t find photos that worked well. Plus, it took hours of fudging to make everything fit.
(I also stopped using pics with full-on faces because they get fewer clicks.)
Looking for stock photo sources?
My favorites these days are Thinkstock and Stocksy (both premium); and Pixabay, Unsplash and Picjumbo for free photos. If you want to save some time, head over to thestocks.im. You can find tons of free and paid photo sites, all there in one place.
In terms of style, I’m all about styled stock photos and flatlays these days. I’ve even been experimenting with taking my own styled stock photos!
Pro tip: Check the license when using free images. You want CCO or CC1 images that don’t require attribution.
Related: 6 Sources of Free Images for Bloggers
Use relevant images
I learned this one the hard way…
One of my first pins had an image of an adorable puppy holding a sign between his teeth. I thought it was SO cute and decided to add this text to the sign:
How to create call to action buttons that get clicked
Oops! Pinterest thought my pin was about pets. With that image, I had no chance of ranking for my target keyword.
Pinterest tries to “see” your pin, so make sure you use images relevant to your brand, pin, or product.
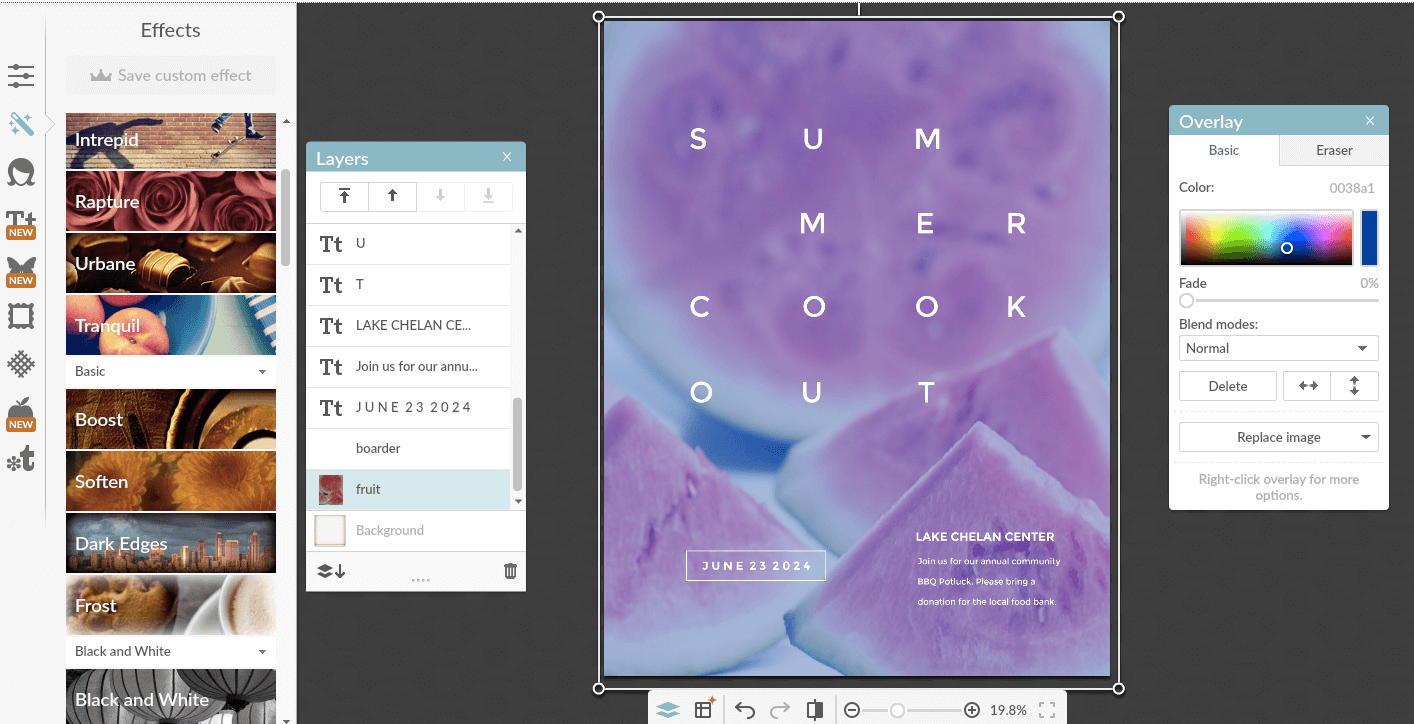
6) Use the right design tools.
Even if you’re not a designer, there are tools to help you create beautiful designs that stand out above the others. A few of my favorites are:
Canva
You can create so much with it…ebooks, call to action buttons, social media graphics…just about anything. Plus, you can edit and publish designs right from the dashboard.
PicMonkey
I haven’t used PicMonkey much, but from what I’ve seen it has similar editing features, minus the Ebook template.
PicMonkey is known for photo editing. Want to add effects to your photo to make it your own? You can do it! You can even change the color of an image:
I’ve got a complete PicMonkey tutorial for you here: How to Use Free Styled Stock Photos to Build Your Brand
Photoshop
If you’re ready to design like a pro, Photoshop is your tool.
With Photoshop you can customize photos and images in a way that you can’t with Canva or PicMonkey. You can even make old photos look entirely new using the mask and rubber stamp tools (great for repurposing your stock photos).
For this pin I used four stock photos – one for the top and three for the body:
To create the top image, I spliced, cut, cropped, and rotated the color wheels until I was happy with their placement.
To create the background image, I cloned sections from a stock photo (using the rubber stamp tool) to create a wooden texture. Then I ghosted two other photos on top to add more dimension.
See how creative you can get with Photoshop? You can use the same photos over and over to create pins that are unique and original.
Want to start using Photoshop? I’ve got a killer graphics tutorial for you right here –> How to Use Photoshop to Create Branded Social Media Graphics
7) Bonus! Use templates.
When you frequently share fresh content, Pinterest will reward you by showing your pins higher in the feed – and to more people.
One of the easiest ways to kick out fresh pins on the regular is to use templates.
Ideally, you’ll create three or four pins for every post you share (some bloggers share up to eight). Templates allow you to kick out as many as you want quickly and easily.
At a minimum, templates should include your brand colors, fonts, and logo and/or website. I recommend creating a variety of styles. For example:
- Light background
- Bright background
- With images
- Without images
- Longer – 1:2 ratio
- Shorter – standard 2:3 ratio
- And so on…
This way you won’t be staring at a blank screen every time you create a new pin.
That’s a wrap! Let me know how you make out with this Pinterest Image Guide. I’d love to hear!

Hi Sandra, many thanks for the tip on the new pinterest image square size.
You’re so welcome, Irene!
Wonderful article! I think you should add Tonomatograph in this list. It’s a new and good platform. It’s also easy to use and you find here a lot of customizable graphics for Pinterest. https://www.tonomatograph.com..
Thanks for the info! A Pinterest newbie here, so lots of great tips!
Definitely need this. My impressions are going up, but I’m getting very little saves and clicks.