
A while back you told us that the #1 thing you want to achieve in your business is to make a profit consistently, and there’s no better way to do that than to put lead generation on autopilot and set up a passive income stream.
So today, we’re sharing our blueprint for making your first sale with passive income while building a list of qualified buyers for your premium offers. 🙌
Big picture, the plan we’ll be walking through looks like this:
- Plan a premium offer
- Create a low-cost digital product that relates to #1 (intro product)
- Create freebies that relate to #2
- Create blog posts that relate to #2
- Drive targeted traffic to blog posts & freebies to get subscribers
- Close the sale with a nurturing email sequence
- Keep nurturing your list and guide them toward your premium offer
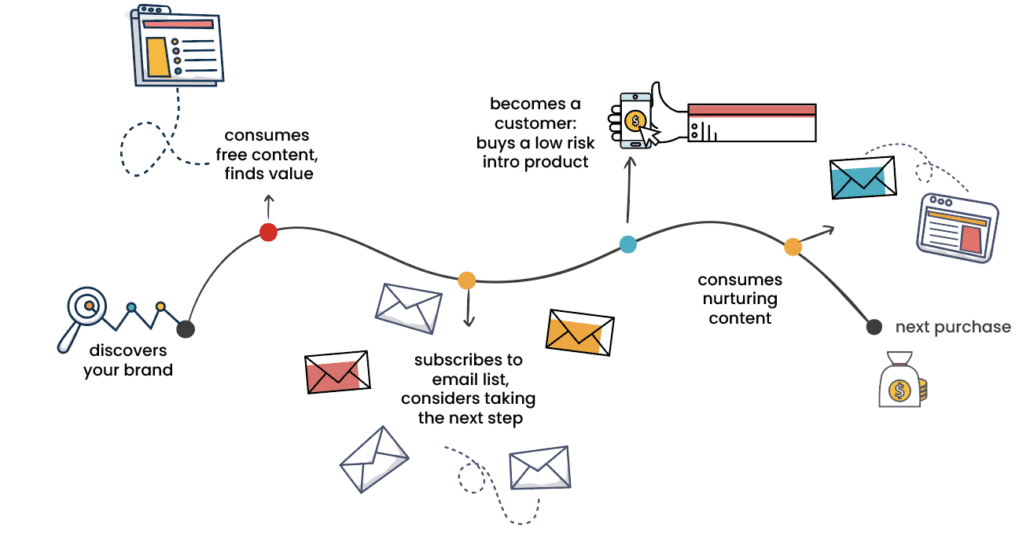
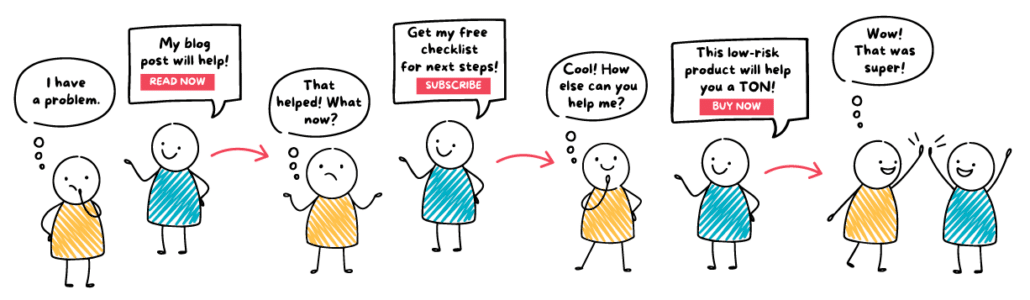
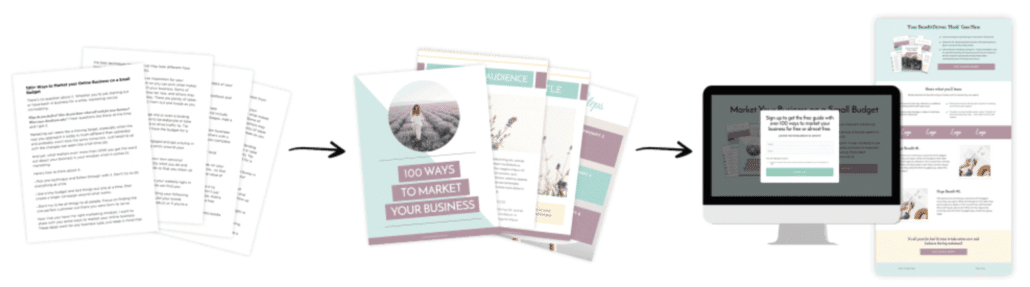
Before we get into the details, let’s take a quick look at the journey your customer will go on to make their first purchase with you…
Coming up…
By the end of this post, you’ll know how to set up an effective email sales funnel that adds a passive revenue stream to your business while pre-qualifying people for your high-ticket services and programs.
- The “First Sale” Funnel origin story
- Step #1: Plan your premium offer
- Step #2: Create a low-cost digital product (a.k.a. “intro product”)
- Step #3: Create lead magnets to attract potential buyers
- Step #4: Create funnel content (blog posts & emails)
- Step #5 Drive traffic to your freebies & top of funnel content
- Step #6: Close the sale with an email sequence
- Next steps to next sales: continue to nurture & sell to your list
You’re going to learn how to “monetize your marketing” and automate the process of attracting and nurturing an audience that’s most likely to buy more things from you in the future.
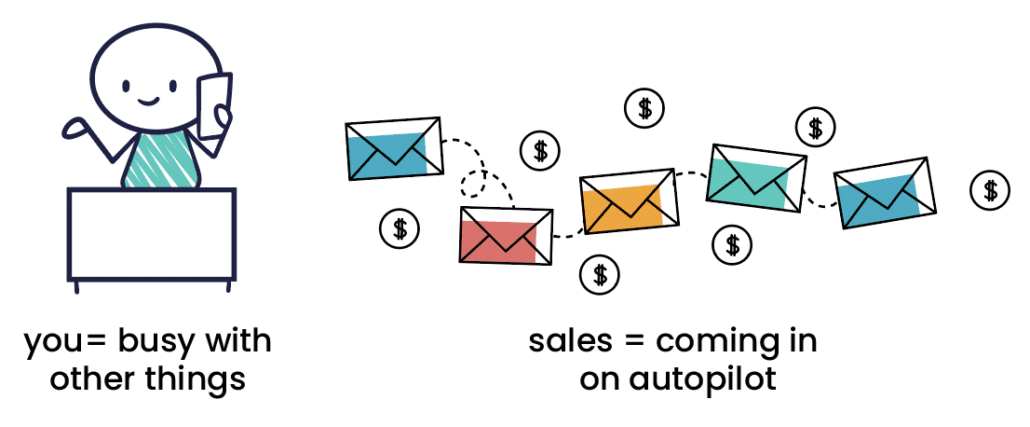
This is perfect if you’ve got a “feast or famine” problem (you’re either working for a client or scrambling to find your next one). Your email funnel will nurture your leads and generate passive income while you’re busy doing other things, giving you the leverage you need to scale and create income consistency.
The “First Sale” Funnel origin story
Before we dive into the steps for setting up your funnel, a little backstory in case you have any doubts about whether adding a digital product to your offerings is right for you.
Our first digital product wasn’t our best and we didn’t have a clue how to sell it. It was a $47 eBook that made about $600 in sales – nothing to write home about. And it took a long time to create because again, we didn’t really know what we were doing.
But here’s the thing: 10% of the people who bought that digital product went on to book high-ticket services, and they referred their colleagues to us after that work was through.
We realized it was a great introduction to what it would be like to be our customer, the only problem was, it wasn’t easy to sell. It was packed with value, but people weren’t aware they needed what was inside. They weren’t already looking for it.
The next digital product we made was a $7 swipe file and something we knew people were out there searching for already. It took one day to create and over the course of the next few years, generated thousands in extra income without spending one more minute of time or putting much effort into marketing – a couple of blog posts linking to it and that’s it.
The problem was, it was a dead end. It didn’t guide those customers to their next purchase.
That’s when it all clicked. We needed a digital product that would not only practically sell itself, but prime those customers to buy again.
💡 We needed the first sale to lead to the next sale.
What we’re about to share with you is the roadmap we followed to go from riding the feast or famine roller coaster to consistently generating highly-qualified leads and passive income with digital products. Allowing us to…
- Work on our business rather than just in it so we could set up systems to scale
- Be more in charge of the work we do and who we do it for
- Transition away from trading hours for dollars entirely and make and sell digital products full time (eventually)
Flash forward five years later and we’re now consistently generating multiple six-figures in digital product sales every year.
It didn’t happen overnight, and there were lots of lessons learned along the way, but transformation and income consistency did come fast once we started adding an introductory digital product to our lineup of offerings.
Ready to learn how? Then grab your favorite beverage, get ready to take some notes, and let’s get started.
The first thing you’ll need to do is…
Step #1: Plan your premium offer
Your premium offer is the final destination – it’s the red-carpet, high-ticket program or service package you want to sell to a specific target market(s).
Now, you don’t need to have this premium offer fully fleshed out before you start creating your digital product, but you do need to be able to answer the questions:
→ “Who is my audience for this?”
→ “Where am I ultimately planning to take them (after they make that initial purchase)?”
This is crucial because your intro digital product needs to be the first taste of being your customer, not a one-off purchase. It’s exponentially easier to sell something to someone who’s already purchased something before – yup, even low-ticket!
So if you want to eventually sell something high-ticket, the most qualified buyers will be existing customers on your email list.
Said another way, there’s a huge difference in the relationship you have with someone who reads your blog or downloads a freebie and somebody who’s trusted you with their money. They go from a member of your audience to your list of customers.
If you already have a clear big-picture vision about your business – the work you want to do, the prices you want to be charging, and who you want to serve – then you’re good to go and can move on to step #2.
If not, the Value Ladder Planner will help you figure out your offers:
Step #2: Create a low-cost digital product (a.k.a. “intro product”)
Once you have a good idea what your premium offer will be and you know where you’re ultimately taking people, it’s time to create a digital product.
A digital product is simply a product that exists in a digital (rather than physical) format. That is, it can be downloaded or viewed on a device such as a phone or laptop, for example:
- Video or audio trainings
- A short digital course
- An eBook or workbook
- Templates
- Swipe files
- Spreadsheets
- Planners
It can also be a bundle of different types of media such as a video training with downloadable templates and worksheets to help them put what they learn into practice.
We recommend digital because it’s very easy to create a product in digital format, it’s largely “set it and forget it” (there’s no inventory to manage or shipping logistics to worry about), plus, it’s low risk for you because the biggest investment in creating it will be your time.
And the reason why you need one in your funnel is because people are skeptical. They have no idea who you are, what you stand for, or if they should trust you, and a low-price product is low risk for them.
Think about it, how often do you buy a $500+ program or service without knowing and trusting a brand first? We bet it’s never.

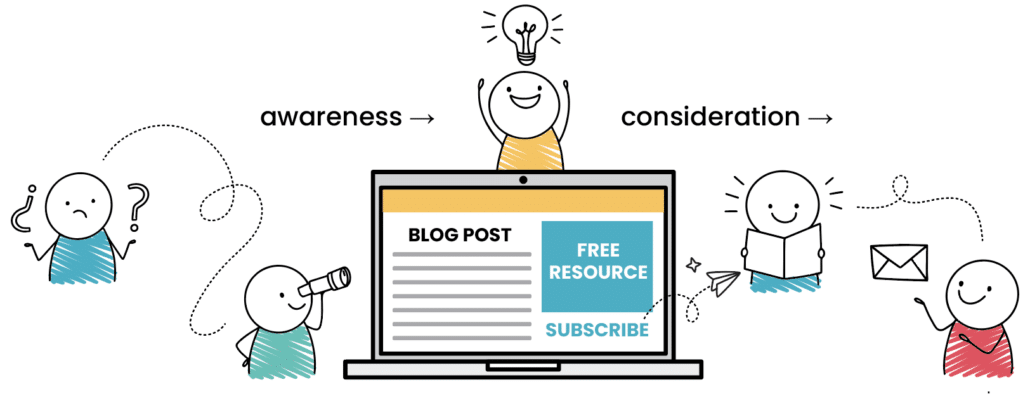
If you look at the buyer’s journey in phases, it’s easier to understand what you need to do. You need to take people on the journey.
- Phase 1: People discover your brand (awareness)
- Phase 2: They begin to understand their problem and research different options for solving it (consideration)
- Phase 3: They make their choice and buy (decision)
Directing people to a sales page for your premium offer won’t work if your audience isn’t even aware they have a problem yet. This is known as a “cold audience.”
Even if your sales page does a great job educating them all about it, they don’t know if they can trust YOU with their money yet.
Phase #2 of the buyer’s journey (consideration) is probably the most important because it’s where you build the trust and good feelings that lead to sales.
The bad news is that it can take a lot of time and nurturing to get somebody from “I’m considering it” to “take my money NOW!”
The good news is, a low-cost digital product is the fast track. ⚡
The purpose of having an intro product is to:
- Turn a member of your audience into a customer as quickly as possible by making their first purchase an “impulse” buy
- Demonstrate your value, that you can be trusted when they give you their hard-earned money
- Give them a taste of what it’s like to be your customer in a low-risk way
- Create an unforgettable experience so they’ll want more
- Build a list of buyers rather than just freebie collectors
- And of course, make passive revenue to shore up your income consistency and free up your time to scale your business further
Now, some people will buy your intro offer and that’ll be the end of the road. But that’s okay, because digital products don’t require more of your time once they’re set up.
And it’s worth repeating…
People who buy your intro offer will be exponentially more likely to make another purchase than somebody who’s never purchased anything from you before.
So if you relate your intro offer to your premium offer, you’ll be building a warm audience of people who know your value. From there, you can guide them to take the next step.
Note: Customers will be judging their next purchase based on the quality of your intro product, so think of it as your chance to really WOW customers. Make sure it’s high quality, aim to over-deliver, give them unexpected value, provide an amazing customer experience, and most importantly…
Price it to sell
If you can price your intro offer low (we keep our intro products between $7-$49), you mitigate their risk and make it easier for you to exceed their expectations.
The price for your intro offer may vary depending on your niche and business model, but you want it to be a tiny fraction of your main offers.
Here’s the key point: Exceed their expectations. Make sure the value of your product far exceeds the price they paid for it.

Caution: This is something that a lot of first-time digital product creators get terribly wrong: if you’re used to charging by the hour, you might be tempted to base the price of your product on the amount of time and effort you put into it. No, no, no. Products are different. Serving 1-to-many means you must make the price accessible to as many people as possible. Your goal is to make it up in volume of sales.
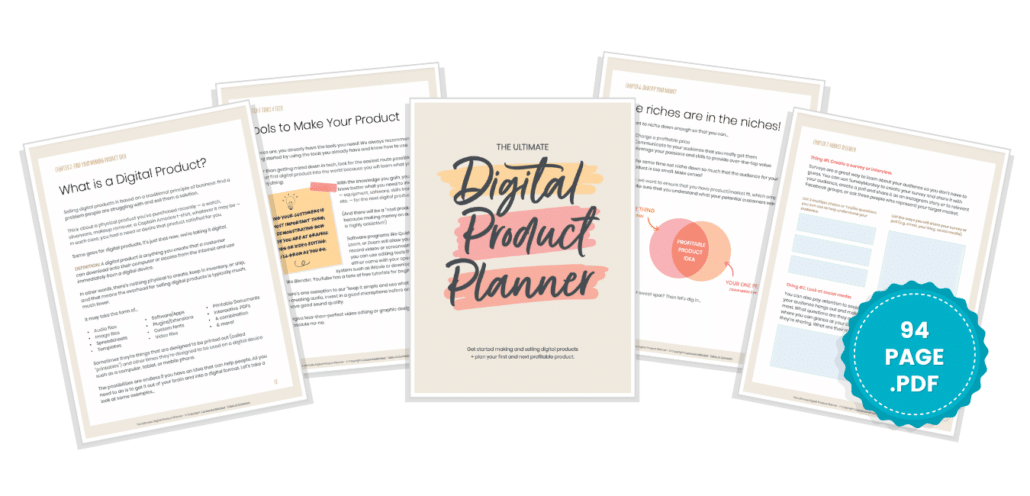
⭐ Check out our Ultimate Digital Product Planner for help creating your intro digital product. You’ll have a complete roadmap that walks you through every step so you can get it done in 2 weeks tops.
Once you have your intro product set up, it’s definitely time to celebrate. This is a HUGE accomplishment. 🥳
But you’re not done, because it won’t sell itself. For that, we need to go deeper into the funnel…
Step #3: Create lead magnets to attract potential buyers
To attract the right people into your email funnel where you’ll pitch your intro product, you’re going to create at least one related lead magnet (or “freebie”) and use it to build a list of potential customers that you can market your intro product to.
Again, these will be digital downloads and we’ll get into more details on what kinds of freebies to create in just a bit.
Right now you may be asking yourself, “Why on earth should I offer something for free?” – again it goes back to trust, you’re building it slowly but surely. People need to trust you before they buy something.
Your digital product is their first experience of trusting you with their money, but your freebie is their first experience trusting you at all: that is, in order for them to trust you with their email address, you need to offer them something of value in return.
It’s super important that you understand…
Why you need free content to sell things online
Free content – including freebies but also social media content, blog posts, emails, etc. – creates opportunities for “micro transactions” with your audience:
You give them something for free (content) and then they give you something in exchange: a read, a watch, a like, a follow, a comment, a reply, and so on.
Marketing gurus call these “touch points.”
Some of those people will go on to consider your brand. They will come to know you, like you, and trust what you have to say and offer.
And that’s important because people don’t buy things from brands they don’t know, like, or trust.
Free content warms your audience up by providing value and then calls them to action with verbs like follow, learn more, sign up, etc.
With each action they take, you’re guiding them through the customer journey. Think of them as building blocks for your know/like/trust factor until they feel ready to make a purchase.
Said another way…
Nobody’s going to consume one of your social media posts and think to themselves, “I wonder what this person has to sell me! Let me take some time out of my busy schedule to Google them and click around their website to find out.”
Your audience needs time to consider and they need to be told what to do next with every piece of content you put out. They need YOU to guide them.
For example, if you write a blog post, ask yourself: “What do I want them to do after they’re done reading?”
Most blog posts should invite them to sign up to your email list, but just saying “join my mailing list” ain’t gonna cut it. You need to offer a freebie as an incentive.
From there, if you continue to help them and nurture that relationship with emails, they’ll stay engaged with you.
It may not feel like it sometimes, but all of the things you’re doing to put out content and engage with your audience is making an invisible impact.
These interactions are just as crucial for sales as making a hard pitch, because it takes an average of 7 touch points before somebody will consider making a purchase.
Subscribing to your list is a HUGE step on their journey to become your customer
After they subscribe, this is where the relationship really begins to change.
Now you’re no longer speaking to some anonymous internet person, you’re speaking to a subscriber who has raised their hand to get help with something specific (now you know a little something about their problems based on the freebie they signed up for) and you can tailor your messages to them going forward.
If you continue to deliver value, your email list will be your highest-converting marketing channel. It’ll be your #1 asset because you own it, and everything you do to build your list will be an investment in future sales.

Make your freebies relevant, strategic, and valuable
Don’t waste your time creating freebies just for the sake of building your list – freebies should immediately pull people into your funnel where you can keep guiding them toward a purchase.
So think about the logical steps on your audience’s path to your intro product:
- Start with the problem you solve with your intro product and brainstorm some freebies that would help them solve a related problem.
- Think about the outcome they want and ways you can take them 10% of the way toward that goal.
Some types of freebies that you can create are checklists, worksheets, templates, spreadsheets, how-to guides, and video training. Our best-converting ones are less than 4 pages, so it doesn’t have to be long.
The best lead magnets are actionable and quick wins. Most people don’t have a lot of time and want it to be quick, so even if you’re adding your freebie to a long blog post that is really in-depth, your freebie should be quick and to the point.
An irresistible lead magnet is:
- Targeted – speaks to a specific person.
- Actionable – easy to understand and implement.
- Simple – Takes the reader from A to Z on one topic.
- Delivers results – Gives actionable steps that bring results.
- Builds trust – Establishes your authority.
- Sparks curiosity – Opens a door to future products.
- Is High Value – Provides real value that people would actually consider paying for.
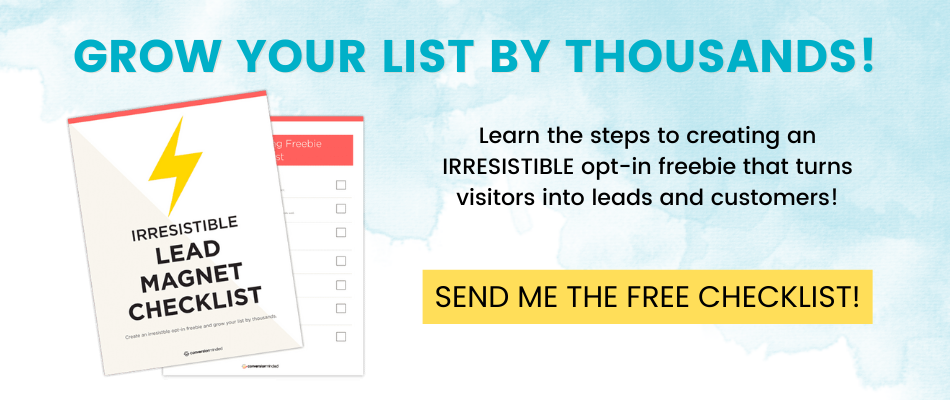
⭐ Download the Irresistible Lead Magnet checklist and keep it handy for your brainstorming session.
Once you have some ideas for your freebie, now it’s the time to execute it. Think simple and impactful.
Lead Generation Tech & Tools
Here are some of the tools we use and recommend:
· For freebies: Canva, Google Sheets, Google Docs
· For landing pages: LeadPages, Elementor (WordPress)
· For email delivery: ConvertKit, MailerLite
⭐ Check out our Lead Magnet Marketing Bundle for lead magnet & landing page templates with tech tutorials that walk you through setting everything up and connecting to your email service.
How many freebies should you create?
One is better than none, but the more freebies you have, the more opportunity to get traffic into your funnels. You also never know which ones will convert and get the most sign ups so having more is better so you can test to see which ones work best.
When you have multiple freebies, your best-performers will give you insight into the problems your audience are struggling with the most, and the freebies that flop give you good intel too.
This information will help you address your audience’s most pressing problems with your content and even digital products, and help you understand what topics they’re not interested in too.
So start with one freebie, but don’t stop there if you’re not getting the results you want. For our core products, we create at least a half a dozen freebies.
Troubleshooting your freebies
Do you have a freebie but it doesn’t perform?
You may already have a freebie that doesn’t bring the results you want. That means that not many people opt for it so your email list is growing slowly or not at all. You’ve gone through the trouble of creating the freebie so that is an important problem to fix.
Here’s how to optimize your freebies:
- Change the placement on the website – Ideally, you should have a separate landing page for each freebie. Add your freebies to blog posts as “content upgrades” through exit pop-ups. Content upgrades are important because including a freebie in the context of a blog post makes it super relevant to what they’re reading and they’ll want to know more
- Improve the copy that promotes your freebie on pop-ups and landing pages. Be specific about what they will get in the freebie and how that will help them. Include some sort of urgency. Write short sentences that are easy to read. Make sure the call to action is exciting.
- Improve the freebie titles – make sure they are specific and not vague; use numbers and a timeframe if possible (e.g., The Ultimate Guide to Tripling Your Followers in 1 Month); Keep testing titles until YOU would want to click on the freebie to sign up and always include a benefit in the title.
- Include a visual mockup so people know what they’re getting – treat it like a product and really “sell” it
These actions should bring your conversion rates up and your list will grow faster.:
- ⭐ Read: How to Create Content Upgrades and Explode Your List Growth (with Examples & Free Templates)
- ⭐ Check out our Lead Magnet Mastery course to learn how to get more people opting in to your freebies
Once somebody has trusted you with their email address, you want to treat them like a customer even if they haven’t purchased anything yet. Roll out the red carpet and deliver the kind of value that will blow away your competition.
For that, you’re gonna need to…
Step #4: Create funnel content (blog posts & emails)
You’re well on your way to creating an amazing funnel! Now, to really ramp up the “warming up” factor and guide people to the sale, you’re gonna need content.
This is content that relates to what you’re selling (your low-cost digital product) and addresses problems and questions your target audience has (as they relate to what you’re selling).
What do we mean by “funnel content”?
It’s just a fancy way of saying content that “meets people where they are” in their decision-making process to become a customer.
Think about it in terms of the role it performs in your funnel…
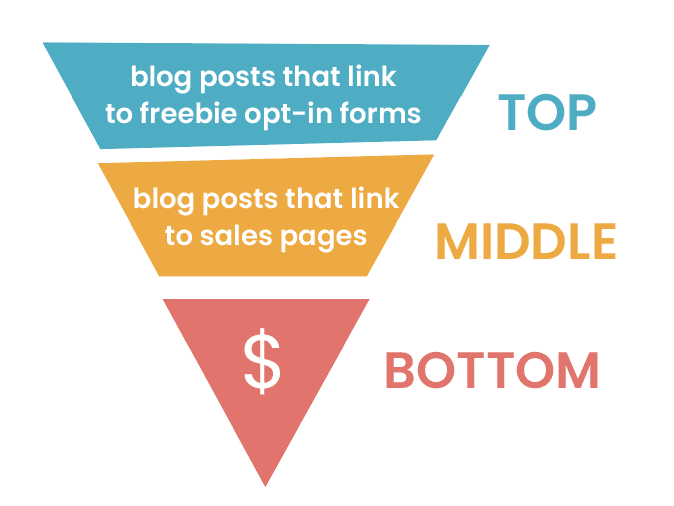
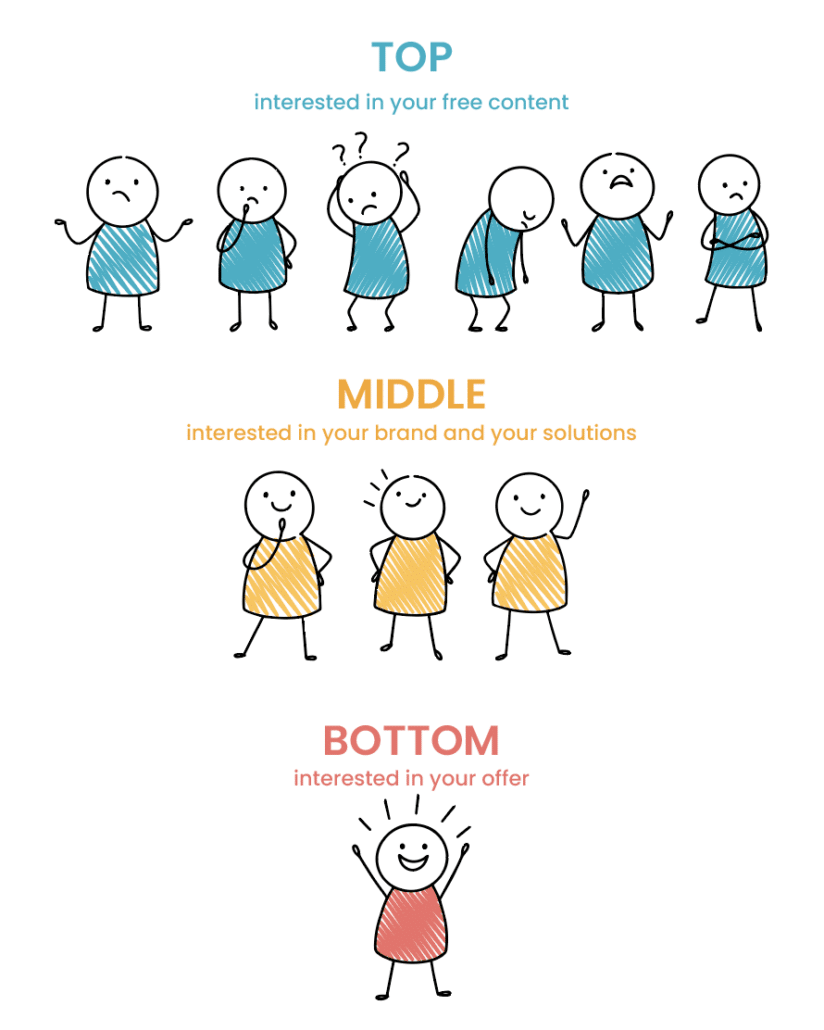
If we look at a funnel as having a TOP, MIDDLE, and BOTTOM, the “funnel content” looks something like this:
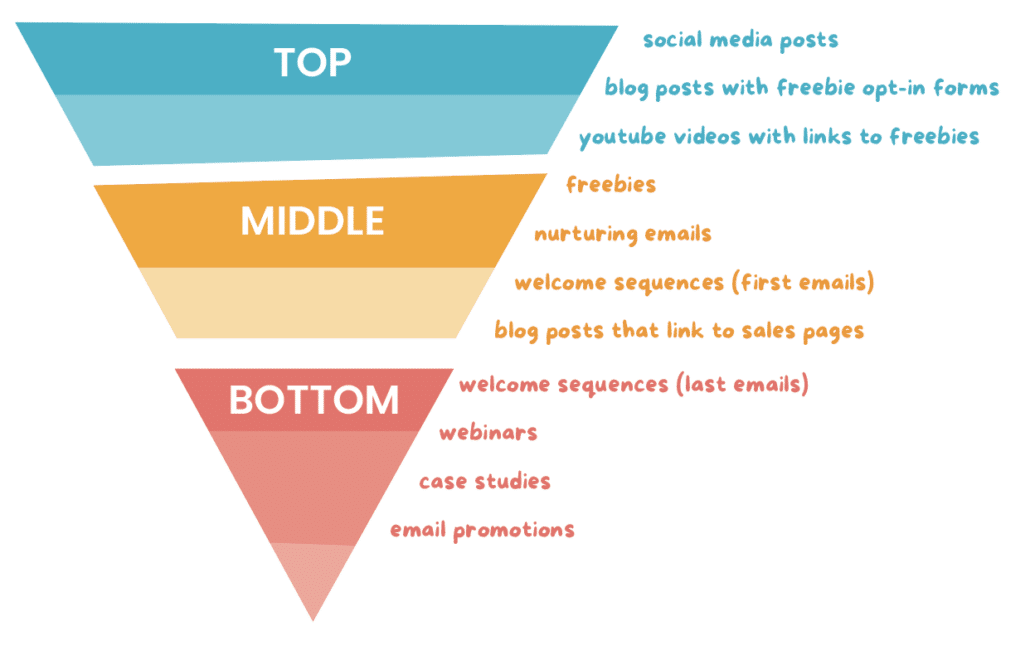
Note: This list is not exhaustive – it’s just meant to demonstrate that there are different types of content needed at each stage of the customer journey. And you don’t need all these things and you don’t need them all at once – breathe!
As you can see, there’s a lot happening in the MIDDLE of your funnel. This is content for your warm audience, the people who are considering or most likely to consider becoming your customer.
This is something a lot of busy small business owners get wrong:
If you focus all your energy at the top of the funnel and not enough in the middle, you’ll fail to convert your audience into customers.
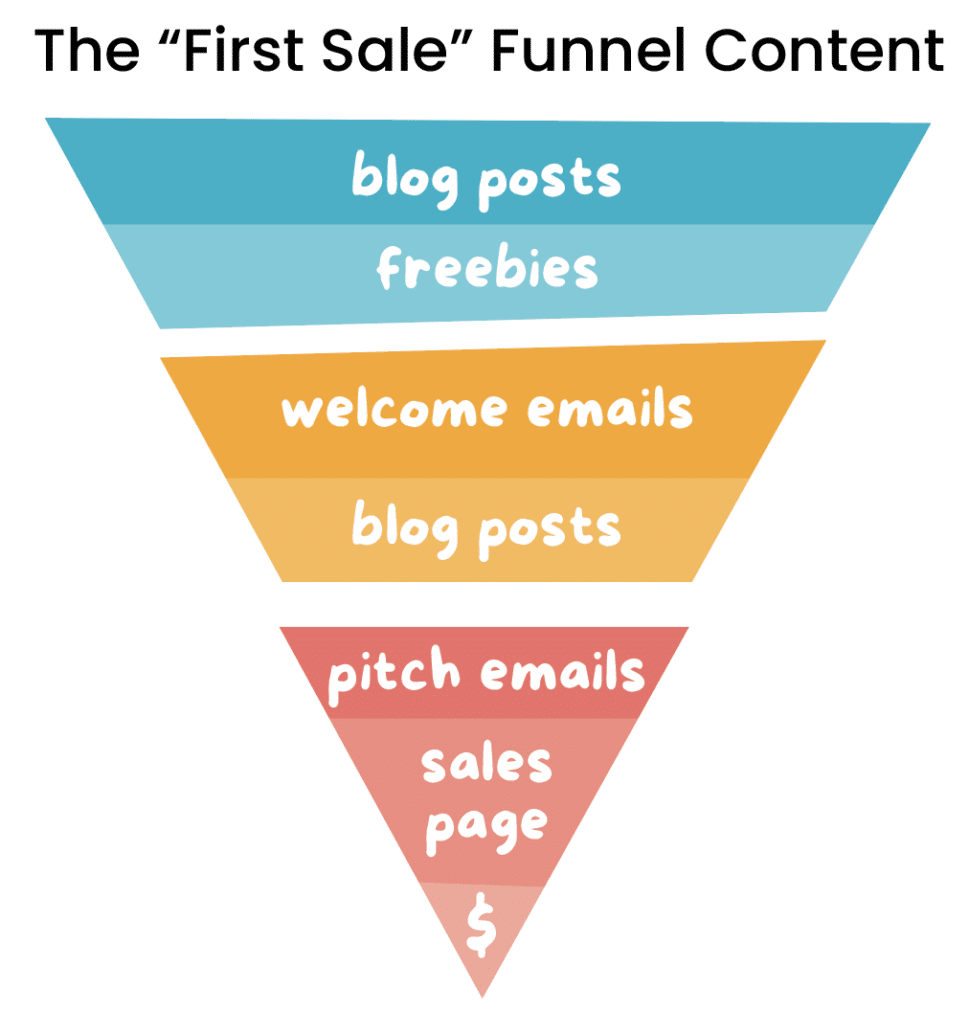
For the “First Sale” Funnel, we’re gonna need a few pieces of content:
- At least one freebie
- A few blog posts (optional, but recommended)
- A welcome sequence of emails. (6 emails total)
You may have noticed there are blog posts at the top of the funnel and in the middle and emails in the middle of the funnel and at the bottom.
The same content format works in your funnel at different stages depending on the purpose of the content – that is, what you’re asking your audience to do, and where they’re at in their decision-making journey.
Here’s what we mean:
- If you’re asking them to sign up for your email list in a blog post, that blog post is at the TOP of the funnel.
- If you’re priming them to buy something in your blog post and including a sales pitch and a link to a product at the end, that’s at the BOTTOM of the funnel.
- If your email is providing pure value and education, that email is in the MIDDLE of the funnel.
- If your email is helping them overcome purchasing objections and asking them to buy something, that’s at the BOTTOM of the funnel.
Let’s take a closer look…

We recommend blog posts for your first funnel because not only can you use them as assets at the top and middle of the funnel, you’ll be building authority with Google so you can get organic SEO traffic to keep feeding people into your funnel without extra cost.
Also, you want to train people to click through to YOUR website (not Youtube or a podcast app) and blog posts are the easiest way to do that.
Our blog is the #1 way we’ve been able to build our list to over 40k subscribers and we make sales directly from our blog posts when we optimize them with product recommendations and links to sales pages.
When this happens, it’s good for your brand because you’re not constantly bombarding your audience with a sales pitch – you’re providing them value whether they buy or not. And unlike sales pages, you can just naturally guide them to a solution to their problems (your products/services).
When you write blog posts for your business, always ask yourself, “What am I expecting my audience to do next? Where am I taking them?” and make absolutely certain you’re actively guiding people and inviting them to take the action you want them to.
In fact, one of the biggest inspirations for our system of blog post templates, Blog Post Vault, was seeing so many experts sharing tons of value but never asking their audience for anything in return. They were just “giving it all away” without thinking about their own business goals.
- ⭐ Download our FREE High-Converting Blog Post Structure cheat sheet to use as a guide for what to include and where when writing blog posts
Now, there are two types of blog posts you’ll need to create for the First Sale Funnel:
- Blog posts that link to freebies and include email opt-in forms
- Blog posts that link to a sales page for your intro offer
(Yes, you can add both links to freebies and links to products in one blog post, but we’re going to treat them as separate types of posts for now for the sake of simplicity.)
Let’s get into the differences between these two types of posts…
Blog posts that link to freebies (top of funnel)
You want to write blog posts that really wow your readers and educate them on topics that relate to your intro product and link to one or more related freebies right inside the post.
By choosing super relevant topics that teach people how to overcome something they’re struggling as it relates to what you sell, you’ll automatically attract the right people into your funnels.
Typical top-of-funnel blog post types include:
- How-tos
- List Posts
- “What is?” posts
- Beginner’s Guides
- ⭐ All of the blog post templates mentioned above are included in The Blog Post Vault along with dozens of niche topic blog posts that prompt you to promote your freebies and offers.
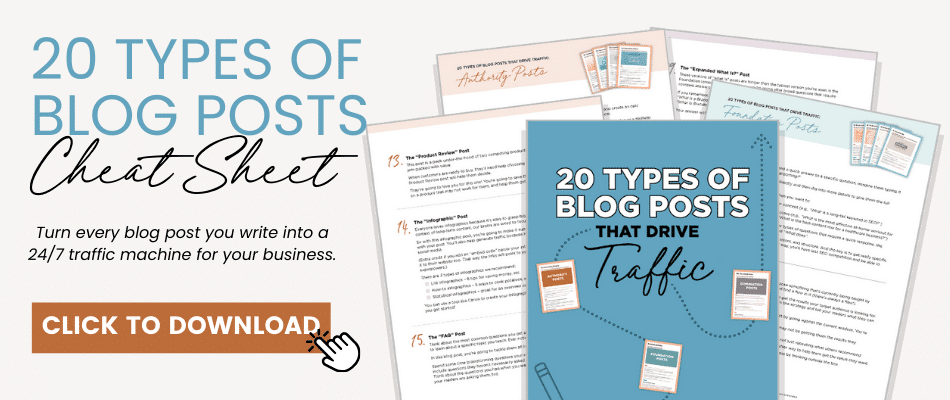
- ⭐ For more details about the specific types of posts you should write to drive traffic, download the free 20 Types of Blog Posts Cheat Sheet
Linking to freebies
Make sure to include at least one relevant freebie and place an opt-in form or popup in at least 1 but preferably in 3 places if your post is long. You can also create links that go to a dedicated landing page that has information about your freebie and an opt-in form on it.
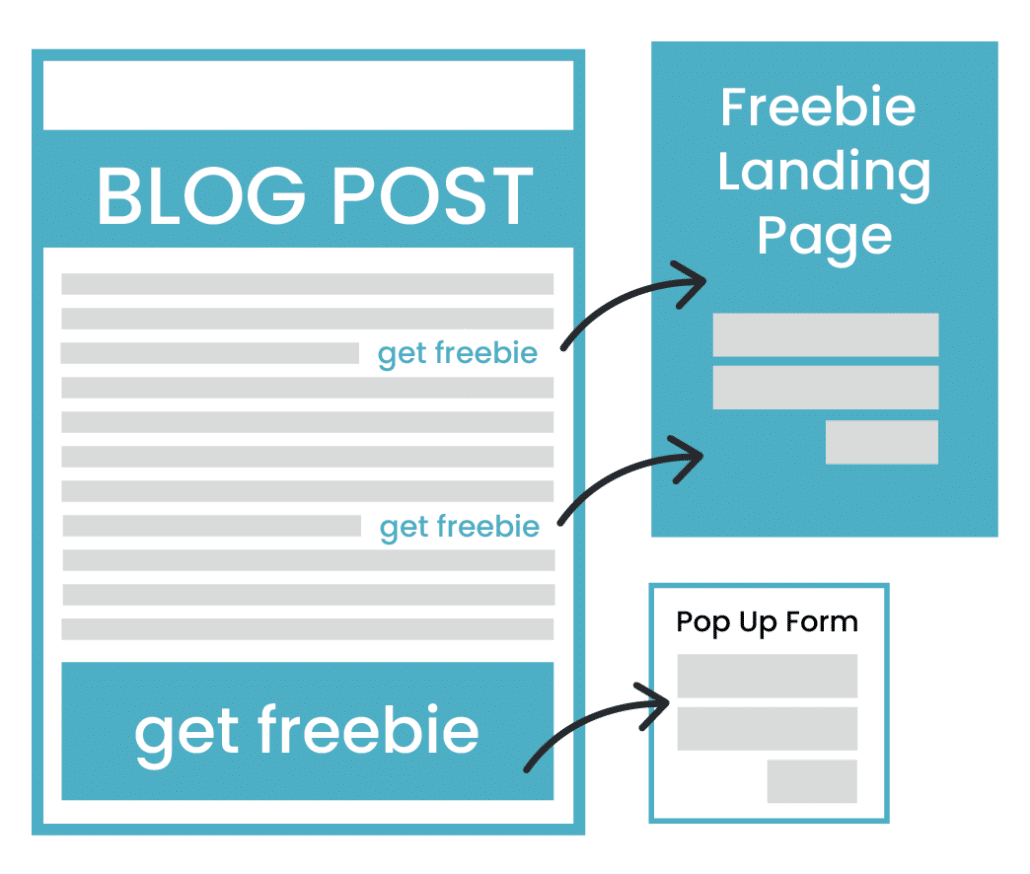
If you can, use graphics and pop-up forms in your posts to draw attention to your freebies (click on the “20 Types of Blog Posts Cheat Sheet” below to see an example). This serves to draw attention to them and break up your copy with visuals to keep your audience engaged. To do this, you’ll create a graphic in Canva and then use a pop-up plugin such as ThriveLeads or Sumo to connect it to your email service.
You can also mention your freebies naturally in your content and link to dedicated landing pages with your opt-in form.
Email services like Mailerlite or ConvertKit will allow you to create landing pages, but we like a little more control, so we use WordPress. Treat them like sales pages – you want to “sell” people on the benefits of your lead magnets to get the most conversions possible.
Most email providers offer embeddable opt-in forms you can place inside your posts and that works too, just be strategic in your placement. You want to place them in places where they’re most relevant to what you’re addressing in your post.
If you’re wondering if you can include different freebies in your blog posts the answer is yes! If you created 4 freebies for your intro offer, you can include all of them so long as they are relevant to the topic.
Bottom line: you want to give people as many opportunities to sign up as possible.
⭐ For more information about creating relevant freebies for your blog posts, check out How to Create Content Upgrades (with examples and free templates).
Blog posts that link to sales pages (middle of funnel)
Your MIDDLE of funnel blog posts will directly & indirectly sell your offers. This is where you get to be more convincing and ever-so-slightly salesy. In these posts, you will be linking to your sales page.
Blog post types include:
- Educational Blog Posts – These posts allow you to continue sharing value on topics that relate to your offer, help people achieve quick wins, and prepare them for your product. If your product teaches people how to create a webinar, a blog post topic might be:
Example: “How to Choose a Winning Topic for Your First Webinar.” - Break Down Barriers Blog Posts
Example: “How to Overcome Imposter Syndrome Before Hosting Your First Webinar” - Positioning Blog Posts – These posts position you as the one to trust instead of the other options they’re considering. Think product comparisons, “behind the scenes,” and the inside scoop about your unique process.
Example: “Behind the Scenes: A Glimpse into Our Profitable Webinar Creation Process” - Social Proof Blog Posts – Social proof posts demonstrate that other people have had success using your product or unique approach. Think testimonials & case studies
Example: “How [Client Name] Made $15,000 Running Her First Webinar”
Before we head on down to the bottom of the funnel where we close the sale, we first need to make sure you have a plan to get potential customers to your funnel content…
Step #5 Drive traffic to your freebies & top of funnel content
Hopefully by now you’re convinced that driving traffic directly to your premium offer and expecting people to buy is not the wisest move.
A better idea is to focus on driving traffic to freebies, blog posts, and intro products, and here are a few ways to go about it:
SEO
SEO is the holy grail of traffic because it’s free and high-quality traffic. The only problem is, you’re competing with everyone else in your niche for that traffic.
Writing lots of blog posts that go after low-competition keywords is the best place to start and those are usually fast and easy to write. This builds your “SEO Foundation.”
Think…
- What is [niche topic]?
- X Reasons why they need [niche topic]
- X Common myths about [niche topic]
The way to win with Google is to create the most helpful piece of content on any given topic, but your posts only need to be as long and involved as the topic requires. You can choose topics that are narrow in scope if you’re short on time..
Make sure you’re using the keyword phrases that searchers are using to find answers to their questions. Take some time to check out the posts ranking on page 1 for your topic to see how you can make yours even better and more helpful.
- ⭐ Read this post to learn our strategy for writing posts that build your SEO foundation, then niche authority, and finally dominating in search for competitive topics
- ⭐ Download our free SEO checklist.
Social media
Your social media posts should, at least part of the time, be guiding people to your freebies, low-cost digital products, and top of funnel blog posts where you have more of a chance to demonstrate your expertise and build credibility.
Here are some of the things we recommend doing:
- Use an evergreen scheduler Social media platforms like LinkedIn, Facebook, and Twitter allow users to click through to external websites, so you want to be sharing links back to your blog posts, freebies, and digital products. Use a social media scheduler that has ‘evergreen’ scheduling capabilities so you can share your content regularly and on autopilot. We use Metricool “autolists” (affiliate link). Just be sure to space out the intervals between sharing a piece of content so you won’t be seen as spammy!
- Leverage your blog posts, freebies, and digital products to create social media content Pull out tips and snippets from your blog posts, freebies, and intro products and create social media posts, stories, and short-form videos from those. Include a call to action at the end of your caption that takes your audience to the next step (e.g. “for more information check out our blog post”).
- Have a “link in bio” that links from your Instagram profile that shares links to your blog posts, intro products, and freebies. (Here’s ours.) We make anywhere from $100 to over $1,000 per month passively just from people checking that page out and clicking on our links!
- Cross post to different platforms Expand your reach for every piece of content by cross posting them to multiple platforms. For example, if you make a TikTok, share them to IG Reels, YouTube Shorts, and Pinterest as well.
- Use a Content Calendar System like this one so you’re able to create your posts and stay consistent on social media in less time. You’ll have endless post ideas and pre-written content you can adapt for your niche.
- Use content templates with ChatGPT to speed up the process of customizing them for your niche. Read: An Unconventional Way to use ChatGTP for social media posts
Pinterest is an amazing source of high-quality traffic! However, Pinterest is more of a search engine than a social media site, so we treat and think of it differently.
- Spend time researching keywords. SEO is really big on Pinterest. Do manual searches for similar pins and check their keywords.
- Create multiple pins for the same article.
- Optimize your boards with keyword-rich descriptions.
- Invest in high-quality images that catch the eye.
- Always post new fresh pins.
- Pin content from TikTok, Instagram, Facebook, or Youtube.
Caution: You want to post multiple unique pins for each blog post, freebie landing page, or product sales page and test different visuals and titles, but be careful not to spam Pinterest. We pin 3 pins for each URL spaced at least 7 days apart and then take a break from sharing that URL again for six months or so.
Paid ads
You may want to invest in some paid traffic as well, but you want to play it carefully so you don’t lose money. Traffic used to be cheap, but it’s getting more and more expensive, and unfortunately the days of putting $1 into ads and expecting to easily get $3 back are over.
You can run ads to freebies and low-cost products, but avoid running ads to “cold” (low awareness) audiences directly to high-ticket offers.
If priced in the “impulse purchase” range (ideally under $50), and if the offer is high value and low risk, it is possible to skip over the middle phase of the customer journey – that is, even if they’re not familiar with your brand, they might just give you a chance.
For those types of campaigns, expect to break even or make a tiny profit. The goal is really to acquire customers. Once you earn their trust by “wowing” them with your intro offer, be prepared to offer additional products so you can increase the average order value and the lifetime value of a customer.
When running paid ads directly to products by targeting cold audiences, you’ll need to include lots of social proof (testimonials, case studies, # of happy customers, a photo of you with your bio, etc.) and a money-back guarantee on your sales page to help people overcome any objections or doubts they may have.
Many digital product creators don’t offer a money-back guarantee because of the nature of the product. It’s a personal decision you need to make, but we choose to offer a guarantee and can tell you that our refund rate is very low and we believe the increased conversions are more than worth it.
Guest posting with content upgrades and landing pages
A great and fast way to get quality traffic is to find blogs with similar audiences and write a guest blog post.
Guest posting works really well if you give the readers a solid reason to head over to your site. A simple byline with a link to your website at the end will not be enough. You need to attract them with content upgrades.
A content upgrade is simply a bonus download you offer to complement your guest post article. You need to mention in the article that you have created a free resource for those interested to learn more and that they can get it on your website. You then send them to a landing page created for the freebie where they need to enter their email to get it. The bonus can be something like a PDF, a swipe file, a case study, a template, or anything that adds real value.
Next up, the most important step: closing the sale!
- ⭐ Check out The Blogging Machine, it includes an epic directory of guest post opportunities by Niche
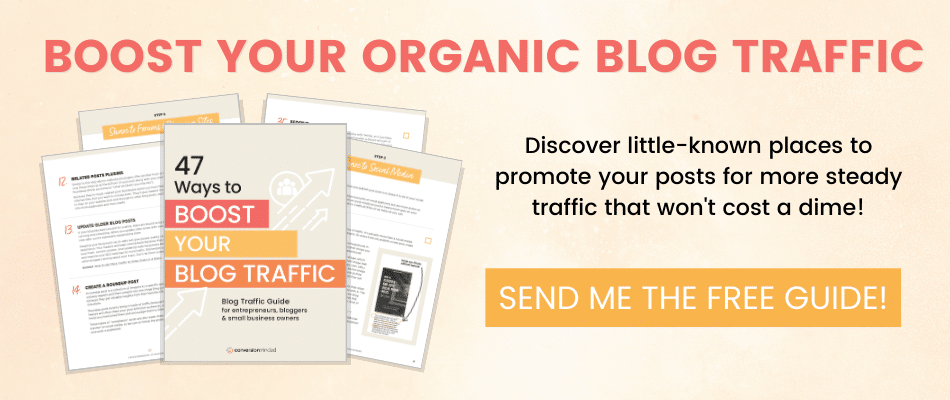
- ⭐ Download our Boost Blog Traffic (Free Guide) below for more ways to drive organic traffic to your content
Step #6: Close the sale with an email sequence
You’ve come such a long way! By now you have people on your email list ready to hear what you have to say! Congrats!
They’ll be most engaged during the first week after they sign up so you want to make the most of it and continue nurturing that relationship and invite them to become a customer as quickly as possible.
In order to do this, you need to master two important tools: the email sequence and the sales page.
The First Sale Funnel Email Sequence
Your email sequence is simply a series of emails that guides people toward making a purchase.
These emails need to be scheduled to go out automatically after somebody subscribes to your email list using automation tools that come with email services such as ConvertKit or MailerLite.
Once your sequence is set up, it will work for you in the background to generate sales and line up work.
Common mistakes people make with email sequences
An email sequence must flow seamlessly and every element is important. If it has gaps, it won’t be effective.
Remember, people will only buy from you once they know, like, and trust you and that’s not achievable by just sending out one freebie delivery email after they subscribe to your list.
You need to give in order to receive.
Emails You Need in Your Sequence
Here’s what we recommend for your First Sale Funnel that includes all the elements you need to build trust and close the sale:
✉️ #1 The Welcome Email (deliver immediately)
Introduce yourself and deliver your freebie. You can casually mention your digital product but don’t be too salesy here, put it in the PS and present it as “something else you think they’ll love” or “the fast track” to getting the result they want.
Example Subject Line: Welcome [Name]! Your [Niche] journey starts here 🙌
✉️ #2 The Educate Email (deliver on day 2)
Offer value and help your audience solve a problem that relates to your info offer. Share an educational blog post if you have one so you can really deliver the value and establish your credibility. This also helps train your subscribers to click back to your website knowing they’ll get value when they do so.
Example Subject Line: The #1 Secret to [Niche Topic] Success 🤫
✉️ #3 The Break Down Barriers Email (deliver on day 3)
When making a purchasing decision, your customers will have objections standing in the way of moving forward. In this email you’ll connect with them on a personal level and show them how to face their challenges, overcome obstacles, and take action. If you have one, link to a blog post that busts a myth, helps them avoid common mistakes, or helps them overcome a common obstacle.
Example Subject Line: Overcoming [Common Obstacle] in 3 Easy Steps 💃
✉️ #4 The Social Proof Email (deliver on day 5)
Prime them to buy by sharing a success story (either your own or a client’s). Mention how you helped others achieve great results and share some testimonials or case studies. You can also link to a case study (“how they did it”) blog post if you don’t have testimonials yet. Casually mention your offer and link to the sales page.
Example Subject Line: How [X – describe your client] Achieved [Niche Goal] 🚀
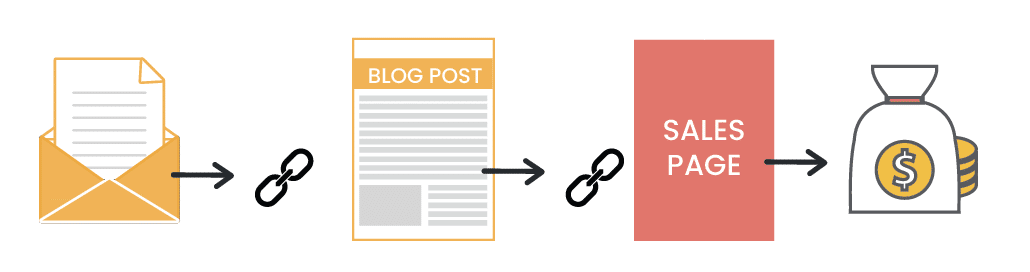
✉️ #5 The Pitch (deliver on day 6)
Tell them about your offer. Remind them that you understand where they are today and describe to them what life will be like when they overcome their biggest obstacle. Describe the outcome they can expect and focus on the value and benefits. Create a strong call to action and link to a sales page that has a timer like this one) on it set for 24 hours. Make it clear they must act now to get the deal because the offer will expire soon. Link to the sales page.
Example Subject Line: Grab this deal before it expires, [Name]!
✉️ #6 Last Call (deliver 3 hours before the offer expires)
Remind them that this is their last chance to take advantage of your special offer. Briefly recap what it is, the price, and the features and benefits and link to the sales page.
Example Subject Line: ⏰ Down to the wire
⭐ Check out our Email Sequence Builder to get dozens of pre-written emails you can mix & match to create endless email welcome sequences & campaigns along with pre-planned sequences you can adapt to your niche.
Grab the First Sale Email Funnel Cheat Sheet below to take this email funnel with you:
The Sales Page
Your sales page is where the customer makes their final decision, and there are certain elements you need to make sure to include so you don’t lose out on conversions.
The good news is that sales page copywriters and conversion optimization specialists have tested what works and what doesn’t so many times that all we need to do is follow proven formulas.
Here’s a sales page framework we use and teach inside our courses because it’s easy and it works:

Section 1:Introduce the problem and your solution.
Make sure you have a really clear, specific headline and hook. This is probably the most important piece on the website. Address a need and promise some kind of result.
Describe the problem and then describe the goal / the desire / the place where they want to get to.
This is the perfect introduction to the solution, which you will be presenting only in short here. Right below this is where your first call to action button is going to be.
Section 2: Forgiveness, details, and proof
Beg some forgiveness that other people haven’t solved this problem already.
Give more details about your program and offer some proof so people can see that it works.
Start to relate with the audience and the obstacles they are facing. Tell them how you’ve experienced that too and how you came up with the solution.
This is where you get specific about your solutions (proofs, mock-ups, etc.) Then you can feature testimonials and show what other people are saying about you.
Elaborate on the benefit and dig deeper and help people visualize their transformation.
Section 3: Address objections and close
Now, address the objections and answer the questions that people might have.
You can include:
- A money-back guarantee
- Frequently Asked Questions (think about what you would need to know to purchase).
- Bio and headshot
- A final CTA and product Mock-up
Section 3 is also where you will include your bonuses and create a sense of urgency for the offer by including a deadline for the current offer.
Keep the design clean, distraction-free, and focused on the goal. Consider your audience’s preferences when you choose the colors. Use beautiful images, including lifestyle images, and keep your CTAs clear and actionable.
Look at everything through the eyes of your customers. If something doesn’t seem right, change it or leave it out.
Download the free sales page copy worksheet & tutorial below:
Remember that this is a funnel, which means that…
👉 The most people in your audience will be at the top consuming your free content.
👉 Some of those people will move into the middle of the funnel, enjoying your emails and exclusive subscriber content but they’re just not ready to make a purchase.
👉 A small percentage of people from your audience will make a purchase and that’s normal. That’s why it’s shaped like a funnel. 😎
So if somebody doesn’t convert (purchase) right away, it doesn’t mean you’ve failed! Every customer goes on a journey and that happens at their own pace. Many will remain in your warm audience until they’re ready.
That’s why after you’ve set up your First Sale Funnel, don’t forget to…
Next steps to next sales: continue to nurture & sell to your list
From here, you want to keep your email subscribers happy and engaged so they continue to build trust in you and develop good feelings about your brand. There are two main types of emails you want to be sending to your list:
#1 Nurturing Emails (Broadcast or “Default” Emails)
After your welcome sequence has been completely delivered, you need to keep nurturing your audience – not only for the people who didn’t purchase, but for your customers too, so they’ll develop a sense of brand loyalty and make another future purchase.
But it can seem a daunting task to communicate with all these people you have on your list. What will you email them, right?
Think about what your audience is interested in. What type of problems do they have and what kind of solutions are they seeking? You want to show up regularly (at least once a week) with value.
Value emails will continue to nurture your relationship with your subscribers and guide your audience toward a purchase when they’re ready.
Providing value means offering anything that will help them solve a problem or get what they desire most and can take the form of:
- Educational tips
- Your personal/professional transformation stories
- Customer success stories
- Insights, lessons learned, and “aha!” moments
- Inspirational and motivational messages
- Engaging questions to learn about your audience so you can serve them better
- Your take on industry news
- Exclusive behind the scenes looks at you and your business
- New blog posts and youtube videos you’ve just published
- Invitations to buy/work with you
The important thing is to show up regularly so they get used to clicking on your emails and so you stay top-of-mind. If they don’t hear from you, they may forget who you are or that they subscribed. They may unsubscribe or even mark your emails as spam!
⭐ Check out Activate Your List for 2 years of nurturing marketing emails already planned out and pre-written for you. It’s an epic vault of 252 emails designed to build brand awareness and guide your subscribers along their journey to become a customer. It’s a great deal because it’s just one low payment with no recurring fees!
#2 Promotional Emails (Flash Sales, Launches, Product Updates)
We also recommend running regular email promotions to your list using a series of promotional emails that have a start date and an end date for an exclusive deal for your subscribers.
We plan email promotions around product launches, product updates, and run special promotions around seasonal holidays and special occasions – and that includes “anytime holidays” for when we need to hit sales targets.
- ⭐ Read our Beginner’s Guide to Email Promotions
- ⭐ Bookmark our epic 12 Months of Social Media Holidays with ideas for running special email promotions any time of year
- ⭐ Check out our Monetize Your List ~ Seasonal Sales Promo Builder. It includes an epic pack of 160 sales emails pre-written for you with pre-planned promotional sequences you can adapt to sell your products and services to your list
- ⭐ Free Download: Email promo calendar with 95 Email Flash Sale Ideas
- ⭐ Get the free guide: How to Make $1k/month From Your List
- ⭐ Download 9 Email Promotion Strategies that Work
That’s a wrap!
We’ve covered a lot of ground today and you deserve a round of applause for making it this far! It shows you’re committed and have the drive to do what it takes to launch your first sale funnel and intro product successfully.
Let’s recap some of the things you’ve learned so far:
- Get clear about your “ultimate destination” premium offer so you know where you’re taking people long term
- Create a low-risk intro offer in the form of a digital product that will serve as a first experience of being your brand loyal customer
- Create freebies that get the right people into your email funnel
- Guide people to a sale using strategic emails, content, and an optimized sales page
- Keep nurturing your list and guiding them to the next sale
You have much more than just the basics in your toolbox now and you are ready to create your first funnel and get your first sale using a low-cost digital product. We wish you MUCH success, we’re rooting for you! If you have any questions please leave them the comments.
Taughnee & Sandra
We stand against get rich quick schemes and this is not one. Our success depends on the effort you put into it, the resources that are available to you, and a myriad of other market forces we cannot predict nor have any control over. We want to help you move your business forward by giving you great content, tools, and strategies, but we do not make any guarantees about your ability to get results or earn any money with them. Any mention of earnings that appear on this website are estimates of earning potential used for illustrative purposes, not a guarantee you will make the same level of income. Any financial results we refer to should not be considered a promise of future income as past results do not assure future success. We don’t guarantee future earnings and you accept the risk that results vary by individual and the use of our information, products, and services should be based on your own due diligence. You agree that ConversionMinded is not responsible for any success or failure of your business that is related in any way to the purchase of our products or the use of information on this website.
