
How to Easily Create and Grow a Facebook Group (to Increase Sales)
 Hi friends!
If you’re a member of Facebook Groups, you already know what sanity-savers they can be.
Now, I’m not talking about the kind of sanity-savers that drive incredible amounts of traffic or help you grow your business.
Yes, they can do that, but I’m talking about the kind of sanity-savers that make you feel connected to the universe again.
When you’re sitting at your kitchen table in sweats and a t-shirt bangin’ away at your laptop, it’s easy to feel disconnected. And being able to pop into your favorite group, get feedback, share tips, ask questions, and partner up with other members makes you feel like part of something bigger.
(Fo’sure, there’s the dark side of Facebook groups. But that’s for another day!)
Many of you have asked me how to create and grow a Facebook Group, and today, I’m sharing the strategies that have worked for me to help you do the same.
I’ll be drilling down on the art side of creating and promoting a group. For the techie side of how to create a Facebook Group, Neil Patel has a step by step guide for you.
Ready? Let’s dig in.
First, why should you start a Facebook Group?
Well, for starters, you’ll have the opportunity to meet amazing individuals with similar interests and goals. Just like you can in other groups.
But here’s the difference:
In your own group, you have center stage. It’s much easier to be visible as a group owner vs a member because people HAVE to notice you. It’s like networking on steroids.
Here are some other perks:
- You can reach a broader audience with your posts – you’ll likely get more traffic than other groups
- More comments on your posts – you can use these to fuel other posts and threads
- Draw attention to your freebies – pin them to your group for all to see
- Announce your courses and programs – increased sales
- Showcase your expertise and build trust – hold Q&A sessions and challenges
Of course, I wouldn’t write about building a Facebook group without pimpin’ my own. 🙂
If you want to network with other professionals and have multiple opportunities to promote your business, I’d love for you to join my Facebook community!
Before you create a Facebook Group
You’ll want to spend some time researching, taking notes, and creating brand assets before you set up your group.
I recommend creating a Google Spreadsheet (or Word doc, Evernote, Excel) so you can keep your ideas in one place. Here’s what mine looks like:
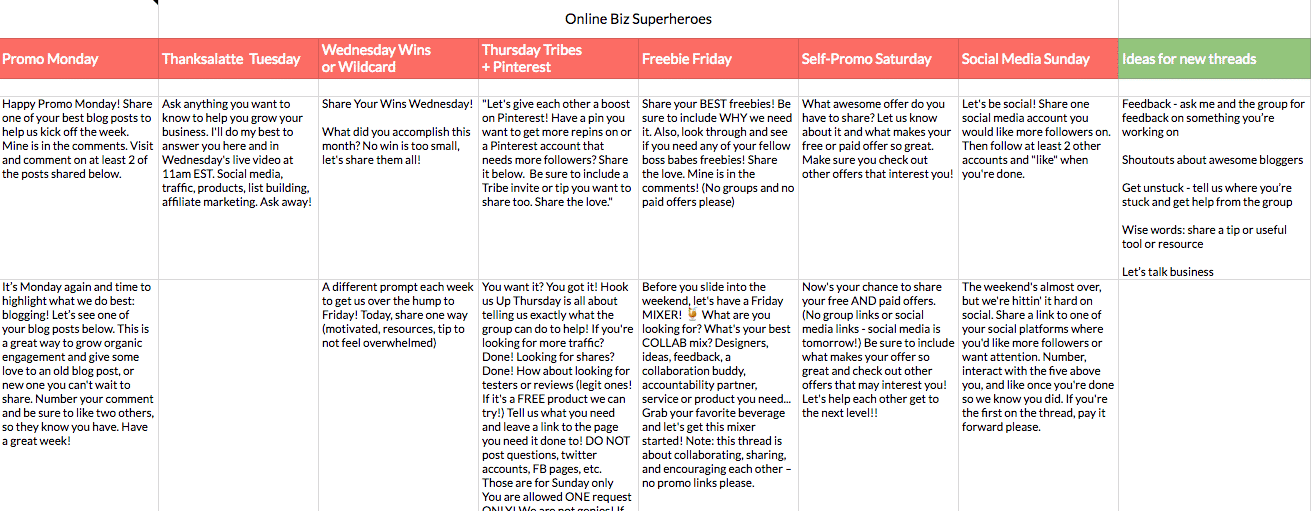
I create multiple variations to keep my daily threads fresh and new. Then all I have to do is put them in rotation in SmarterQueue. No last-minute wondering what to post. It’s all ready to go!
1) Decide what type of group you want to create.
Here’s where it pays to “think it forward.”
What level of engagement do you want your group to have?
Do you want it to be a promo group where people can sell their products, a group for sharing ideas and tips only, or a mix of both?
And what types of daily threads will you have?
For example:
If you have a wedding planning group, your thread may include the wedding planning highs and lows, best wedding plans, tips, budgeting, and finding photographers, bands, florists, invitations, caterers, and so on.
What about location? Will it be a local, regional or global group where members can buy and sell old wedding items and advertise their services?
As a rule of thumb, sharing groups have higher engagement than promo groups. Buut, it may be easier to get members if you mix it up. Just sayin’.
2) Create a group description.
Take the ideas you have from the previous step and create a group description.
Make sure you include the purpose of your group, who it’s for, and any group rules you have so that everyone can see.
For example, here’s my description:
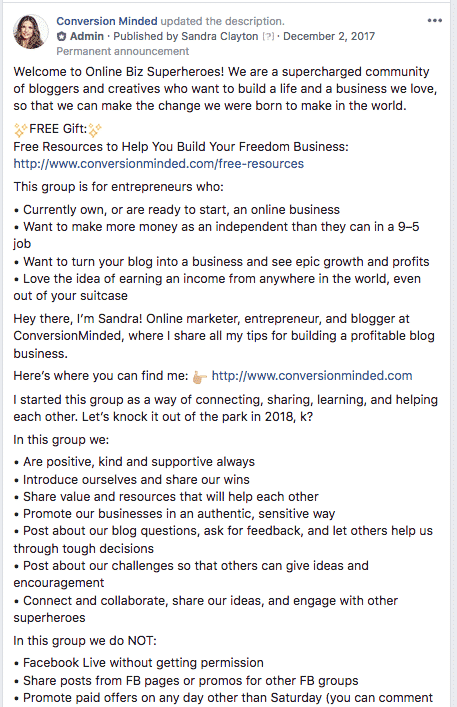
See how I include a link to my free resources and my website? Boom.
3) Create a cover photo.
Doesn’t have to be anything fancy. Just a photo of you or a graphic image with the group name.
If you want, you can take it up a notch and brand your cover photo with colors, a logo, and other elements. It’s really up to you.
What size should your cover photo be?
Great question! I’ve got Facebook group cover dimensions and a free template for you.
4) Create daily thread images.
If you plan to run the same threads each week, creating images and scheduling them in advance will save tons of time and headache. This way you can have your group running on semi-autopilot.
Here’s a 1020 x 800 template I use:

Related: How to Use Photoshop to Create Branded Social Media Images
The last thing you’ll want to do before you create your group is to gather up some Facebook friends and invite them to join. You need to add at least one person (besides you) in order to create the group.
Remember, you can always remove them later!
how to grow a facebook group
Next, it’s time to promote your Facebook Group and get some members!
5) Invite Twitter followers to join.
I send new Twitter followers a message to thank them for following me. In that message, I include an invitation to download a freebie or join my group.
When you do this, make sure you frame your invitation around what’s in it for them. Don’t just ask people to join your group!
Be authentic and human, strike up a conversation. Then let them know about the group and why they should join. What’s in it for them? More sales, networking, support, encouragement? Whatever it is, put it out there!
Whatever you do, don’t send people messages like this:
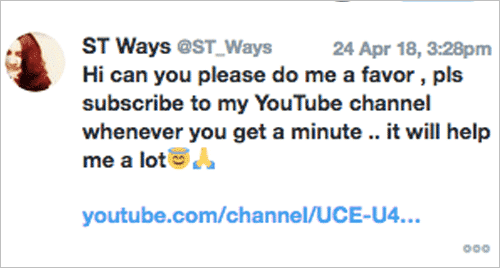
Ick. What a buzz-kill.
Make sure you make it about them and not you. With me?
6) Invite email subscribers to join.
Don’t forget to email your subscribers! They’re your biggest fast and will likely get the most benefit from joining.
I always include a shout-out at the bottom of my emails, like this:
-P.S. Want your marketing questions answered? I’d love for you to join my Facebook Community where you can network with other professionals, share tips, join forces, and have multiple opportunities to promote your business. Join Online Biz Superheroes.
You can mention your group wherever you prefer – at the beginning, middle, or end of the email.
I like to keep the focus of my email on-topic and close with the group link. Too many buttons and links in the body of the email can be overwhelming, in my book.
7) Include a link on your website.
I just added my Facebook Group to my site navigation. So every time people visit my site, they’ll see the link which will redirect them to the group.
The way I see it, it’s just one more way to make the group visible.
More visibility = more people who know about it = faster growth.
Hmm…sounds like the formula for anything we want to promote, no?
Anyway, we’ll see what happens with it!
8) Mention the group in autoresponders.
When people opt-in to your list or sign up for a freebie, include a link to your group in the Welcome sequence.
Something like:
Hey there! Here’s the link to download the Guide to Wall-Hanging Art.
If you’d like more free resources like this, plus tips to design and sell your wall hangings, join my Facebook community [link].
If you include this extra line in all of your welcome sequences, everyone who signs up for your free offers will have an opportunity to join. And it’s all happening behind the scenes.
The best part is, the more opt-ins you have on your website, the more members you’ll likely get.
9) Add to social profiles
This one sounds like a no-brainer, but it’s easy to overlook. And really, it’s not hard to add a link to your group in your social profiles.
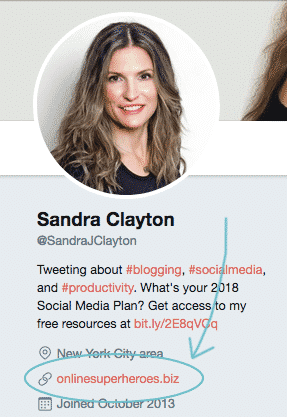
What IS hard is deciding how many calls to action (CTAs) you should include. After all, Instagram, Twitter, and even Pinterest don’t give us much real estate to work with, friend. It’s up to us to choose our primary CTAs.
My picks? My free resources and Facebook Group. Here’s how I include both in my Twitter profile:
What about you?
Are you looking to promote a new course or program? Get more subscribers? Or are you all about your group right now?
Psst…Curious about that fancy URL for the group?
You can do it too! Just create a branded domain (through GoDaddy) and have them forward the domain to your group.
I came up with the idea when I started my YouTube channel. There’s no way to create pretty links in YouTube descriptions, and this is my workaround.
#SHAMELESSPLUG Subscribe to my channel! It’s brand new and I can really use your support to help grow it. ✨ You’re the best!
10) Invite members of other Facebook Groups
This one has worked well for me. If you’re in a number of groups, you can direct message people who seem like they may be a good fit.
#WORDOFCAUTION You have to be careful with this strategy. Make sure you follow the group rules. If they don’t allow direct messaging or promoting groups, don’t do it.
And don’t go crazy inviting 100 people a day or anything like that. Maybe ten people every other day, you get the gist.
As long as you mention the benefits of your group (and follow through with your promise), people should be receptive to your invite. Most people have thanked me for inviting them…
11) Invite people who sign up for webinars.
This one I haven’t tried and am so excited to test for my upcoming webinar:
When people register for the webinar, instead of redirecting them to a Thank You page, send them to your Facebook Group. Simple.
I’m going to try this one soon and will keep you posted on my results. If you get to it before me, please let me know in the comments. I’d love to hear all about it!
12) Pin a post or a tweet to your timeline.
This is another one of those things you can put into rotation with other promotions.
Create a post/tweet about your group, then pin it to your Facebook and Twitter timeline. It will be the first post people see when they land on your page.
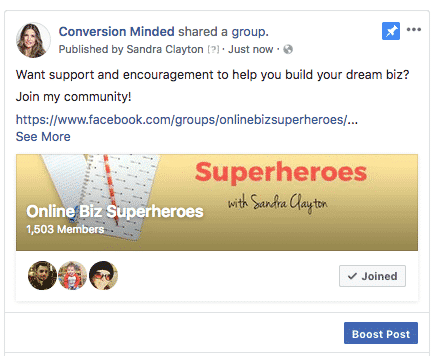
Pinning a post is super easy. See those three dots in the upper right of the post?
You can boost the pinned post and reach a bigger audience.
(I’d keep the budget small, say $5-10 a day for a week, and see what happens.)
Even if you boost another post and people visit your page, they’ll see the pinned post first. Woo!
13) Create an Instagram Story about it.
Instagram Stories work! I easily 2x my Instagram traffic every time I create a story.
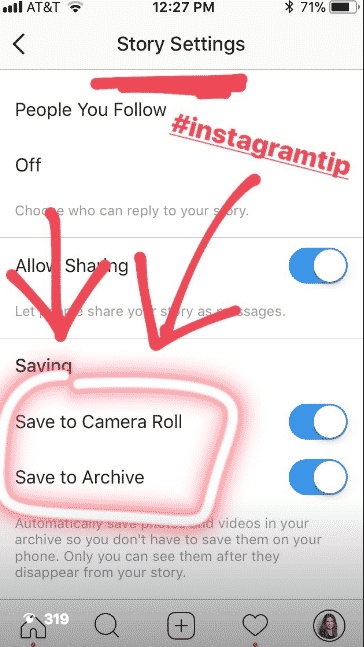
The best part is, they’re fun and easy to create. Record a quick video or create a graphic about your group and use Instagram’s editing tools to add colors, text, hashtags, and more.
If you enable Save to Archive in your settings, the story will appear on your profile until you remove it, so new followers have a chance to see it.
14) Share your Facebook Group on social media.
You know what? I ALWAYS forget to promote my offers.
It’s terrible! I had to create a product promo worksheet to force myself to get into a routine of promoting offers in the same way I promote blog posts.
And to this day, I haven’t shared a single post about my group on social media (except for the pinned post, step #8 above).
So, friends, I’m off to start sharing!
Here’s my plan:
- Create three Facebook/Twitter images
- Create three IG posts
- Create one pin
Hook those bad boys up in SmarterQueue, post them to my “freebies” category, and let them loop.
Curious about how to schedule posts with SmarterQueue? I’ve got a full guide for you right here.


Great tips Sandra. Growing an FB group is a tough task and you have to make sure that all members are active & your group isn’t turning into a spam land.
Have you heard about the recent news of subscription model for FB groups? What’re your thoughts on it?
I looked into the subscription model a while back and am glad that Facebook is officially testing it. I think it’s a win-win, especially for admins who are working hard to provide value to the group members.
Hi Sandra, these are amazing tips. I want to insist that inviting random people to the group is probably the worse idea possible. Well, first, it is a just a disrespectful move. I hate it when someone adds on Facebook just so they can invite me to a group I had no clue it existed before. And second, if the group is not all interesting, or it is full of spam, I consider the person who invited me spammy as well. It hurts how others perceive you when your work that way.
I find it cool when someone asks for permission first and sees whether I am at all interested in that group to begin with. At least, if I’m not interested in the group, I may be interested in what the person is doing.
Thank you for this great article!
Great tips! I had always thought starting a Facebook group seemed like way more trouble than it was worth (plus I’m shy, so the attention scares me, even if it’s just online), but you make a compelling case for starting one! Now that I think about it, I could probably bring something unique to a group by combining elements that I like from other groups while remedying what I find problematic.
Hey there Kate! Glad you found the post helpful. Facebook groups take more work upfront. Once you get into a routine they become manageable. If you decide to start one, make sure you’re very targeted with your audience and group mission (makes it easier to make sales). Also, I’m interested in learning more about your copywriting services. Feel free to reach out via email…