Part 3 of the Blog Profit Plan series. This was originally a 2-part series, but after the last post, I realized that we still have a missing piece:
A social media strategy.
The missing piece is crucial if we’re going to tie our four buckets together:
- Traffic
- Content
- Subscribers
- Money
Social media is the bridge that connects you to your future customers and when you do it right (which I’m going to show you how right here!), it will be a game-changer for your blog and business.
If you missed parts 1 + 2 of the Blog Profit Plan series, here’s what we covered:
Today, I want to look at part 3. Before we dig in, I should mention that having an effective social media strategy is all about showing up. Everyday. Even if it feels like a colossal waste of time and you have so many other things to do already, if you stay with me here, you’ll see the payoff. Promise.
Let’s dig into the strategy.
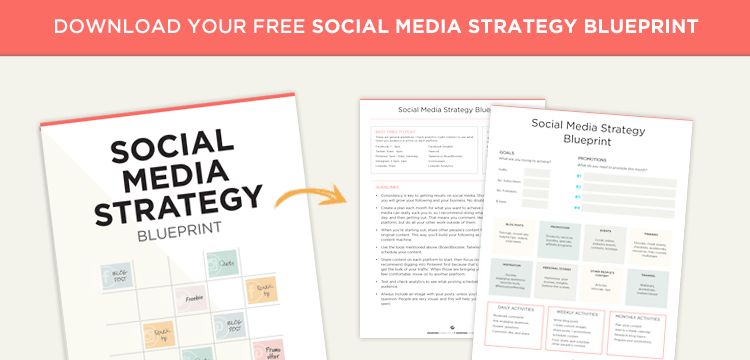
I created this social media strategy blueprint to help put what you learn into action. Click the image below to download.
This post contains affiliate links.
Step 1: What are your monthly goals?
Write this all down so you can see your priority goals for the month. This way when you share content, you have a strategy and a plan behind it. All successful social media strategies start here.
What’s the most important thing for you to accomplish this month? Do you want to:
- Add 1,000 new subscribers?
- Launch a new product?
- Gain 3,000 Pinterest followers?
- Sell 25 products? (remember the blog income formula)
- Get 200 webinar signups?
Knowing your end game will help you plan what types of content to share (including any promotional content), plus give you actual numbers to hit.
For example, if your month’s goal is to get more subscribers, you would want to schedule blog posts that include a freebie or opt-in offer. And if your goal is to promote a new service or product, you would want to schedule blog posts that contain links to your product offer, coupons, discounts, and so on.
Step 2: Share content
Now that you’re clear on your goals, it’s time to share content to support your monthly goals and help build your following. There are two types of content you’re going to share:
- Other people’s content
- Your own content
We could just lump these two together and call it “share content”, but I’d rather break this section down because our strategy will be different for other people’s content vs our own content. First of all, it will take some time to develop a system for your original content. Sharing other people’s content is easy to set up and you can build a ginormous following this way. I grew my Twitter account to over 16K doing exactly that – retweeting and curating content.
Now, would I recommend sharing only other people’s content? No way. Definitely not a good plan if we’re going to build a platform for a hugely profitable business (which is exactly what we’re going to do!). Buuut, a following of 16K means that when you start sharing your own content, you have an audience ready to consume it. I say let’s check the box on it, so we can move on knowing that we’re revvin’ up a social media strategy the right way, k?
First up: create a source library of bloggers, influencers, pins, and posts.
Here’s how to do it:
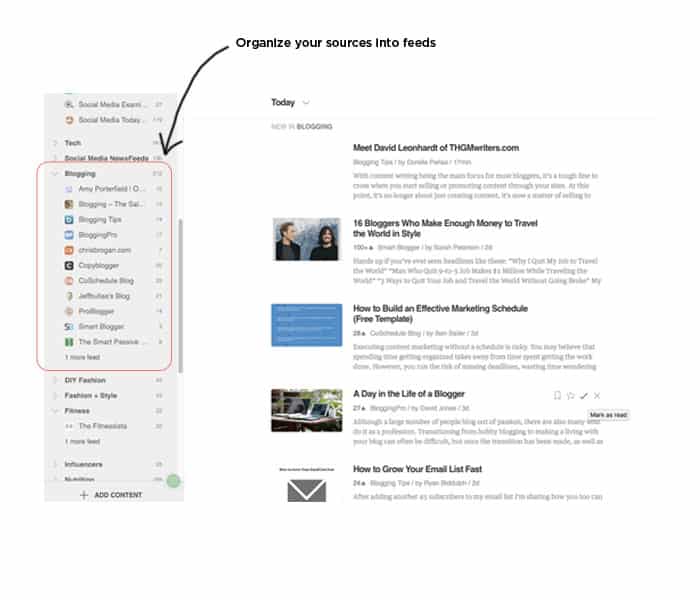
1) Create a Feedly source library
There are likely blogs and influencers in your niche that you follow (if not, time to crack the books!). Make a list of sources that are relevant and useful to your audience. The sources can be anything…blogs, Facebook pages, Instagram accounts…anything.
For instance, my list includes:
- Social Media Examiner – socialmediaexaminer.com (social media tips)
- Copyblogger – copyblogger.com (blogging tips)
- Amy Porterfield – amyporterfield.com (online courses)
- Jeff Bullas – jeffbullas.com (online marketing tips)
Now that you have your sources, it’s time to import them into Feedly. Feedly will read and organize all of your favorite news sources in one place. Uh, huh? It sounds more confusing than it is. With Feedly, you have access to all of your favorite content right from their dashboard. This means that whenever a new post is published, Feedly will update your feed in real time, so you only have to check one source to see fresh new content.
2) Create secret Pinterest boards
Now we’re going to do the same thing on Pinterest using secret boards. Secret boards are Pinterest boards that only you can see, so when you save pins here, they’re just for you and no one else. You’ll see them below your other boards, like this:
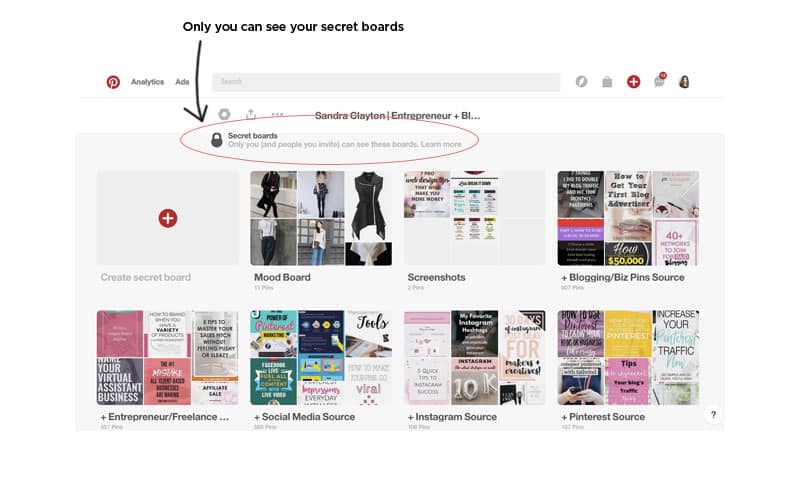
For example, my secret “source” boards are:
- + Blogging/Biz Pins Source
- + Entrepreneur/Freelance Source
- + Social Media Source
The + sign is how I know that these boards are secret. See the mood board in the image above? That’s another secret board where I pin everything that inspires me…things like colors, fonts, work spaces, interiors, textures, fashion, logos, other brands…everything I love gets pinned here. If you want a place to gather design ideas for your brand, this is a fun way to do it! Gotta love Pinterest!
Step 3: Create and share your own content
Next up: let’s look at your own content. Here we’re talking about all the content you create: blog posts, tips, promotions, products, Ebooks, quotes, behind the scenes, stories, and so on.
The best way to approach this is always to be thinking about how you can turn one piece of content into something new. This way you’ll have multiple visuals to share, plus you’ll be building up a huge content library.
What do I mean by this?
First of all, for each post you want to create a number of assets, which is a fancy way of saying that every time you publish a post, you create a few pieces of content for it. Think of it as your blog post kit. For example, for each post you might have:
- The post itself
- A free offer
- A quick tip from the post
- A video summarizing the post
- An email for your subscribers
Phew! This looks like a lot, I know, but can you see how much content you can create by repurposing? Once you have a system together with branded image templates (use Canva or Photoshop), things move much faster.
Here’s an inside look at the content I created for one of my posts: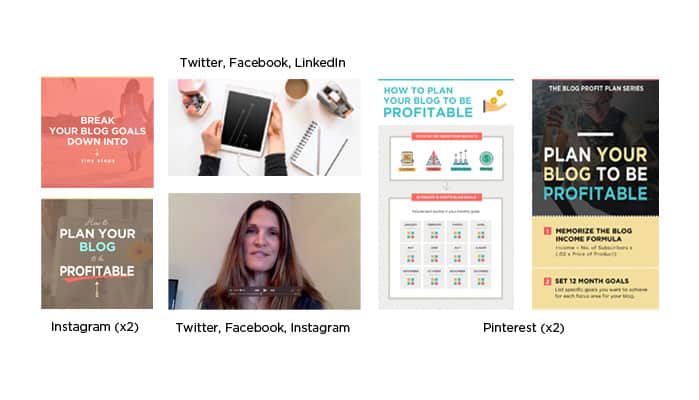
Step 4: Schedule content
I’m a huge fan of Buffer, SmarterQueue, BoardBooster, Tailwind, and Planoly for Instagram. What’s the deal with all these scheduling tools, you ask? Here’s how I use them:
BUFFER – $10 a month
Use for Twitter
To share other people’s content, I use it with IFTTT, where my recipes pull my Feedly feeds into Buffer. I also use Buffer to give new posts an initial spike in traffic. When I have a new post, I create 15-20 tweets and schedule them throughout the week in Buffer. I’ve found this to be an effective Twitter marketing strategy for my content.
SMARTERQUEUE – starts at $20 a month
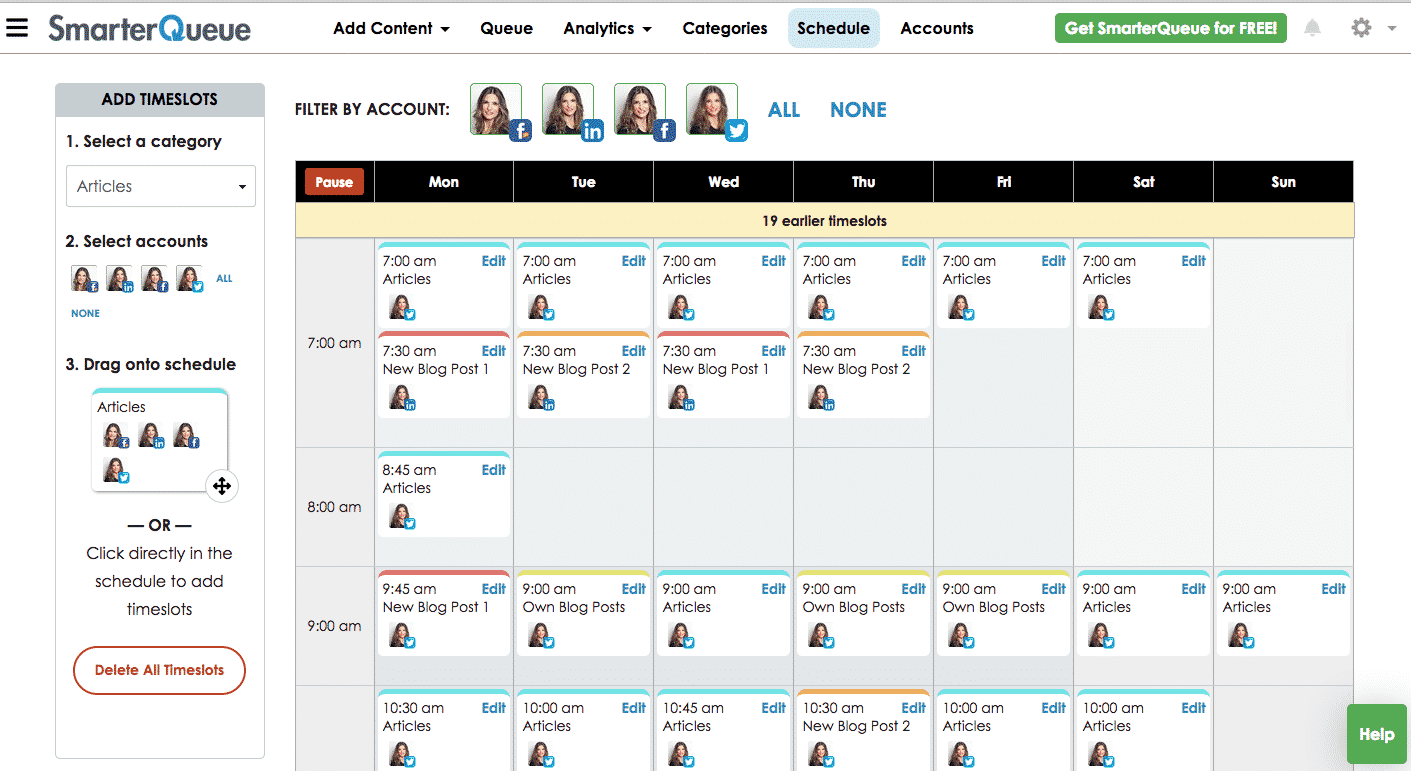
Use for Twitter, Facebook, and LinkedIn
A serious game-changer for me, I heart it big time. SmarterQueue is like Buffer meets Edgar without the huge monthly fee. Once my queue reaches the bottom, SmarterQueue loops my posts so that they are always being shared. The only thing on my wish list is a better way to promote new blog posts, which is why I still use Buffer. Hopefully, these guys will be adding that feature soon.
Use for Pinterest
Pinterest accounts for 80% of my traffic at this point and BoardBooster has been a huge reason why. This is a cool way to pin all at once but have Pinterest space them out for you, so you don’t bombard your audience with 30 pins in one hour. Oh, and remember the secret boards we created? BoardBooster is where you’ll set up campaigns to share those pins with your audience. We’re talkin’ set it and forget it here, friend.
Related: 14 Ways to Get Massive Traffic from Pinterest
TAILWIND – $10 a month
Use for Pinterest
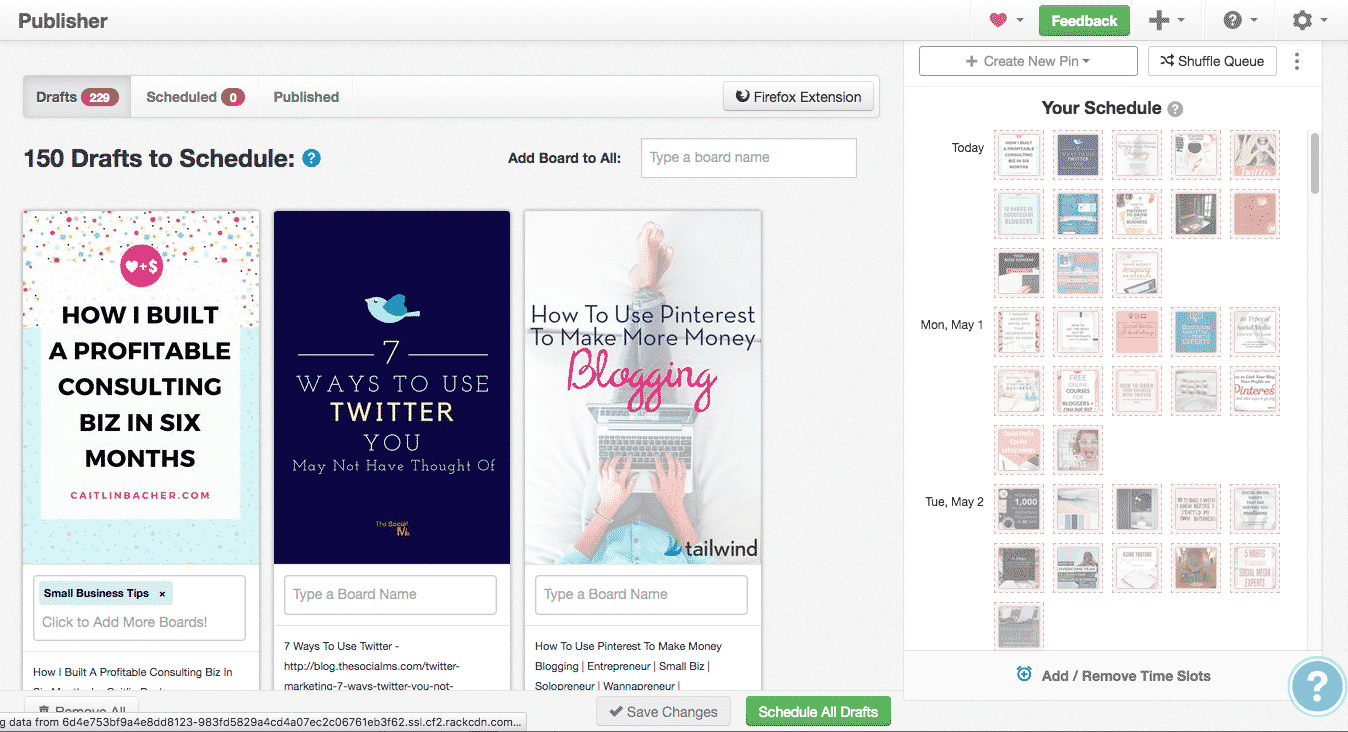
BoardBooster has a semi-steep learning curve. There’s a lot to digest, and it takes time to set up your campaigns. If you want to get a jump on scheduling and get right to it, Tailwind is your answer. It’s amazingly easy to use, and all of your scheduled pins will be right there on the dashboard, so if you’re a visual person like me, you will love it!
There’s also a way to loop your pins similar to BoardBooster. If you’re curious about how looping on Tailwind works, this post is a good read.
PLANOLY – $7 a month
Use for Instagram
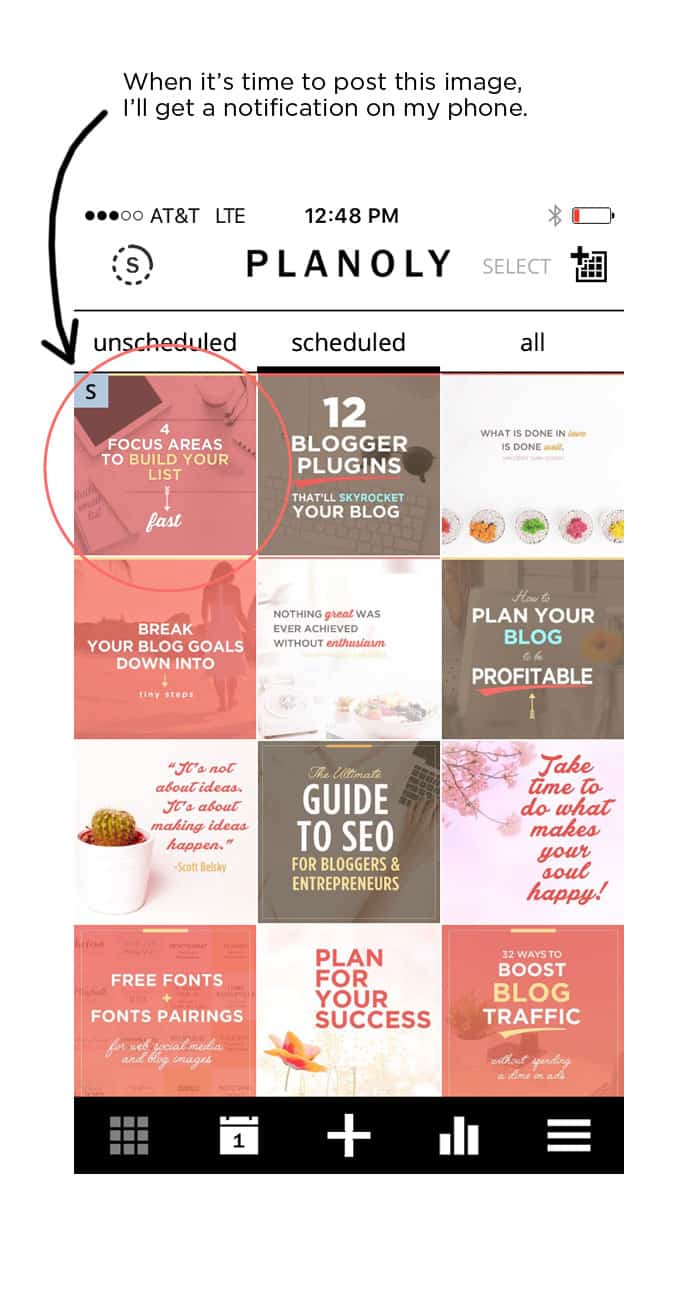
If you’re a control freak like me and want all of your images to have the same look and feel, with Planoly you can tweak designs in Photoshop, schedule them straight from your desktop, and share them from your phone. I started using this tool a few months ago and have to say it’s a fun way to schedule posts on Instagram. I’ve grown my following quite a bit thanks to Planoly and highly recommend it.
 Step 5: Engage with your audience daily.
Make sure you engage daily with your audience – reply to comments and tweets, like other people’s posts, share, comment, and so on. The trick here is to get in and get out so you don’t get sucked in! Try to limit your time to 15-20 minutes a day. Preferably this will be your downtime, so you don’t interfere with more productive tasks, like creating content.
Phew! You made it. We’re gettin’ close…just a few more things to cover.
[ WHAT SHOULD YOU POST, AND WHEN? ]
Step 6: What types of content should you share?
The best social media plan includes sharing the right types of content on each platform. For instance, Facebook and YouTube are perfect for videos. Quick tips and inspirational quotes work well on Instagram, Facebook, and even Twitter.
Instagram and Pinterest are visual platforms. You’ll need to focus on creating eye-guzzling graphics that stand out and grab people’s attention. A straight text post won’t do on these platforms.
On Facebook and Twitter, you can include text-only posts, just know that these tend to get fewer retweets and shares than graphic posts.
What you can do with text posts is to ask engaging questions, such as:
- What is the one thing most people don’t know about you?
- If you could wave a magic wand over (your subject), what would you like the result to be?
- What are the top 3 things you want to learn more about?
- Are you excited about (insert subject)? Yes/No
People love inspirational quotes, quick tips and videos, so I like to spend a day or two at the beginning of each month to create graphics and quick tip videos. If you do this, you’ll always have content to share, even if you fall behind with writing blog posts. Been there, done that!
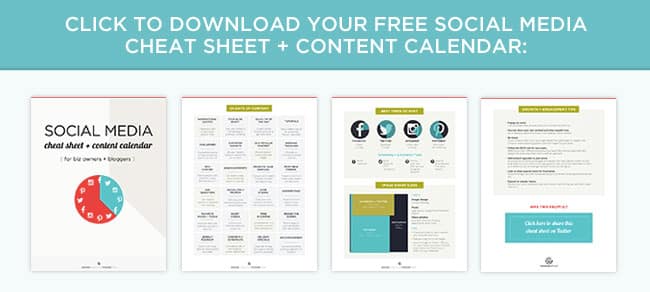
If you need help brainstorming what to share, this social media calendar has over 24 different types of content to help you get started.
Step 7: Best times to post
I’m going to give you general guidelines for each platform, which I also cover, and more, in this post. Here again, you should track the analytics on each site to find the times when the largest number of your fans are online. (Psst…I’m working on a social media strategy template to help you with this, so stay tuned.)
The reason I recommend tracking your analytics is because I’ve seen some interesting patterns for my blog. Even though the best times to tweet should be weekdays 1-3 pm, I see a lot of retweets happening between 2-5 am, and again at 11 pm. This tells me that my Twitter audience is very active in the middle of the night, and not so much during the day. And with Pinterest, everyone (including me) will tell you that Saturday is “Pinit-Day,” but recently I’ve been getting more Pinterest traffic on the weekdays than on the weekends, including Saturdays.
You’ll likely experience the same thing, and these insights can be applied to your social media marketing tactics and posting times. I recommend starting off using the times below as a guide. Then, check your analytics every month to find the best times for you.
When to post guidelines:
- Facebook – 12-3pm & 8-9pm weekdays, weekends 12-1pm
- Twitter: 10am-6pm, sweet spot between 1-3pm weekdays
- Pinterest: 5pm – 12am, all day Saturday
- Instagram: 12-3pm, 8-10pm
Analytics tools:
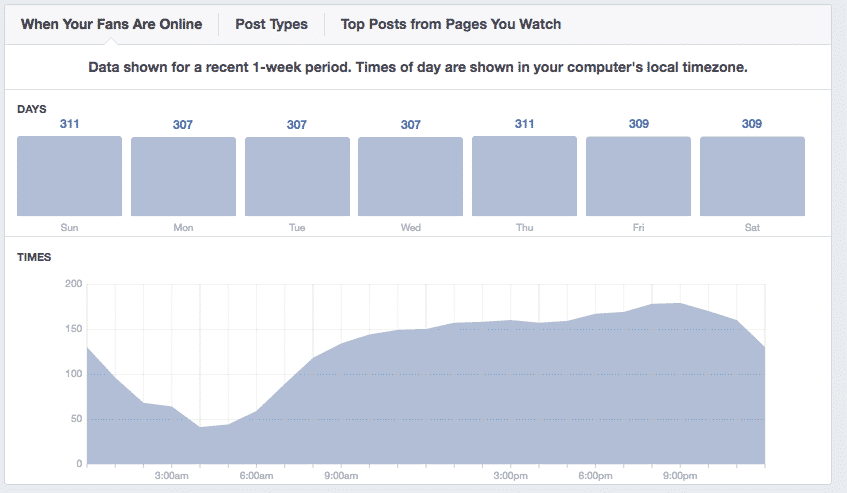
Facebook – No more guessing! Use Facebook Insights (Your Page > Insights > Posts) for the best times of day to post. Here’s what your data will look like:
Twitter – Tweriod is a site that will give you the same data as Facebook Insights. I believe you can even view individual days for more specific data.
Instagram – Since you’ll only post on Instagram 1-2x daily, it’s crucial that you nail down the times that your audience is most active. Now, Planoly is a very pretty way to schedule Instagram posts but Iconosquare is going to be your one-stop Instagram HQ. Use it to find out which times your audience is actually engaging. Then schedule your posts accordingly.
Update: If you have (or switch to) an Instagram business account, you’ll see similar data in Instagram Insights.
Pinterest – If you use Tailwind for nothing else, use it for the analytics. With a premium account, you can see the best times to post based on engagement, which is what you’re looking for. You can use the data to schedule pins either through Tailwind or BoardBooster. Make sure you pin heavy on the weekends, especially Saturday. As I mentioned above, that’s when people are most active on Pinterest.
That wraps up the analytics. Now that you have your toolkit make sure you pop in once a month to review and tweak your social media strategy according to your best times to post. Your goal is to get the most engagement for each piece of content and skyrocket your growth.
Step 8: How often should you post?
Each platform is different. On Twitter, you can post 20-30x a day. Same for Pinterest. On Facebook and Instagram, you’d be spamming people’s feeds if you did that.
Here are some daily guidelines:
- Facebook: 1-3x
- Twitter: 13-20x
- Pinterest: 10-50x
- Instagram: 1-2x
You’re probably thinking How the heck am I going to post 30x on Pinterest or Twitter?
I’m right there with you… It’s a lot. I recommend starting small and scaling up. Think of the guidelines as your finish line. They’re up ahead, around the corner, and you’re going to reach them, just not quite yet. First, let’s put our heads down and focus on the start, which looks something like:
- You post once a day on each platform.
- Once you’re comfortable with that frequency, increase it to twice a day.
- Next, pick one platform to dominate, preferably the platform where most of your audience hangs out. Become a Ninja Pinner or Instagram It-Girl, kind of thing. The key here is to focus on just one platform for a long time.
- Once you’ve mastered step #3, repeat it for the next site.
Let’s recap: our monthly goal is to tie all of our buckets together (content, traffic, subscribers, product). And we want to do that with social media.
Here’s what a day on social media might look like:
- Share on Twitter, Facebook, Instagram: Your own blog post, a quick tip, other people’s content from resource list
- Share on Pinterest: 5 pins from your source boards, 5 repins
- On all platforms: Moderate, engage, comment, like, reply, retweet, share
The beauty here is that the only thing you’re doing in real time is that last one: moderate and engage. Everything else has been planned and scheduled ahead of time. Super fantastic, you’re all set!
Psst… an easy way to build up your content library is to repurpose your blog posts as videos, helpful tip graphics, questions, text posts, and so on. I know I’m repeating myself here, but I learn things visually, so figure it can’t hurt. Here’s what I usually create for my blog posts:
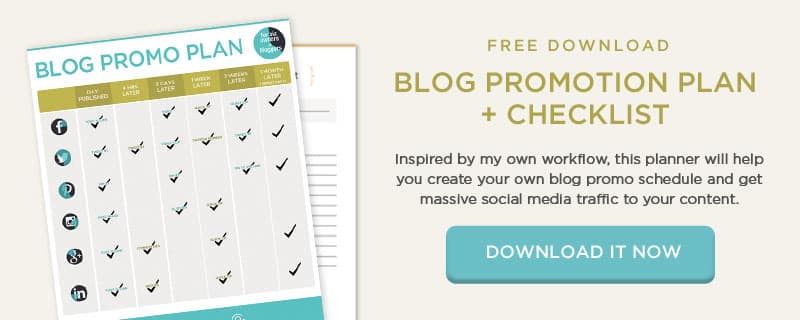
Then I share each of these the first week my post publishes to get an initial spike in traffic. If you want, this blog promo plan will show you what to share on each platform so you can do the same:

We’re almost finished.
If you feel like this is a lot, I get it. There’s a learning curve to all of this. No one becomes a ninja warrior overnight 🙂 If you hang in there with me and put in the time, scheduling social media will soon become effortless. And it will be so worth it. You’re going to rock social media and your goals, k? Just one last step which is super important and we can’t forget it.
Step 9: Queue it all up – one day a month
Spend one day a month planning your content around your monthly goals, so that you know what you want to share. Preferably you do this on the first of the month. What this looks like is you use the monthly calendar (step #1 above) and gather your content for the month around it. Pull from your blog posts and your resource lists from Feedly and Pinterest.
What this looks like:
You use the monthly calendar (step #1 above) and gather your content for the month around it. Pull from your blog posts and your resource lists from Feedly and Pinterest.
Then on Sundays, schedule your content for the week and create the images you need. This will include blog post images and other social media images, such as quick tips and inspirational quotes.
Here’s what I create for each post (now this is the 3rd time I’m saying this haha)
- 2 pins (for A/B testing)
- 2-3 Instagram images with links to my posts, or inspirational quotes
- an image for Facebook and Twitter
- a video of my post
- a quick tip image for Facebook and Twitter
Let’s wrap this baby up!
Here are some final thoughts:
- Consistency is key to getting results on social media. Show up each day, and you will grow your following and your business. No doubt.
- Create a social media marketing plan each month for what you want to achieve on social media. Social media can really suck you in, so I recommend doing what you need to do each day and that’s it. That means you comment, like, moderate inside each platform, but do all your other work outside of them.
- When you’re starting out, share other people’s content first, then focus on original content. This way you’ll build your following as you rev up your own content machine.
- Use the tools mentioned above (BoardBooster, Tailwind, Buffer, etc.) to schedule your content.
- Share content on each platform to start, then focus on growing one site. I recommend digging into Pinterest first because that’s where you’re going to get the bulk of your traffic. When those are bringing you great results and you feel comfortable, move on to another platform.
- Test and check analytics to see what posting schedule works best for your audience.
- Always include an image with your posts, unless you’re asking an engaging question. People are very visual, and this will help your posts stand out and be seen!

I would love to hear how you made out with this. What does your social media strategy look like?
Having fun with the Blog Profit Plan series? Let’s keep it going:
Part #4: Affiliate Marketing for Beginners: How To Start Making Money With Your Blog


As a new blogger, this is such an informative post! I am going to have to read through it a few times as I make plans for my blog. There is so much useful information. Thank you!
These are all great tips! I can’t wait to get a subscription to do my pins. Still researching which one I like the most. Thanks for sharing all the great information on timing social media! I am getting better at this everyday! Consistency really is key.
Super detailed post, i am definitely bookmarking for continued reference!
This was Jam Packed with resources. that is awesome. I guess i just need to focus more on certain areas. with my blog its a little harder to plan ahead because I talk about movies and I don’t often get too much time ahead to get to posting about them. my parenting side maybe but so far I don’t feel like these two fit together anywhere. I love them both! maybe I should choose one?
Hi Kristina! It’s a good idea to narrow your focus to one topic, and then see how you can incorporate the other as a subtopic. If you were to go with the parenting site, for instance, it’s possible that you can find creative ways to weave in kid’s movies, favorite characters, etc. Of course, it’s also a matter of how much time you have to blog about both!
This post might help with narrowing your focus: https://conversionminded.com/blog-niche-and-focus/
Great info and very interesting things to look into more. Thanks!
-Dee
Thanks for your comment, Dee!
Oh thanks for mentioning Tailwind! I’m going to try it out and have you tried UNUM? If so, whats the difference between UNUM and Planoly?
Hi Brenea! Oooh UNUM’s a new one for me! I just downloaded it and it’s very easy to use, with even a similar design to Planoly. Love that it’s free! The only thing I wish it had was a desktop version (looks like this is an app only) which means that it’s tied to the images on your phone. The reason I prefer Planoly is because I use Photoshop to design my images and need a tool that allows uploading from the computer. You may want to look into Later, which is similar to Planoly, and offers a free subscription: https://later.com/.
Great Post! I just started my blog (for predental and dental students) yesterday and I have already used Canva so much. As others have mentioned I will be reading this a few times through and saving it for reference. You are great! Thanks again!
Glad it’s helpful, Andrea! Best of luck with your blog (sounds interesting)…
A valuable blog indeed. Thanks for writing such wonderful posts.
You’re so welcome!
I can’t wait to go back and read the first 2 parts! I found this part first so informative that I couldn’t stop to go back (until I was finished)! I wonder if you learned this all on your own or if you took a class? You sound like you ‘get’ it all!
Thanks so much, Theresa! I’m glad the posts are helpful. I’m pretty much self-taught all the way 🙂
Hey Sandra, you mentioned you wished there was a better way to promote new posts in SmarterQueue. Here’s what I do. I created a category called “New posts” and have that scheduled once or twice a day. Then I add my each of my tweets as one-time posts in that category. I also add the tweets to my regular categories, which automatically re-post. So, new posts get pushed out daily for the first week + they go into the regular rotation. I hope this helps and I’m loving your blog!
Hi Tonia, thanks so much for your tip! I actually have the New post category too, but am keeping my fingers crossed that there will be an easier way at some point 🙂
Awesome information. Thanks for the sharing this. I’ve been blogging for about two weeks and have some of the social media involvement down, but need to download Tailwind etc. It’s good to know specific times to post on the various social media sites as well. I appreciate the knowledge.
Hey Liz, I see the best engagement on Pinterest during the weekdays and on Twitter between 1-3am. Completely the exact opposite of what I expected. Checking analytics on each platform is definitely key to knowing when your audience are active. I’m glad you found the post helpful!
Amazing information. Many post about building traffic but none with this much information without a hefty price tag. I started my blog last year and it has not gone well for me so far. So much so I stopped writing for a bit because I felt overwhelmed by all the efforts and still no traffic. I’ve invested money in a few courses that are pretty redundant with little information. Some key steps missing. I feel motivated after reading your post, and thank you about the bit on sharing other people’s posts. It makes so much sense but I used to think that was a no-no. I heard about tailwind and boardbooster before but didn’t know how they worked or why I needed them. Thanks again!
You’re so welcome, Zoe. I’m glad you found the post helpful. You have an amazing blog and you should definitely hang in there. There are so many who can benefit from your DIY builder projects!! Also, Pinterest, YouTube, and probably Instagram would be great channels for you.
I’ve struggled for a while with planning social content; this has really helped. I think I need a more structured approach to content; I tend to either share personal stories or blog links I need a better mix of social content x
Hi Maria, I find that the more strategic I am with content, the better results I get from social media. You have to start with your end goal in mind, then break it down into smaller content goals, and work backward from there 🙂
Mindblowing post dear, Awesome information, I am already subscribed your blog
Thank you!
Very well explained. Amazing and informative post. A social media marketing strategy provides the best way to promote your business and achieve your goals.
This was by far the best “how-to” blog I’ve read. It’s super helpful and filled with such practical tips and tools I can implement right away. I printed your social media cheat sheet and content calendar, which is on my wall right now. I’m going to pin this, print this, and refer to it over and over again. Thank you!
Amazing and informative post.Thanks!
A great post, I’ve pinned to refer back to.
Awesome!
This is such a comprehensive post, thank you for breaking it down and going into such detail. Clearly, I need to elevate my social media presence and adopt some of these techniques. If someone doesn’t want to buy all the tools you mentioned here, is there one that you think has the beat roi?
Hey Rebecca! It really depends on the social media platform you’re focusing on. I’d go with SmarterQueue off the top of my head. It has loads of features (for both original and user-generated content), integrates with most platforms, and is very affordable.
This is a great in-depth post. Will definitely circle back to this for tips.
Thanks, John!
I have not started automation as of yet but by reading this post, i see that it could save me lot of time. Thanks for sharing.
You’re so welcome!
Great post jammed with content! I am going to look into some of the tools you suggested thanks!
You’re so welcome, Alisa!
This is such a great and informative post! Very helpful. Something I’m a little confused about is pinning. (As a new blogger here) when you pin your content, what does it mean to “repin” your content? Would u repin the same image to your own board? Or would you have to create a new image for your post and pin that?
Thanks again for your helpful info!
Great question, Urwah! Repinning is just another way of saying re-sharing the same pin from one board to another board. Let’s say you share a pin to Board A. You can go back and select that pin you just shared from Board A and “repin” it to Board B. Hope that helps!
You’re so welcome, Shellie. Glad it was helpful.
Clearly, I need to increase my presence in social networks and adopt some of these technologies. If someone does not want to buy all the tools mentioned here, is there any thought that has a real pace?
If you’re asking about free tools, Recurpost and Google Calendar are great options.
A different approach to building a social media strategy. Love it!
This is such an insightful piece, especially for a beginner blogger! As I develop preparations for my blog, I will need to read it several times. There is a wealth of knowledge available.
I’m grateful.