7 Things Every Blogger Should Do After You Hit Publish
 Hi friends! I don’t know about you, but for the past few weeks all I can think about is how to get more traffic to my blog. I mean, I want it so bad I can’t even see straight!
Does that happen to you too?
You wake up dreaming about traffic, go to sleep thinking about it, and are literally consumed by it during the day? Maybe it’s my OCD, but there’s something about the thought of traffic pouring into my site that makes me feel all warm and snuggly inside.
Today, I want to talk about more ways to get the traffic we’ve been dreaming about. In this post, I’m sharing a short blog checklist of things you should do as soon as your posts go live so that your amazing content is found by as many people as possible.
Before we dive in, I’ve already covered some things to do before you publish (14 to be exact!), so be sure to read that post too.
Now let’s get into some things you should do after you publish.
You may notice that one of the steps (#4 below) is included in both the Before and After Checklist. If you’re curious, it’s because this step is something you want to do both before and after you publish. And if that sounds confusing, don’t worry, it’ll all be crystal clear in a few minutes!
I’m forcing myself to keep this list short, partly because my brain’s a bit woozy today, but mostly because I really want you to have a checklist for a blog that includes simple, actionable steps to take right after your post goes live. I figure if you can count the steps on your fingers, they’ll be easy to remember. Plus, I’m committed to writing a blog post a week (how about you?), so looks like we have to jump in and do this. 🙂
And if you really want a deep dive on this topic, be sure to read this post where I show you over 32 ways to get free traffic to your blog.
Ready? Let’s dive in.
Blog Checklist: 7 Things to Do Right After You Publish Your Post
Step 1: Create a second pin
You might be thinking Do I really need to do this? It took me forever to publish my post with just one pin… Isn’t that enough? There’s no way I have time to create another one!
I’m with you. This is one of those things that is a biggie though, which is why it’s step #1 on our blog to-do list. Trust me, having two pins will make a huge difference in your traffic. I know this for sure because I tested two different pins and one of them was a complete dud, while the other one is my top performing pin of all time! If you’re curious, you can read my case study for that test here.
#MORALOFTHESTORY Don’t get left with a dud pin! Make sure you have a second pin so you can compare. Once you get into the habit of creating two pins for every post, it’ll go much faster and you won’t even think about it. Promise.
How different should your pins be? Great question! I recommend creating one short one and one longer one that highlights points from your post. My longer-form pins almost always get more traffic (and sign-ups) than the shorter ones. But you still need the shorter one for your blog post, so that readers don’t have to scroll too far to read your epic post.
Easier if I just show you, right? Here are two pins I created for my last post:
Wanna know how I hide that second longer pin so it doesn’t appear on my post? I picked up a ninja coding tip from Sarah at xosarah.com. Here’s how to hide images on your posts:
- In WordPress, use the text editor and locate your pin image
- Once you find it, put this code around it: <div style=”display:none;”><img src=”your image here” /></div>
- Make sure the first <div> is before <img and the last </div> is right after the />
Now both pins will show up when you save your pin to Pinterest, but the longer one will be hidden on your actual post. Cool stuff, no?
Step 2: Socialize it!
After you create your second pin, it’s time to get social with it. Don’t be shy here! Make sure you share your work everywhere so people can find it.
As soon as the post goes live, I share it a few times the first week like this:
- The first day
- A few hours later (for Twitter)
- The next day
- A week later
- Then into SmarterQueue, where it cycles through every month or so.
I’ve already covered how often to share your posts here, so if you’re still feeling your way around a social media strategy, you definitely want give it a read.
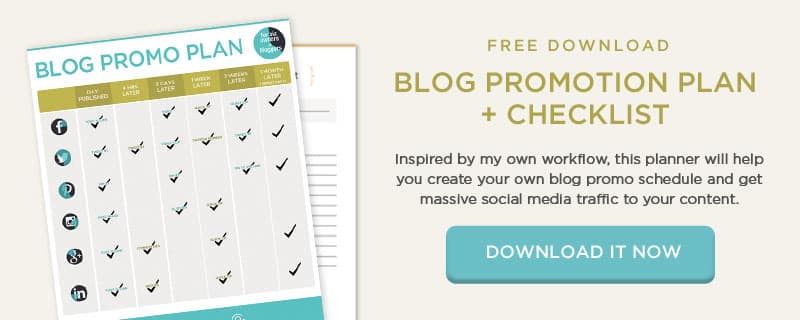
One thing that I haven’t covered clearly, I think, is how to create a time-saving blog promo system, so that every time you publish a post you know exactly what to do with it (almost like a daily blog checklist for social media).
Let me take a quick stab at it now and break it down into 2 parts:
- Part 1: Scheduling Tools
- Part 2: Manual Sharing
First up, Part 1 (Scheduling Tools)
Your bangin’ system starts with going into your scheduling tools and setting up your posting schedule. Whether you use Buffer, Hootsuite, Edgar, Tailwind, or other is really up to you. You just want to make sure you do that first. This way whenever you add a new post to your queue, you know when and where it’s being shared.
Next, Part 2 (Manual Sharing)
You need a way to track where and when you manually shared each post. All that really means is When did you add it to Hootsuite? When did you share it to Pinterest? What about Tailwind? You get the gist here. You want a system where you can say done, done and done, so you know your post is out there in the socialsphere. This part actually took me a while to figure out! I would lose track of where I shared my posts, and then a week would go by and I’d think Wait a minute, did I schedule to Buffer?
After some trial and error, I came up with this simple tracking spreadsheet:
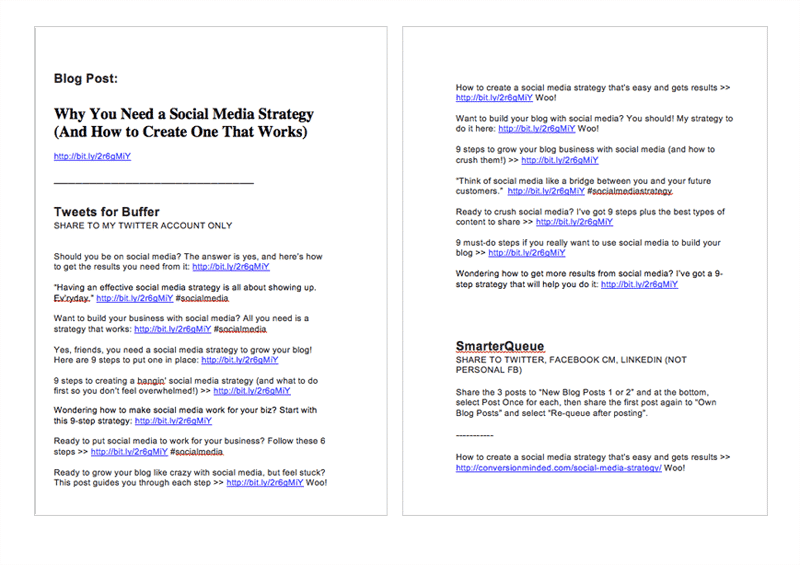
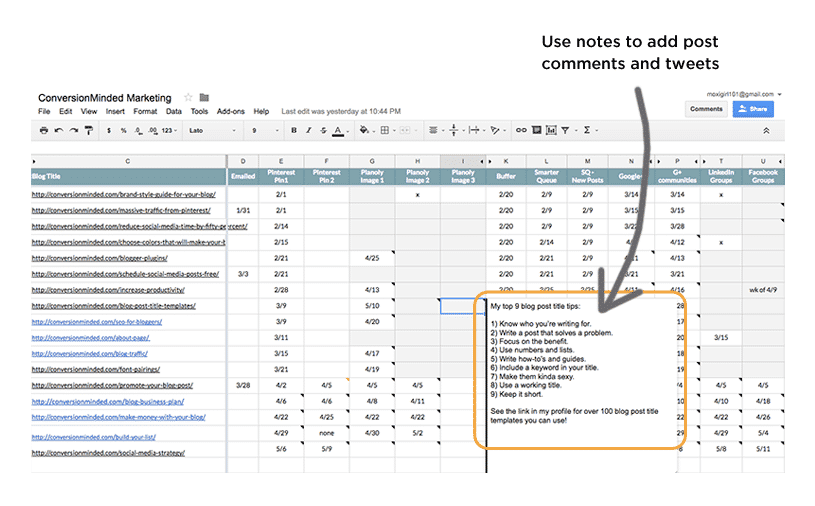 See those notes there? That’s where I add my post text, so all I have to do is paste it into my tweet/comment/description, etc. Now for Twitter, I create 15-20 tweets to go out the first week. They all have to be slightly different, so I write them out ahead of time in a simple doc, like this:
Now you may be thinking I know I need scheduling tools, but I’m on a tight budget and really don’t want to pay monthly. I’ve got you covered! You will love this free way to automate and loop your posts using IFTTT and Google Calendar. I’ve tested it and still use it in my other business for Facebook and Twitter. Be sure to watch the video tutorial where I walk you through how to set it up.
Step 3: Share with groups and communities
Almost halfway through our blog checklist. In step #2, we shared to our social media profiles, pages, and scheduling tools. Now it’s time to share your post to groups and communities!
Here’s the thing: you need to take a more personal approach when it comes to sharing posts in groups. Don’t just spam your groups and disappear (especially with Facebook). Get in there and talk to people! Make sure you participate in the weekly promo threads too. It only takes about 15 minutes a day to go through your groups, share your post, like and share posts from other members, and you’re done.
How do you track of all your groups? I’m glad you asked! Here’s a separate spreadsheet I use for Facebook groups:
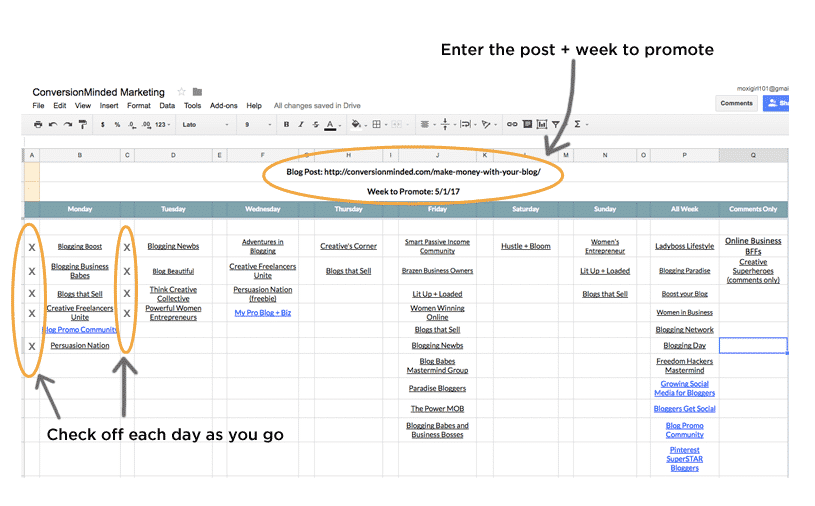 Each group name on here is a direct link to the group’s page, so it’s super fast and easy!
Step 4: Make it SEO-mazing!
Remember the step that gets repeated in both the before and after checklists? Here it is!
We’ve already used Yoast SEO to target a keyword and write an SEO-friendly blog post before we published, so we should be all good.
Hmmm, or are we?
I highly recommend giving your post another look-see. The reason is that I’ve searched Google for my keyword months after publishing a post, and believe me when I say it was out there in the blogosphere. I’m talking waaa-yy out, like nowhere to be found. My keyword has zero competition and I’m on page 14? Nope, that’s not going to work.
What’s happening here? Why was my post so far down in rankings?
Well, first off, I thought I was using a long-tail keyword but it turns out it was too broad and so, highly competitive. I needed to go back into Yoast and narrow down my keyword so I could give my post a chance to get up there on page #1.
See where I’m going with this? This same thing may happen to you. You might think you’re all set with your keyword, but in reality it needs tweaking (maybe there’s even an easier keyword to target).
This is perfectly ok. Nobody becomes an SEO wizard overnight. It will take some time to get it right and you’ll be learning as you go, k? That’s why I want you to check your keyword twice, once before and once after you publish. Heck, maybe even twice after.
[clickToTweet tweet=”How to #SEO your blog posts: Make sure your keyword is in the title, post, images, and headings.” quote=”How to #SEO your blog posts: Make sure your keyword is in the title, post, images, and headings.”]
You might be thinking, no way…I can’t even get my head around SEO. Now you want me to do it 2 times?
I get it! This is one of those things that once you get it right, it will pay you back double in your investment. Google is going to be an employee for your blog, working hard to bring you leads and customers. I call that worth it!
So right after you hit publish, go back and give your post another once over. Take a look at your keyword, go back to Keyword Planner if you need, check your title, double- and triple-check keywords in your post, your image tags, headings, and so on.
If you want, you can grab the Blog Post SEO Checklist I created to help you boost your posts up to page #1. Click the image below to download.

Related: The Ultimate Guide to SEO for Bloggers and Entrepreneurs
Step 5: Repurpose it!
Repurposing your post is a fancy pants way of saying that you turn it into another type of content, like a podcast or video. I like to think of it as repacking one piece of content and making it unique for a new platform and audience.
The reason repurposing is on the blog checklist is that it gives you a chance to reach a broader audience. Anytime you can expose your content to more people, that’s the way to go! It also takes some pressure off when you feel like you just can’t come up with another blog post idea.
This looks like: You write a post and pin to Pinterest, then you record a quick tip video and post it on Facebook and YouTube the next day. 10 people repin your post, 4 people share your video on Facebook, and 7 people share it on YouTube.
See how your reach is snowballing? Are you getting a sense of the greater impact you can have on your audience this way? From one post, you now have 2 different types of content to share on at least 3 different platforms. You can actually share that same video to Instagram and Pinterest too. Woo! That’s what I call smart content…
But wait, there’s more. Your new content will also help you rank higher on Google because you’ll have different content linking back to it.
Have I convinced you yet? Let’s look at some types of content you can create:
- A video
- A podcast
- Infographic – if you followed step #1 you already have this
- Slideshow
- Quick tip graphic
- Webinar or hangout
- Create a challenge
- A twitter chat – build off of your post idea
- Turn it into an email series (this is great for popular posts)
- Create a free offer (help build your email list)
- Publish it on Medium or LinkedIn (more like reblogging, but still good)
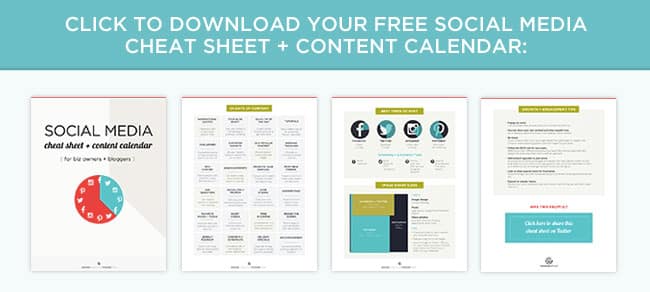
Bonus: Grab the Social Media Cheat Sheet and Content Calendar so you know what to share and when, plus the best tools to use for each platform.
Don’t overdo it
Okay, so now you know this is something you should be doing, but hold up a sec. Not every post is a good candidate for repurposing. You can overdo it here, especially if you’re reaching the same audience with the same thing over and over again. We don’t want to burn people out. Let’s throw some randomness into the mix so our content doesn’t become formulaic and blah.
So for every content piece, ask yourself How can I present this in a different way so that people don’t see the same thing in the same way? What can I do to extend on this idea?
And remember, it’s okay to be choosy with what you repurpose. You want to be sure that whatever you create, you create it well. You don’t want to hurt your brand.
You probably have some more questions about repurposing, so let me give you some guidance here:
Which posts should be repurposed?
Great question! Popular posts are a good place to start. You know that people love them so it makes sense to reach a broader audience. Another thing to do is go back and look at older posts that you can turn into something else today, kind of bring it back to life in a new way.
When should I share my new content?
You don’t have to share your new content all at once. In fact, why not spread it out? Let people breathe and explore other ideas until they’re ready to come back to it. Maybe you share a slide deck next week, then a video at the end of the month, then an infographic the next month. The more different types of content you have for each post, the more creative you can get with what and where you share. Make sense?
Oh, and I highly recommend investing in some tools to create amazing visual content. This makes such a huge difference, and when you think about it, we’re all becoming publishers these days, so the better your images are, the more traffic you’re gonna get. Pinky swear. It makes a huge difference.
Should I include a link back to my post?
Absolutely! Now you’re thinkin’. You can actually link between all your repurposed content, and this works like SEO fairy dust. The more links you have back to your post, the better your post will rank on Google. How’s that for making our traffic dreams come true! Gotta love it!
What linking looks like: In YouTube you link back to our post, in your podcast you link back to it, and even in your slideshow you link back to it.
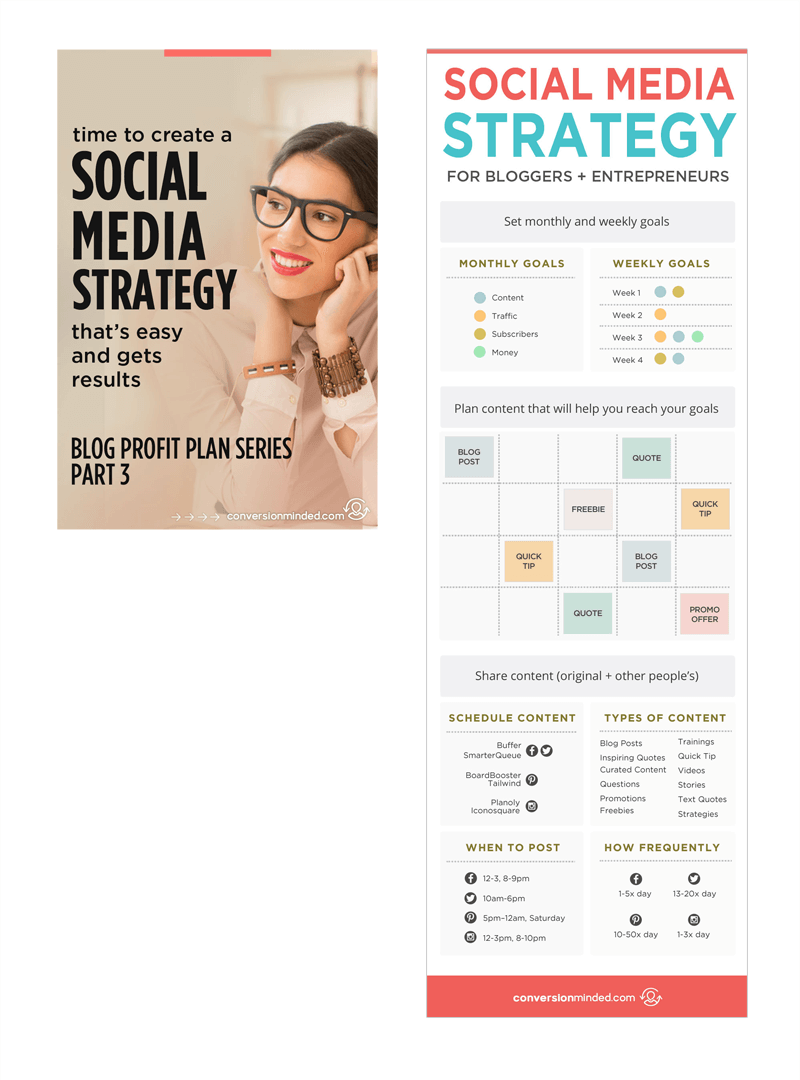
By now you can see how creating multiple pieces of content for your ideas starts to give you a library of things to share, which is something I cover (and tons more!) in this social media strategy post.
Related: How to Promote Your Blog Posts Effectively on Social Media
Step 6: Reply to comments
It’s important to engage with people who read your blog posts. Watch how people respond to a post and make sure you reply to their comments. Let them know that you’re paying attention to them and that you value them.
When people feel like you really want to know their opinion (which of course you do!) it makes them feel like they are important, and of course, they are. Comments mean that people liked your post enough to invest their time in leaving a comment. That takes effort, friends! Try to deepen and expand on what they’re saying, maybe ask them for a question or for an example. Who knows? Maybe they’ll leave you a second comment.
The other thing you can do is to provide more info in your replies. Or, you can add a poll to your post, which will give you a perfect excuse to re-share it on social media. I’m thinking something like I’ve added a poll and would love your opinion! You can even highlight conversations and share them. So if you love Mary’s comment, for example, share it! This way you highlight the community and show that you value these types of conversations.
Step 7: Extend it with future posts
Great blogs take their readers on a journey, which is a fun way to build momentum with your blog post . Once your post goes live, ask yourself if there’s anything you can do with what you’ve just written to extend or follow up with on the idea.
Even if you’re going off-topic a bit, as long as you have a relevant blog post, you can write about it. Your reader comments may contain questions (step #6 above). Can you turn those into a post? Psst… This is a quick and easy way to come up with new blog ideas when you get writer’s block!
Sometimes, one post naturally triggers another post. Maybe your post triggers a question that you don’t know the answer to. You can write a new post to answer it. Or, you can follow up with a new juicy nugget you’ve learned since writing the blog post.
Here again, check your analytics to see which of your posts are most popular. Similar to repurposing in step #5, brainstorm how you can extend on a popular post. There’s something in it that resonated with people, so you have a golden opportunity to extend on it, deepen it, and even mimic the style of that post.
Step 8: Fooled ya, one last step!
Now I know you may be thinking How do I remember to do all this? It’s all I can do to stay on schedule with writing and publishing my posts!
Once you put a system in place it will be a natural part of your blogging process. You’re not even going to have to think about it. Promise.
All you need to do is set up a blog post checklist (in Google Docs, Excel, or Word) with prompts to help you do these 7 things. And don’t worry. You may not get to all of these steps the minute your post goes live. That’s perfectly okay and nothing to stress about. The best way to approach this is to master one step at a time.
So at first, you might get into the habit of creating a second pin and socializing your posts. That’s a lot right there, no? Soon you’ll see how just focusing on steps #1 and #2 will help you get monster traffic and exposure for your blog. Anything that brings you more traffic is time well spent, in my book! So right there, you’re already increasing your reach and your traffic with those two steps.
Once you’re comfortable, move on to step #3, and so on.
The other thing to do is to keep your blog checklist handy, so that every time you publish a new post, you can just reach for it. I find that when I have those questions right in front of me, even if I don’t get to it right away it’s making me think about it while I’m doing other things. Keeping your list front and center will naturally trigger some of these steps, so you’ll be doing them without even realizing it!
If you missed the first part of this series, the things to do BEFORE you publish your post, you can download that checklist below so you have it on hand for your next post.




I kinda know how you felt about getting more Traffic. That’s me as well.
From being part of the many FB groups, I have now started to share everywhere. I’ve gained good social media habits/routines. ALL THE BEST TO YOUR TRAFFIC!!
That’s great to hear, Bryce. Best of luck with your traffic! More, more, more 🙂
These are really great tips. I’m probably doing 75% of them. I’m going to start doing all now. You mentioned some things that I never even consider, like making a second pin. Thanks for sharing.
These are great tips! I’ve been trying to figure out how to do the hidden pins for FOREVER. Your awesome ! Subscribing to your email list now : ) Thanks so much
I know! I was hunting around forever on that too. Glad it helped!
This is all great advice. I already do some of the things listed, but should definitely do all of what is listed.
Hi Jessica, thanks for you comment! It took me a while to do all of the steps in there, but now it’s just habit and so much faster. If you add just one a step/week, before you know it you’ll be doing all of them automatically!
I definitely need to work on this! Definitely going to pin this for later!
Yay! It will make such a difference in your traffic!
Hi Sandra,
What an informative share.
Though i have been in the blogging field for quite some time I never new about many of the things you shared in this post, I have been using wp since almost three years many things yet to know like the alt image, featured image etc. thanks for explaining it well with the screenshots. I am book marking this for my further study.
Thanks a lot
Keep sharing.
May you have a great time of sharing ahead,
Best
~ Philip
Thanks for your comment, Philip! I’m glad the post was helpful.
Hi Sandra, great tips! I would also suggest leveraging DrumUp https://drumup.io/ . Curation, management, scheduling, suggestions – it features it all and so much more!
Thanks for the tip! Can’t wait to check it out…
Wow, you shared a lot of info here! I’m just recovering from surgery and reading this from Pinterest on my phone but I made myself a note that this is the FIRST thing I need to look at when I get back to my desk on a Monday. Thanks so much for such awesome, detailed information.
You’re so welcome, Rose. I hope you have a speedy recovery 🙂
So much information in this post. I just started my blog and have been researching on how to increase my traffic. I am happy I can across this post.
Awesome checklist! I actually do this for all of my blog posts, it’s really helpful if you’re trying to optimize content and draw more eyes to your site! Sharing on social and repurposing content to share with your audience is also incredibly important to cultivate that following and increase engagement.
Thank you for your informative blog posts. I am part way through your freebie course on starting a blog and have found it very useful.
You’re so welcome, Natalie. Glad you’re enjoying the course.