How to Create a Social Media Content Calendar (Tutorial & Template)
Last Updated: October 3, 2023
Having a hard time figuring out what to post on social media? Do you want a template to organize and plan your content so that you always have something to share?
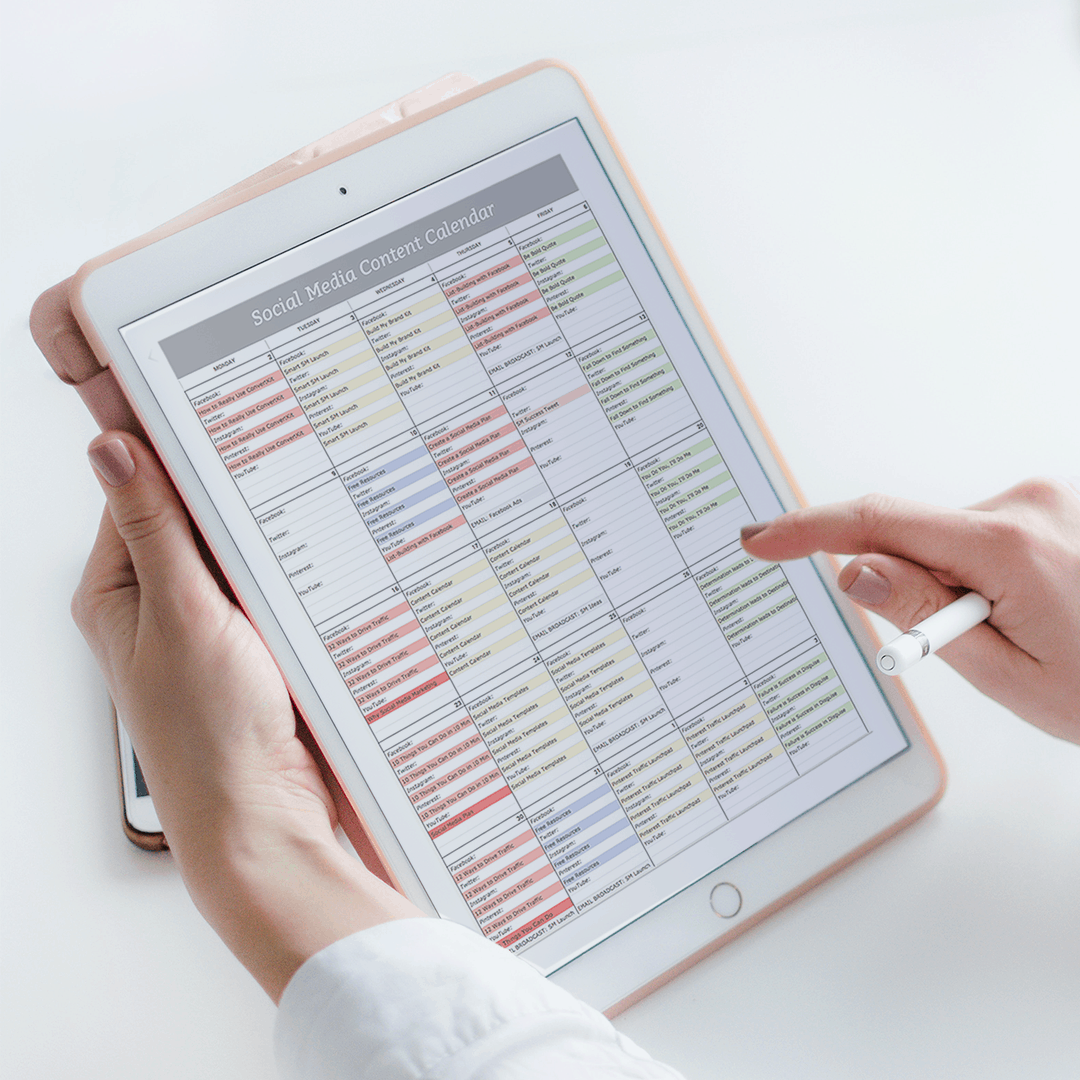
I’m with you. It’s hard to stay ahead of social media! One thing’s for sure: a social media content calendar template will help you stay on track, post consistently, and keep track of important events and promotions you want to share.
Today, I’m sharing how to create and use a calendar with Google Sheets, with a free content calendar template you can start using right away.
Let’s dig in!
#1: Create Monthly Goals
It’s important to have an end goal for all content you share so that you can track what’s working, which types of content drive your bottom line, and what to change based on campaign performance.
For most of us, our goals fall into the category of generating more leads and sales. Working backward from these long-term goals, we can create short-term goals that will help us achieve them.
The key with short-term goals is to start small, be specific, and set a realistic time frame to achieve each goal. At the end of each month, you want to be able to track your growth, see what worked, and set new goals for the future.
We’re filling up each of these goal buckets:
- Content
- Followers (new!)
- Traffic
- Subscribers
- Sales
#2: Determine what you will share
The purpose of a social media content calendar is to provide a framework for sharing content that resonates with your audience and also sells your business. Before creating your calendar, be sure to plan content around specific campaigns and goals.
First, determine the types of content that make sense for your business and audience. The following categories are most commonly shared by small businesses:
- Evergreen content – blog posts, freebies, user-generated content, case studies, educational tips
- Inspire content – quotes, mantras, and motivational stories
- Convert content – information about your product / services and promotions, events and announcements, free trials
- Ask content – engaging questions and polls
- Connect content – personal stories, lessons learned, behind the scenes
- Holidays
Once you’ve chosen your categories, create a separate spreadsheet to use as a working library for the original content, products, events, and promotions you plan to share. It’s helpful to color-code each content type so that you can easily differentiate them on the calendar.
Make sure you include publishing dates, post descriptions, URLs, images, action items, campaigns, and any other details needed for your workflow. If you have weekly or monthly content themes, add a column to the left of the spreadsheet, and include your theme.
#COLORTIP Use the same color codes for each category in your scheduling tool! Color coding makes it super easy to spot your categories across multiple tools and spreadsheets.
Plan your content on or before the first of each month. Throughout the week, you can fill in by creating content, designing images, manually sharing posts, and adding them to your scheduling tools.
Bonus: If you want, you can use this social media cheat sheet with over 24 days of content ideas. Click the image below to download.
#3: Next Up, Create the Calendar
Here’s where the fun starts! Log in to Google Drive to create a new spreadsheet.
Create a sheet by selecting the New tab, and then click the title to rename it. Now it’s time to customize the spreadsheet and create your calendar template.
Since we’ll be working with seven columns, select columns A–G and drag them to the right until they fill the screen. Then delete columns H–Z.
Next, highlight the cells in the first row, and select Format from the top menu to merge the cells (Merge Cells > Merge All). Customize the font style, and center the text.
In the next row, enter the days of the week, beginning with Sunday. If you’d like, you can freeze these two rows so that they remain in view at all times by highlighting them and selecting View > Freeze > Top Two Rows.
In the next row, enter calendar dates, and then select the top three rows and add a bottom border using the border tool from the top menu.
Next, add your social media profiles to each date, leaving one or two rows between each profile to accommodate your posting frequency. Then select each column, and add a right border to each.
Leave a few extra rows, and add a bottom border to the last row in week one. Then copy week one, change the dates, and complete the calendar template.
Don’t forget to download the done-for-you content calendar template so you can start using it right away. It’s a huge time-saver!#4: Add content to the calendar
Now it’s time to choose the specific days that you will share each piece of content. Using the same color blocks, add the content from your working library.
Customize the calendar to suit your posting frequency. For instance, you may want to include specific times you plan to share each post or add email and other distribution channels. I like to use the additional rows each day to highlight important events and promotion dates.
If you publish a large volume of content each month, you may even want to create separate calendars for each social media profile.
I regularly share the same content on each profile and find it helpful to use a simple color-blocked version of my calendar so that I can quickly see what content I plan to share each day.
#5: Create the Content
Now that your calendar is complete, it’s time to research, gather your content, create blog posts, and design images. If you find yourself struggling to find the time to execute on your social media plan and create the content you need, the tools below will help.
Canva
Canva is a graphic design platform that makes it easy for non designers to create beautiful images. It’s the fastest image creation tool I’ve used to create high-quality social media images.
For more on designing social media graphics, be sure to check out our post 10 Social Media Design Tips
The Content Calendar System
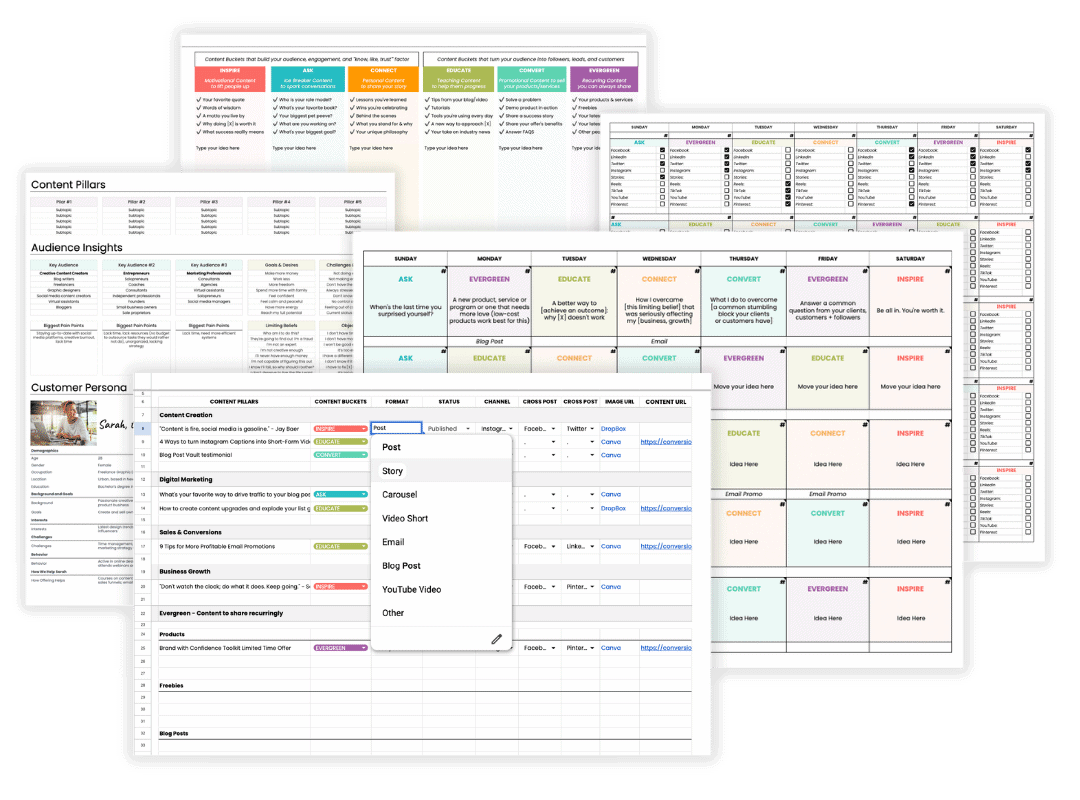
With the Content Calendar System you have a content library at your fingertips so you never get stuck on what to share. It has 730 daily prompts and 885 pre-written captions so you can relax knowing you’re always sharing a nice mix of content to fill up all the buckets you need to meet your goals.
And the cool thing is, there’s no monthly fees involved and you can use it for life and with the apps you already use (it’s available for Google Sheets, Google Calendar, and Trello).
You can learn more about it here.
Final Thoughts
Using a social media calendar will help you plan your content around smart social media goals and coordinate with campaigns and blog content to achieve them. If you use the tools mentioned here to create and share high-quality posts at the right time on each channel, you will likely see more results from social media.
Remember to monitor each channel for engagement, moderate comments, and reply to fans and followers daily. Check the analytics of each platform to see what content resonates with your audience, and use that to inform future marketing campaigns.
Over to you! Do you use a social media content calendar? What tools do you use for creating and scheduling your posts in advance?
Wow, this is awesome! I really need to get on my planning. I usually just fly by the seat of my pants. ????????????
Hi Jamie! I used to do that too but always felt like I was playing catch up. I think the more content you create, the easier it is to plan because you have more pieces working together, if that makes sense. 🙂
This is great, I really need to get started with my social media calendar!
I’m so glad it’s helpful, Melissa.
Fantastic post for someone like me who is looking for step up their blogging game. Sharing with others on Pinterest.
Thank you for your comment, Mala!
This is great, really helpful! Thank you ????
You’re so welcome, Kat.
This is a truly excellent post. I love that you offer so many tips and resources but the whole piece is written in a way that is super easy to understand.
For me, I have set days that I post content to each category of my blog, I have a fairly good idea of what the content will specifically be focused on (a very good idea for the current quarter), but I need to dig into Smarter Queuu or another. I have also been told Trello is awesome for organization so I will check that out too.
Thanks so much for your comment, Elise. SmarterQueue makes it much easier for me to follow through and ensure that I’m actually sharing the content I plan. I used to fall terribly behind and forget to post, so all of that planning went right out the window! I think you’ll love both SQ and Trello.
This is so timely, I need this in my life stat! Thank you so much Sandra.
You’re so welcome, Taughnee. Love your website. Will keep you in mind for anyone who may be in need of branding services.
Wow! These are the kind of tips I thought I wouldn’t be able to afford to get from a pro like you. Thanks for so generously sharing these tips! I need them!
Hello! Thanks for sharing! I love how you showed many ways to do this. I am an old-fashioned girl and still put everything down on paper. I like being able to see it as soon as I walk into my office.
What an absolutely brilliant post! So helpful and makes me want to start planning now! We usually just wing it with what we’re posting from day to day if we don’t actually have a blog post to publish, but this is what I’ve been looking for! I love to be organised and so this is perfect! Thank you ????
Your posts are so informative and so useful. I love that you give an honest approach to all these curated resources. Keep up the great work! 🙂
Thanks for your kind words, Shruti. I’m doing my best 🙂
Loved your post! In social media marketing content plays an important role so always write sharable content!
I can’t express enough gratitude for sharing these tips on using a social media content calendar. Your emphasis on aligning content with goals and campaigns is spot on, and the tools you’ve suggested make the process much more manageable. The reminder to stay engaged and monitor analytics is a key takeaway, and your guide has made me more confident in managing my social media strategy effectively.