Step by Step Guide to Amazon FBA for Beginners | Want to start a business from home, or just looking for side hustle tips and ideas? In this post, I’m breaking down the steps to all things Amazon FBA. Click through to learn the best ways to get started, source products, and brainstorm Amazon products ideas so you can start an online business that makes money. #makemoney #makemoneybloggingWant to know how to get started with an Amazon FBA Business?  Looking for a good Amazon FBA course?

Have I got a surprise for you guys!

Today, an amazingly talented member of my Facebook group, Paige Cole, is giving you a peak behind the curtain of her Amazon FBA course.

Amazon FBA whaa?

It stands for Fullfilled by Amazon and is an e-commerce business model for selling products on Amazon.

We’re talkin’ real, physical products. Things like cups and pens and magnetic clips and holders. Remember those? 🙂

Here’s the perk:

Instead of you warehousing and shipping out products one by one, Amazon will store your products in their fulfillment center and ship them out to customers as they order.

In a nutshell, an Amazon FBA business entails:

  • Sourcing products
  • Private labeling / branding
  • Storing products in Amazon’s fulfillment center
  • Marketing and selling

Read on for Paige’s guide on how to set this up.

This post contains affiliate links, which means I may receive a commission if you click a link and purchase something that I’ve recommended.

————————–

It’s been said that 2018 is the year of private-label products.

In fact, Digiday and CNBC both posted articles about 2018 as the breakout year for private label.

I began private labeling on Amazon last year!  So, you could say I jumped in before the craze. After experiencing my own trial and errors in launching private-label products, I’m breaking down how to get started with Amazon FBA step by step.

1. Rifle through the Amazon “Under $25” bin

The first step is to decide what to sell on Amazon.

You know that “under $25” bin some retailers have? Amazon FBA has its own version. If you enter any ‘ole search term in the Amazon search engine, you will be presented a list of products. Mozy on over to the left of the product list and you will see a list of categories and subcategories.

Let’s say Liza is an up and coming Amazon seller. She enters a search term to narrow her search.  Let’s say she is starting from scratch, though, and is selling based on niche market and opportunity.  In that case, she hits “Today’s Deals” under the search bar.

A list of items will pop up running the gamut of kitchenware to electronics. Liza clicks “Under $25 on the left hand column under “Price.” PRESTO! Now her search is limited to items that are more generic and less brand-name oriented.  She scrolls a couple of pages and finds yoga mats. There’s a lot more that goes into selecting products to sell on Amazon. You can read all about it here.

You can buy an inventory order of yoga mats, on the cheap, and give them an edge over the other Amazon yoga mats with your specialty design.

VWALLAH!  You have a private label product. But wait there’s more . . .

2. Contact a manufacturer

If you are selling a high volume of product for an affordable price, you are going to need to negotiate with an international manufacturer.  Why? International manufacturers simply offer exponentially more competitive prices for affordable goods.

Alibaba.com is the most common platform but here is a list of some additional manufacturers to check out:

You’ve heard the term “fake it til you make it?”  Even though you’re a first-timer, just express confidence and remember to come across professionally. Remember this is a business relationship we are trying to build.

3. Branding is everything

Let’s face it, you are selling something generic. The way you bring value, then, relies on how well you brand yourself and design your product. Let’s return to the example of Liza and the yoga mats for a moment. Liza is selling yoga mats. A lot of people are selling yoga mats. The way Liza can add value, is to hire a designer to create specialized graphic designs for the yoga mats or maybe choose a softer more padded slip resistant material.

If she is creating seasonal yoga mats, she might have a graphic designer add a personal touch to summer, winter, spring, and fall themes (which she can stamp or sticker onto the yoga mats along with her logo).

Fiverr is a great place to hire a freelance designer. Freeeup.com is also a hidden gem because of the level of vetting the company does. With FreeeUp, you get personalized attention throughout every step of the hiring process, and its still affordable!

4. Create an Amazon FBA  listing

An Amazon FBA listing is the last step between the product and the sale. It should deliver four high-value touchpoints:

  • Upload high-resolution product image
  • Include product specifics
  • Deliver a unique value proposition
  • Create a company page

What is a unique value proposition?

A value proposition is marketing speak for “answer these 4 questions”:

  • Why is your brand better and different than the competition?
  • Who specifically does your product target and what type of specific topics, words and phrases appeal to them?
  • Where did your company come from & how does your company’s context put you in a unique position to provide this product?
  • Why should the customer trust you to be an expert in this particular category of product (aka niche)?

You should write the answer to these four questions out in paragraph form and then use them to inform your crisp, bulleted product description and paragraph on your brand page describing your context and vision. Remember to incorporate your targeted keywords here as well!

5. Link up with Amazon

Thanks to the boom in private label business, Amazon offers Fulfilled by Amazon as a service. They’ll do everything from packaging to providing special exposure to the Amazon prime market.

FBA covers:

  • Customer delivery
  • Returns
  • Customer service

This will save you much sweat and furrowing-of-brow as some of the intricacies of the delivery process are curated for you!

6. Spread the word

There are 3 main ways to promote your products:

Amazon advertising

You can sign up for Amazon advertising here.  By integrating your advertising directly on the Amazon site—you will reap the benefits of special access to built in resources, exposure, & analytics you wouldn’t otherwise.  Also—experience shows that ranking increases with use of the Amazon advertising platform.

Email marketing

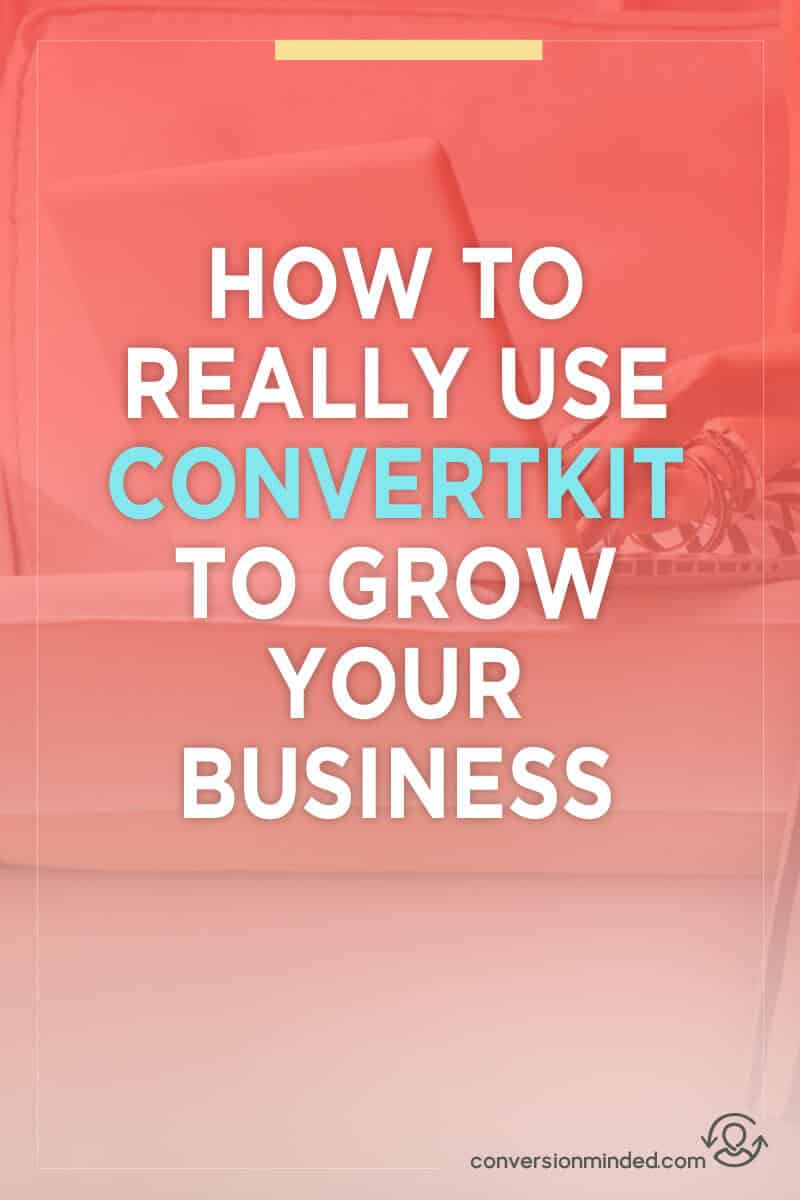
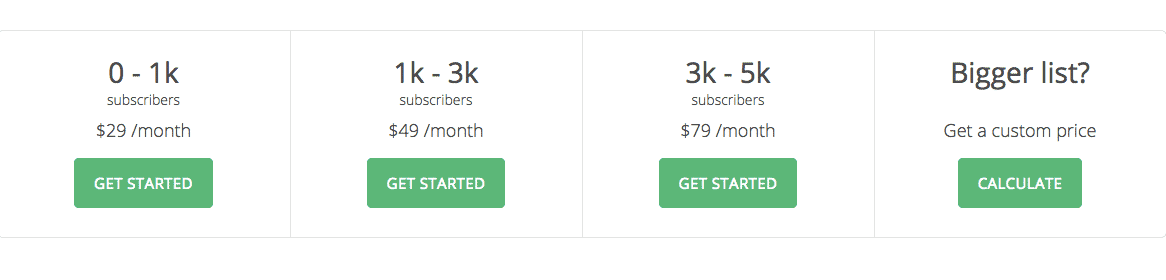
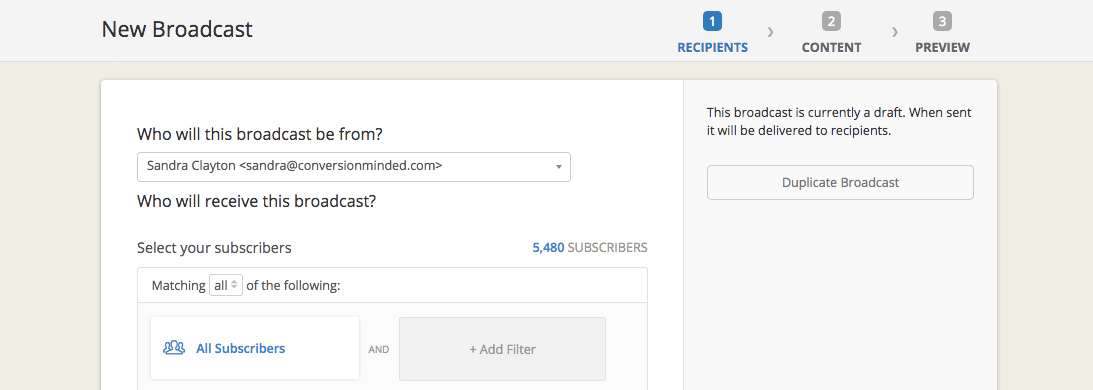
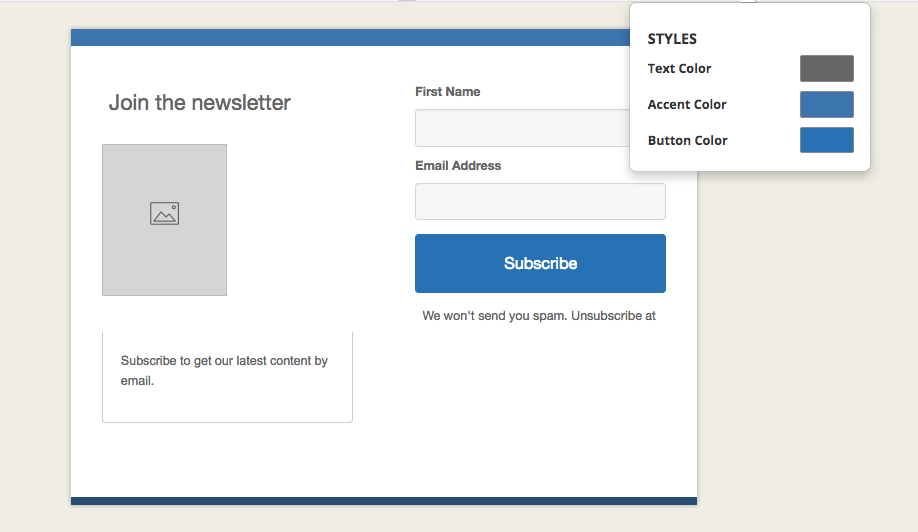
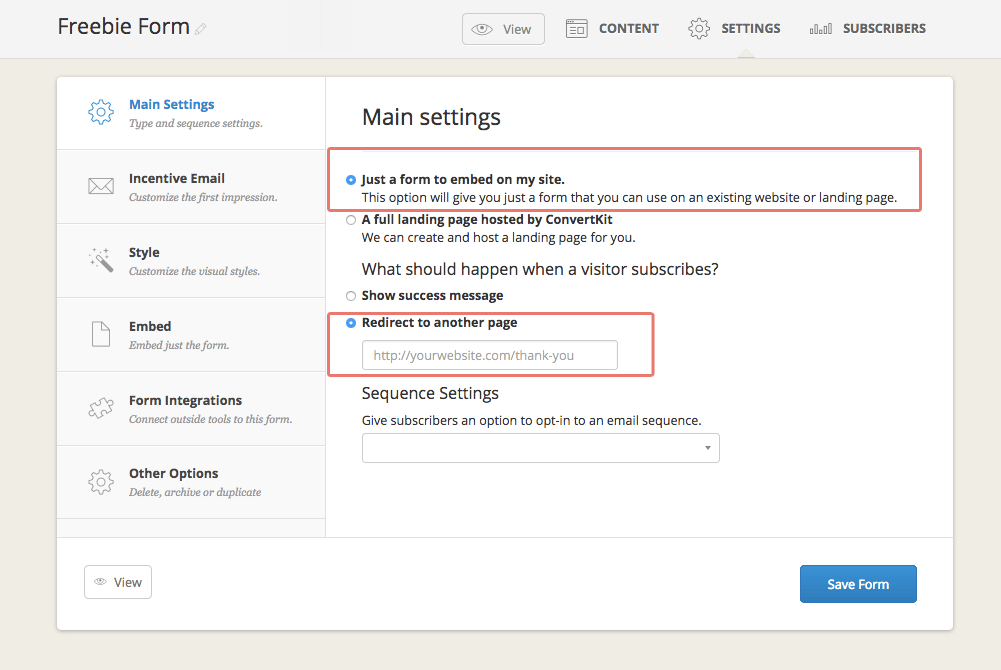
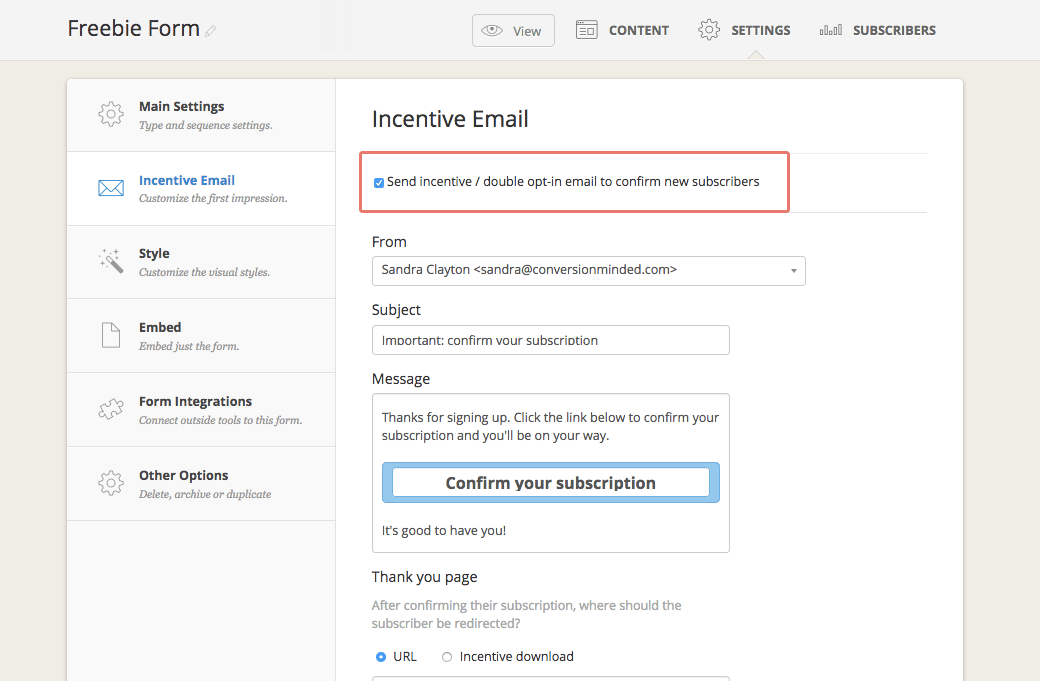
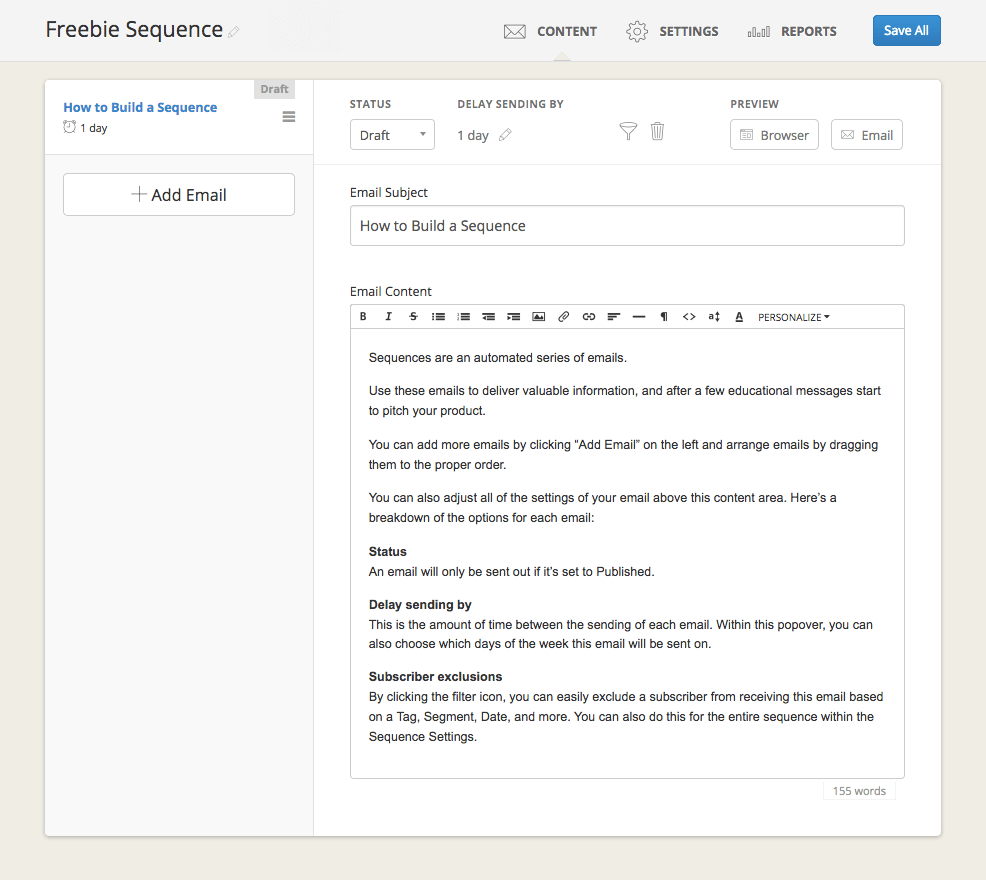
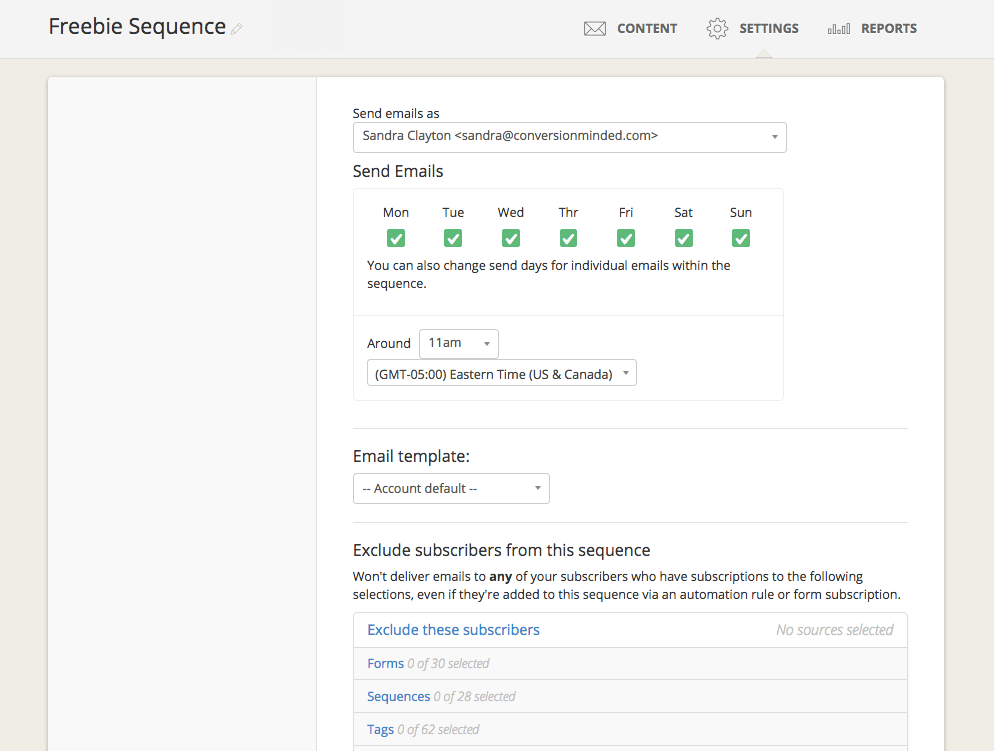
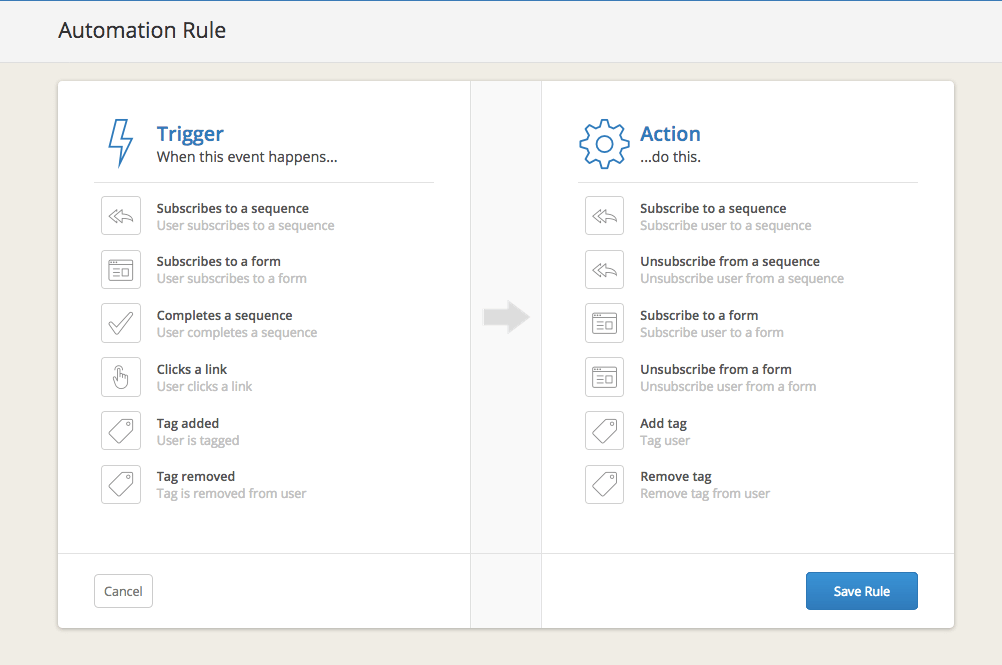
Email marketing via ConvertKit gives you higher status in the Amazon ecosystem by bringing leads from the interwebs back to Amazon!  You can send a welcome e-mail when customers sign up for your newsletter or buy a product. Then follow up with a drip campaign that shows off your expertise in your product niche! Here’s a complete tutorial on ConvertKit to help you get started.

Social media marketing

It’s free to set up an Instagram & Facebook account. Reaching out to Instagram influencers via Direct Messages and email is a great way of raising awareness for your product. And hey, add-on tools like ShopTab (only $10 a month) make a storefront with clickbacks to Amazon immediately available and visually appealing on your Facebook page.

???? Ready to start selling on Amazon? Click here to find out more about Paige’s Amazon FBA course. (affiliate link)

by

Simple productivity systems for busy bloggers to help you streamline and scale your business! It includes time management tips, goal planning ideas, goal planning tips for bloggers, business goal setting, and productivity hacks to help you get more done in less time, plus a free goal setting planner.
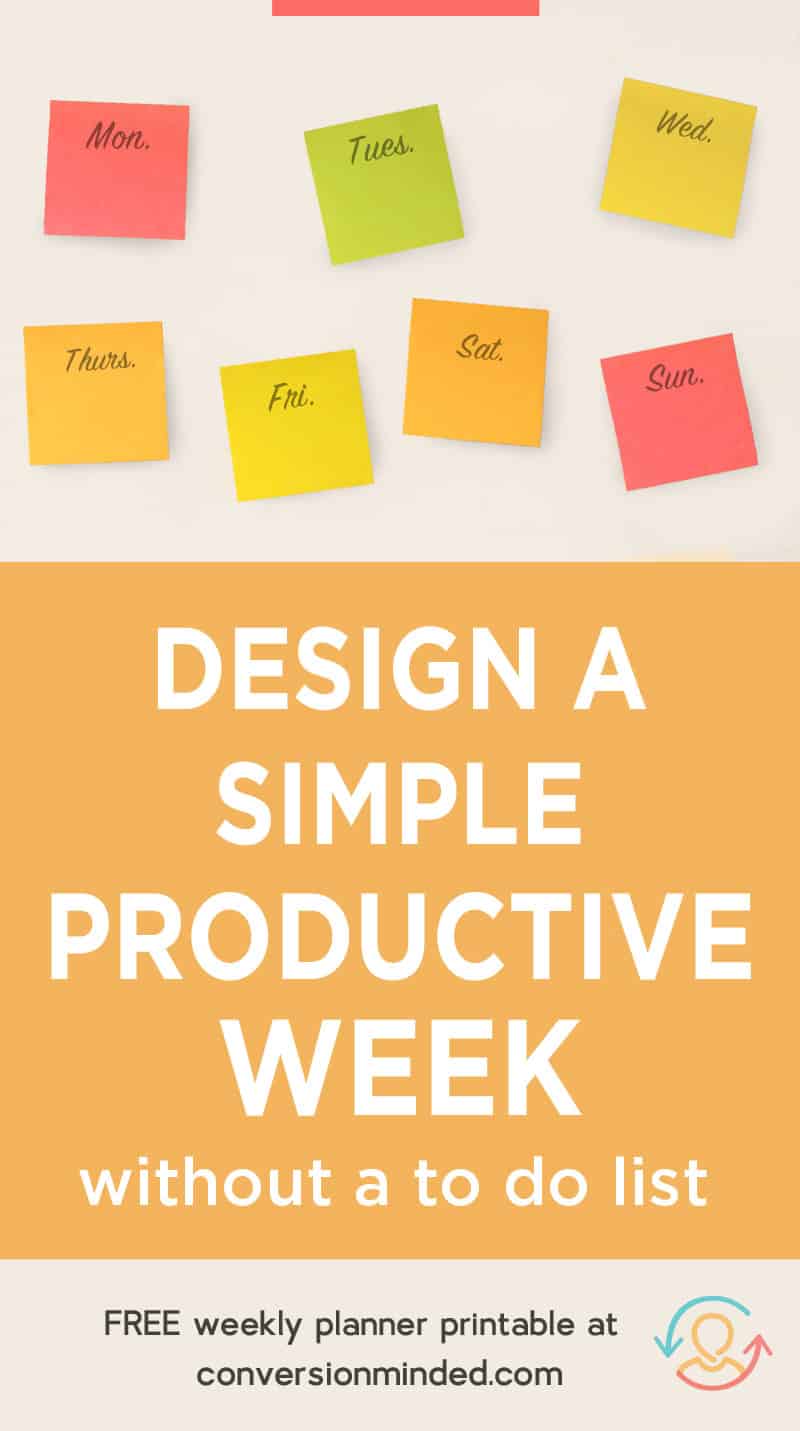
Have you tried time blocking to help with time management?

I was introduced to it a while back and let me just say, total game-changer.

Seeing what I had to do each day, down to the minute, made me feel like a productivity goddess.

I finally had an intelligent way to organize my list and a system that accounted for everything, even things I always forget like exercising, taking breaks, and running errands. I’d even gotten into a routine of blocking out the same time every day for similar tasks, which was like, whoa. I thought for sure that would 10X my productivity right there.

Problem was, my perfect time blocking calendar still didn’t translate into a perfect 40-hour workweek.

I still had more to do than I could manage and was struggling to get everything done. I’d go from writing a post, to working on a project, to meeting with clients, to working out, to writing my blog post again.

Sound familiar?

Most of us know that multi-tasking doesn’t work, but it’s hard to stop trying!

I think I finally nailed it this time, though.

I figured out why time blocking ALONE isn’t the answer, and why we need a whole new productivity paradigm. In fact, today, I’m putting our entire concept of productivity under a microscope and giving it a face-lift.

Here’s what I’m covering:

  • Redefining what productivity means
  • The power of short-term “sprints”
  • The right way to drill down on your goals
  • How to stay in your Passion Zone (more on that in this post)
  • Life-saving systems that you can’t do without

Let’s dig in.

Step 1: Time to redefine productivity.

The standard definition of productivity is some variation of: a measure of output per unit of input.

Now, this input/output formula might work for machines but not so much for humans. It’s turning us into robots, y’all! All we care about is getting more done, and quick like.

I’m a huge fan of productivity but we seriously need to flip the switch on all this.

Imagine what it would feel like to spend LESS time getting MORE done! That’s what we’re shooting for. And the best way to do it is to establish criteria for our to-do lists.

Time to shrink ’em down, friend.

I know you may be thinking How can I even think about trimming down my list? Things need to get done and I can’t just drop them!

I’ve got you covered! We’re going to create a plan to find your freedom and increase productivity at the same time. I want you to be able to work in your sweet spot 24/7 and still get incredible amounts of stuff done.

What we’re aiming for is a better process to manage your workweek, so that when tasks pop up (and they always do!), you run them through these four filters before adding to your calendar:

  • Is this something YOU need to do?
  • Does it need to get done AT ALL?
  • Is it a priority?
  • How can you outsource it?

These next few steps will give you a framework to do just that.

Step #2: Set short-term goals.

Everything starts with goals . . . the trick is to set the right ones.  Here’s a quick exercise to help you do it:

Grab a piece of paper and write down five things that ONLY YOU can do for your business. These are things you can’t outsource even if you want to desperately!

I’ll bet sharing posts on Facebook and creating images aren’t top-of-mind, amirite? The reason is that when we dig deep, we know the difference between busy work and real work. We just need a little structure to help us act on it.

That’s where goal setting comes in.

In my mind, the best goals are short sprints over a period of, say, three months. Far away enough to allow you to focus and really dig in, and close enough to see the end goal.

Here’s why I say this:

As a short-distance runner in high school, I’d leap ahead of my teammates and sprint straight to the finish line. But longer races? Eeeks, I was a mess. I’d either run out of breath after the first mile or drop back because it kept going and going, with no end in sight.

I thinking building an online business is a lot like running. We need to see the finish line to keep our momentum going. Three months is a perfect sprint. 🙂

So my question for you is: What sprint are you in?

If you’re a bit stumped with what your goals should be right now (most of us could use a nudge to validate and act on our instincts), it may help to look at your business in sprints, like this:

  • Launch Sprint: Launch your website and brand
  • Hustle Sprint: Get traffic, subscribers, and clients
  • Growth Sprint: Create courses, products and funnels
  • Profit Sprint: Automate and scale

Each sprint has its own strategic focus and priorities (more on this in my DIY-Your-Biz Blueprint).

For example:

If you’re in the Hustle Sprint, your goals are to get traffic, subscribers, and clients. Everything you do in this sprint needs to support your goals. That means when other things pop up, you put them on a waiting list or delegate to a team member.

Bonus: I created this simple planner to help you put what you learn into action and clarify the goals for your next sprint. Click on the image below to get started.

Use the 90-Day Blog Planner to set goals so you can get to your next level quickly.

What if you need to rerun your sprint?

Great question!

That’s perfectly okay . . . Rome wasn’t built in 90 days. In fact, I ran the Hustle Sprint for the better part of 2017. I’d run it over and over until I hit my traffic and subscriber goal.

Today, I’m in the Growth Sprint and have to admit, feeling a bit out of my comfort zone. I’m creating courses instead of blogging and have less time to develop infographics and content upgrades. And it bugs me to see my traffic fluctuating when I know I can easily increase it.

I also know I can catch up to it later. I read once that women can have it all . . . wonderful kids, an abundant career, amazingly supportive family . . . just maybe not all at the same time.

That applies to building a business. One sprint at a time, yo.

Step #3: Drill down on your goals.

Here’s where you start getting specific. In the Hustle example above, your goals might be to:

  • Get 5,000 subscribers
  • Hit 10,000 pageviews
  • Win three $10K clients

From here, it’s time to figure out the specific projects and tasks that have to happen to hit your goals. If we break these goals down, your individual tasks might look like this:

  • Write blog posts
  • Create share images
  • Create infographics
  • Share on social media
  • Join and share to Facebook Groups
  • Share to Pinterest Groups and Tribes
  • Create content upgrades
  • Do keyword research
  • Add keywords to blog posts (on-page SEO)
  • Look for guest post opportunities
  • Create YouTube videos
  • Start a Facebook Group
  • Message potential customers in Facebook and LinkedIn Groups
  • Join and share to LinkedIn Groups
  • Host a giveaway
  • Do a webinar
  • Make connections on LinkedIn
  • Create email sequences, landing pages, and opt-in forms
  • Create cold email sequences to potential customers
  • Find stock images (or take original photos)

Phew! This quick list just keeps growing – I’m sure it can even double from here.

Can you see the problem here? Even when you use amazing tools like the time blocking template below, you’ve got two things to add to your list for everyone one you check off.

Not anymore, you passion-zone-goddess, you! You only have to choose five tasks. My picks would be:

  • Write blog posts
  • Create content upgrades
  • Host a webinar
  • Do keyword research
  • Add keywords to blog posts

I chose the first three because content needs to come from you. Those last two, keyword research and SEO? Every entrepreneur should know how to optimize content for both organic search and social media. Traffic is the lifeline of your business, and the last thing I want is for some SEO’er to get your site penalized by Google.

If you want, you can use the time blocking template I created to put this new productivity paradigm to the test. Click the image below to download.

Download my Time Block Template to help you increase productivity and get even more stuff done each week!

Step #4: Next up, what can you outsource?

A wonderful member of my Facebook group was having a hard time staying consistent with social media, especially sharing to Facebook Groups and Tribes.

Sound familiar?

When this happens, you’ve got two choices:

  • Create systems and workflows (step #5 below)
  • Hire a virtual staff to assist

Now, you may be thinking It’s too early on to hire an assistant! I still have a full-time job and am not even monetizing my site yet!

I hear ya! It can be hard to bite the bullet. This is one of those things you should do early on in your entrepreneurial career. Hiring virtual assistants is the smartest move I ever made. They are life-savers! If you don’t have one on your team yet, stop what you’re doing and hire one.

Generally speaking, virtual assistants fall into these roles:

  • Video editing
  • Web design
  • Graphic design
  • Social media management
  • General VA (GVA)

First of all, that last one is the person every single employee should have on your team. My GVA is the person I lean on day to day in my business, and she helps me more than any other employee!

The other thing I’ve come to respect and acknowledge is that no one person can wear every hat. To maximize the potential of your team, you want to keep every employee working in their Passion Zone.

It’s best to hire a general assistant for daily admin tasks, a graphic designer for all things graphic, a video editor for courses, screencasts, and YouTube videos, and a social media manager.

Some tasks you can outsource:

  • Social media
  • Moderating Facebook groups
  • Content promotion
  • Graphic design and images
  • Adding tags and images to blog posts
  • Publishing blog posts
  • Proofreading posts
  • Ebook design and layout
  • Opt-in form design
  • Promoting Facebook pages
  • Monitoring Twitter accounts
  • Sharing to Tribes
  • Sharing to Facebook Groups
  • Creating spreadsheets and worksheets
  • Miscellaneous tasks
  • Creating and editing landing pages
  • Outreach on social media
  • Research guest post opportunities
  • Invite LinkedIn connections
  • Researching user-generated content
  • Scheduling to Instagram

Where can you find virtual assistants?

Great question!

Upwork, Facebook Groups, and online marketplaces like onlinejob.ph are places where you can find extremely talented employees.

Pro tip: Effort in = effort out when it comes to building your team. Be explicit with what you expect and provide clear job descriptions upfront. Whatever you do, don’t expect employees to figure out what to do on their own! Record training videos, hold weekly Skype calls, and use time tracking software. Thank me later. 🙂


Step #5: Create systems and workflows.

If you can create a system for what you want to achieve in each sprint, you can reach your end goals a lot faster, and stay in your Passion Zone for the entire race.

And the best part is, you can rinse and repeat over and over again to keep hitting massive goals with your next sprint.

Kick-butt systems = Insane time-savers

Funny, even the simplest system can make big tasks seem small. Here’s an example:


Duh, right? Seems like an obvious thing to number your Dropbox folders.

Alas, only in hindsight! I picked this gem up from Amy Porterfield. You’ll be amazed how fast you can breeze through folders when they’re organized like this.

Here are other business systems I use every day:

Google Spreadsheets

My secret weapon! I use spreadsheets a million times a day.

Anything you can do in Excel you can do in Google Spreadsheets  . . . format text, merge cells, freeze columns, clip text, customize fonts, import colors, create formulas, add borders, add/delete rows . . . and then some.

But what really sealed the deal? I can instantly share spreadsheets with my team and track what they’re working on, what needs to get done, and who’s slackin’ off (kidding).

Here’s how we use spreadsheets:

We have one master marketing sheet that includes multiple spreadsheets for everything we do, including:

  • Tribes tracker
  • Facebook Group promo threads
  • Blog Promotion
  • Product promotion
  • Pinterest keywords
  • Keyword Research
  • Blog ideas
  • Sales funnels worksheet
  • Hashtag worksheet
  • Pinterest Groups tracker
  • LinkedIn Groups
  • Images to create
  • Old blog posts
  • Online Biz Superheroes threads
  • Best pins / tweets
  • Affiliate programs
  • Income tracker

Want to see spreadsheets in action? I created this blog promotion worksheet you can start using today:
Download the Blog promotion worksheet to get traffic to your blog.

Every project or task gets its own spreadsheet where my team and I collaborate, track progress, and brainstorm new ideas.

For example:

Once a month, we grab quick stats on Pinterest Groups and Tribes and document them on the sheet. Then, we use that data to drive our pinning strategy and track share dates to each group/tribe.

Can you see how much time that saves?

No more scratching your head wondering why or when you shared a pin. And the best part is, you’ll only be sharing to tribes or groups that drive traffic.

Same thing for keywords and hashtags. You want to have them at your fingertips, ready to post. When your GVA asks which hashtags to post on IG, just point her to the spreadsheet. Check.

Templates, templates, templates!

You need them, friend. Alot of ’em! The more templates you have, the faster you and your team can get things done.

I recommend you keep templates for these on hand:

  • Landing pages
  • Opt-in buttons and forms
  • Share images
  • Social media profile images
  • Ebooks and printables
  • Email marketing

What tools should you use to create them? My vote is Canva or Photoshop for image templates, Canva or InDesign for Ebooks and printables, and hands down, ConvertKit for email marketing.

Related: How to Create Branded Social Media Images in Photoshop

A Content Calendar

Having a hard time figuring out what to post on social media?

Wish you had a system to plan your content so that you always have something to share?

A content calendar is a tool I’ve come to appreciate BIG TIME. One thing’s for sure, a content calendar will help you post consistently, organize your blog ideas, set monthly social media goals, plus gather images, keywords, publish dates, and deadlines all of your content.

The best part is, you get a high-level view of every piece of content you plan to share so you can coordinate it with important events, promotions, and products.

If you want, you can download this free content calendar template and start using it right away.

That’s a wrap! Hope you guys have your best sprint ever!


by

Weekly planner printable and tips to help you increase productivityThe other day I reached for my notebook and realized something big:

I’m 100% notes-free!

I don’t write things down anymore. I don’t scribble frantically the way I used to. And I don’t make to-do lists.

It happened organically. It wasn’t like I had an Aha moment where I thought I’m not using lists anymore. More like I just got tired of my list.

It always seemed like I added things to it faster than I could check things off. I was tired of feeling overwhelmed by what I needed to do. I just wanted to feel good about what I DID do.

Plus, my list was seriously messing with my focus.

I’d sit down to write a blog post, bang out the first few sentences, and then off my mind would go to a lesson I needed to create for my online course.

Then, while I was working on the course, I’d remember a video I wanted to record. When I switched gears to work on the video, I’d remember a pin I needed to create for last week’s blog post.

The struggle is real.

You’re all set to dive into a given task. Then your brain goes into overdrive on your list. Gotta shoot Michele an email real quick. Oops, forgot to regram @PinkDiaries. Lemme text Blake about dinner while I’m thinking about it.

Let’s flip the switch on all that! Let’s take back control and plan a week that plays out exactly the way we envision it, where we feel calm, centered and in control. I want to help simplify your schedule and free your focus so you can spend more time doing the work you really want to do.

My hope is that this design will make you feel excited and energized about the things you’ve already accomplished and the things you can’t wait to do.

Now, if lists are still your thing, I’ve got you covered! These posts will help you manage your list and plan your week effectively:

Bonus: If you want to get a jumpstart on planning, you can use the 90-Day Planner I created. It’s got sample milestones, goals, and tasks for each stage of your biz. Click on the image below to access.

Use the 90-Day Planner to create goal themes and milestones so you can get to your next stage quickly.

PREPARATION

1) Tap into your Passion Zone.

Your Passion Zone includes those things you can do relentlessly, effortlessly, and repeatedly with a big smile on your face.

To help you tap into this, think about the tasks that make your heart soar. What in your work are you most passionate about? What sets your spirit free?

Once you know what those things are, your next step is to clear out your day so that you can spend more time in your zone.

Head’s up: It may take planning to weed out the tasks you shouldn’t be doing so you can open up your day for the right things. Start by putting the wheels in motion to outsource, delegate (or even drop) tasks that lie outside your Passion Zone. You may be surprised at how quickly things drop off your list as your re-prioritize.

2) Give yourself permission to focus.

Want to know what my success formula used to be?

Juggling a million things at once. In fact, the more things I had up in the air, the more successful I thought I’d be.

In reality, success comes from tackling one small task at a time.

The reason is that even the smallest tasks require intense focus, depth, and concentration to complete. You need to go all in to reap the rewards of your hard work.

But going all in can be scary, right? It takes moxie to focus on one thing and forget about everything else.

Here’s where a little faith can go a long way. Give yourself permission to be wildly, amazingly brilliant at one thing (and one thing alone) this week, k?

I’m pretty sure all the other stuff will be waiting for you next week. 🙂

3) Be present.

When you’re in the middle of writing a post and can’t stop thinking about the images you need to create for it, or the landing page you have to design, it might be time for a gut check.

Is writing a post really your top priority today?

Maybe not. It might be on your calendar, but your gut could be steering you toward something else, say, that course you started.

It’s hard to be present with your work if you’re fuzzy about what you should be working on in the first place.

When this happens, there are two things you can do:

First, trust your instincts.

Feel something tapping you on the shoulder? It’s a good thing, friend! Your instincts are like an inner guide nudging you in the right direction.

Gentle nudges usually mean big things. Maybe you’re ready to take a huge leap in your business. Or, maybe it’s time to shift gears and start a new project.

Whatever that big thing is, go with it. Your inner voice is talking to you and it wants you to listen.

Which brings me to:

Follow your instincts.

We’ve all done this.

We play a game with ourselves where we ask the same question twice, hoping to get a “no” instead of a “yes” the second time around.

If writing a blog post passes your gut check, you’ve got your answer. Time to roll up your sleeves, put your head down, and follow through with it.

You’ll be on to your next task before you know it. Pinky swear.


ROCK THE FREEDOM WEEK

4) Throw away your list!

This is what I’m talkin’ about. No to the lists, yo.

My hunch is that to-do lists are doing us more harm than good by blocking our ability to stay in our Passion Zone.

Here’s why:

Having a list = spending time managing it = less time crushing it.

See where I’m going here?

We spend so much time managing lists and juggling all the tasks on them that list management is about all we have time to do. You wind up with a list that gets so long you can’t get to everything. Then, instead of feeling great about the things you ARE accomplishing, you feel like you’re failing.

This is why I think lists are slowing us down instead of driving us forward.

So go ahead, friend. Do it. Right now! Toss your list in the garbage.

Done?

Great! Let’s keep going…

5) Pick 3 priority tasks for the week.

Three is the perfect number to set your week free.

I started working with three tasks when I quit my list, and let me tell you, it’s magic. No more clutter. No more noise. No more hopping around from task to task. Just a wide-open canvas and a huge playing field to do my deep work.

You probably know a handful of things that you (and only you) should be working on that will:

  • Have the biggest impact on your business
  • Keep you in your Passion Zone
  • Make you feel energized about your work

You’ve just designed your Freedom Week. Bump. Without a huge list of things to do, your mind will now be free to dive into the work you love to do.

6) Commit to one hour.

This one’s pretty powerful.

When I go running, the first mile is always a bear. I want to stop. Turn around. Go right back inside and call it a day.

But, if I hang in there and get past the start, I can tap into a zone and forget about everything else.

Tacking projects that seem overwhelming is like waiting for that runner’s high to kick in. You have to give yourself enough time to get past your own resistance and into your zone.

Give each task one uninterrupted hour.

That means no email. No Facebook. Shut them down. No texts and no calls. If you have to, turn off your phone.

You may find that your first 20 minutes has you staring at a blank screen. Keep staring, even if you start feeling squirmy at this point. It takes at least this long to context shift, which is a fancy pants way of saying “task shift”. Your brain needs time to shift away from previous activities and process the task at hand.

Whatever you do, please resist the temptation to go do something else! When we have big projects or things that overwhelm us, we tend to want to do things like:

  • Run to the girl’s room real quick
  • Clean up your desk area
  • Poke around social media (a HUGE one for me)
  • Check your email
  • Count your Instagram followers
  • Text a friend
  • And more

One hour, friend. That’s all you need to get past your resistance. After that, you’ll be fully immersed and crushing it.

7) Develop a routine.

My husband and I went on vacation this summer and after four days, I couldn’t wait to get home. I missed my routine.

Sounds boring, right?

There’s something about doing the same thing every day that gives you a sense of purpose and reaffirms your ability to achieve your weekly tasks.

Here’s my daily routine:

Every morning I get up, make a cup of tea, straighten up my apartment, and get myself together. Doing these simple things every morning gives my brain time to gear up for the day.

I take a half hour to read through email before I dive into my deep work, which is most often content creation.

Mondays, Wednesday, and Fridays, I go for a run around lunchtime to shake off the morning and gear up for the afternoon.

Later in the day, I meet with my team to coordinate projects. Then, I recap where I’m at so that I can pounce on the next day.

From there, it’s rinse and repeat.

See how doing things repetitively like this can give your day a sequence? There’s little room for guesswork because there’s not a whole lot to think about.

Doing things habitually is like strength training for the mind, in my book. Because your brain already knows what to expect, it can fire on all cylinders right away.

How’s that for a super productive week?

Don’t forget to grab the 90-Day Planner so you can start crushing your goals:

Use the 90-Day Planner to create goal themes and milestones so you can get to your next stage quickly.
by

Online Business Blueprint | This post includes a blueprint to help bloggers and entrepreneurs prioritize and focus your time on the specific things you should be working on right now to grow your business. Click through to see the blueprint!

If you’re a bit stumped with what to do right now to grow your blog business, this post is for you! I break down the exact things to focus on so you know what to prioritize and when. Click through to see the blueprint!Hi friends!

We’ve been tackling so many aspects of making a full-time income from a blog, I thought it might be cool to take a little breather.

I really want you to step away from the minutiae of DOING for a minute. Let’s look at your business from a different perspective so you can see where you’re at right now, and more importantly, what your unique success formula looks like moving forward.

No specific action steps today. More like a bird’s eye view, k?

Here’s what I’m covering in this post:

  • How to know what you should be focusing on now
  • How to “work” your stage to get to the next level
  • Setting high-level goals for each stage
  • Breaking those down into bite-sized goals

Let’s dig in…

What should you be focusing on now?

This is a great question! It’s so easy to feel a kind of push and pull between what you think (or even know) you should be doing, what the experts say to do, and what other brands and competitors are doing right now.

Should you be doing those things too?

It depends.

First things first, you need to pinpoint what stage of business you’re in.

This is massively important because there are certain things you need to focus on at each stage of your business. Knowing where you are right now will help you build a platform for your next stages. Think of it as a road map for getting from Point A to Point Z with your blog biz.

Now, you’re probably wondering about these stages of business. I’m going to break them down for you right now.

Bonus: If you want to get a jumpstart on the stages below, you can use the 90-Day Planner I created with sample milestones, goals, and tasks to help you get started. Click on the image below to access.

Use the 90-Day Planner to create goal themes and milestones so you can get to your next stage quickly.

Stage #1 – The Launch Stage

FOCUS ON: BUILDING YOUR BLOG + PLATFORM

Time to get your blog up and running. Your focus is on narrowing down your passion/niche, validating your profitable idea, laying the foundation for your brand, and getting your first few subscribers. This means writing your core message, identifying your target audience, designing a logo, launching your social networks and writing your first posts.

Whew! It’s a lot. You’ll definitely need some time to implement everything.

In case you’re curious, you’re in the Launch stage if…

  • you’re still in the process of validating your business idea.
  • you’re a bit unsure about how to pursue your idea and turn it into a business.
  • you don’t have a website or social presence just yet.
  • you’re on a tight budget and need to launch your biz as affordably as possible.

If you feel a bit flustered and overwhelmed during this stage, that’s completely normal, so don’t worry. This is a time of major uncertainty. You have ideas about what to do and are battling with a little bit of fear about whether it will all work out. This is perfectly ok and how you should be feeling right now (even though it’s not fun)! If you hang in there with me, your vision will come together. Promise.


Stage #2 – The Hustle Stage

FOCUS ON:  GROWING YOUR AUDIENCE + TRAFFIC

High five! Your blog is up and running and you’ve built a platform for your business. Now it’s time to hustle.

While you’re in the hustle stage, you’re going to be building your audience, driving traffic, and generating initial sales. You’ll want to focus on social media, building a following, growing your email list, and of course, creating original content on the regular.

You’ll also want to follow these steps to optimize your website so that it generates leads, subscribers, and sales. Psst…You can also grab the handy Lead Generating Website Checklist below:

Want to know how to drive and convert incredible amounts of traffic to your business? Download this web optimization checklist so you can turn your website into a 24/7 sales machine!

How do you know if you’re in the hustle stage? I’m glad you asked!

You’re in the Hustle stage if…

  • you have 2-5k email subscribers.
  • you’re publishing original content on your blog or video consistently.
  • your combined social media following is between 100 – 10,000.
  • you’re generating revenue (or close to generating revenue) but it’s not enough to replace your salary just yet.

If you really want to build your traffic and grow your social media following, grab my blog promo plan. It will help you create a plan for what to share and where, and how frequently you should share your blog posts to get the most traffic to them.

In the Hustle Stage, focus on building a following, growing your list, and creating original content.Click To Tweet


Stage #3 – The Growth Stage

FOCUS ON: CREATING COURSES + FUNNELS

This is where you’re really going to start seeing some traction in your business, where all your hard work spent building your platform and audience will start to pay off.

During this stage, you’re going to focus on streamlining your sales process, building funnels and setting a foundation for scalable growth. Your goal now is to move beyond selling 1-to-1 services and toward a “1-to-many” business model. The best way to do this is to create online courses and digital products. These will allow you to free up your time and prepare your online business for success, which is up next in stage #4.

You’re in the Growth stage if…

  • you have more than 5k email subscribers and your list is growing on autopilot.
  • you’re starting to generate enough revenue to sustain yourself and pursue your biz full time. Woo!
  • your business is gaining momentum month after month.
  • you have more than 10k social media followers.


Stage #4 – The Profit + Scale Stage

FOCUS ON: AUTOMATING YOUR BUSINESS

You’re ready to take your biz to the next level! In stage #4, your business is growing consistently, and it’s time to add more team members and implement even better business systems. Buut, you may not have the resources just yet to do all that. You may need to increase your revenue first.

I’ve got the solution right here!

In this stage, your goal is to start scaling the things you’ve already created so you can generate even more revenue and profits from them. Your focus is on automating your sales process and offers so you can sell more with less effort. You also want to start streamlining and organizing the work you’ve done, so you scale with ease.

You’re in the Profit + Scale stage if…

  • you have 15k email subscribers or more.
  • you’re generating at least 50k a year.
  • you’re selling courses and offers that free up your time every day.
  • you’ve completely moved away from offering 1-to-1 services.
  • you have 2-3 sales funnels that are converting consistently.
  • you’re ready to hire at least two staff members (even if they’re part-time).


Next up, how to work the stages

Here’s where you start identifying what you should be working on right now so that you can get to the next stage as quickly as possible. Before we dig into specific goals though, we need to know what we’re aiming for.

For example, let’s say you’re in Stage #1 and just launching your blog. Or, maybe you’ve been at it for a while but want to shift your blog’s focus, which means that your blog is “new”, inasmuch as you’re rebranding or charting a new path with it.

What you want to do is to create high-level milestones that you plan to achieve during this stage. I love working in 3-month time chunks because that is far off enough that I have something to work toward, but not too far off that I can’t see my end game, make sense?

Here’s what your milestones for stage #1 might look like:

  • Launch blog and brand
  • Publish 9 blog posts
  • Complete social media profiles
  • First 100 subscribers
  • 500 combined followers

This means that at the end of stage #1, you will accomplish each of these milestones. If we look at it another way, these are going to be your focus areas until you get to stage #2.

Phew! Now we’re getting somewhere. From here you’re going to specify goals and tasks that will help you accomplish them.

Don’t forget to grab my 90-Day Planner – I’ve even got a sample plan you can follow. Woo!

Use the 90-Day Planner to create goal themes and milestones so you can get to your next stage quickly.


Next, create high-level goals

Now it’s time to break the milestones down into goals. We’re not getting super granular with these just yet. Right now all you need to do is set high-level goals for the next few months. Make sure you account for each bucket in our Blog Profit Plan:

  • Content
  • Traffic
  • Subscribers
  • Profit

Now, I know you’re probably thinking How am I going to get it all done? I have a hard time focusing on just one of these buckets!

I get it.This is one of those things where not all of the buckets will have an equal focus each month. Still, it’s important that you try to address each bucket, ev’ry month.

Why is this so important?

The reason is that addressing each bucket will give you a direct route to your next stage. Think of it as if you’re driving down a superhighway going 100mph. It’s a beautiful sunny day…you’ve got the sunroof down and there are no cars, lights, or speed bumps up ahead to slow you down. Just you and your destination.

That’s how we’re gunnin’ here. We’re tossing all four buckets in the backseat and hittin’ the highway. The point here is to get into a habit of constantly juggling the buckets.

Using our same example above, here’s what your goals might look like:

  • Evaluate my niche for profitability
  • Finalize logo
  • Pick a theme for my blog
  • Write my first 5 blog posts
  • Create my social profiles
  • Share content each day on Pinterest, Instagram, and Facebook
  • Choose an email marketing platform
  • Send my first 5 broadcast emails
  • Create one freebie
  • Create my first welcome email sequence

Your goals may look different than this depending on which stage of business you’re in.


Finally, break down your goals

This part is pretty straightforward. Usually, one goal will precede another, meaning that in order to tackle the next goal, you need to do “x” first. For example, if you’re in stage #1, your order of things may be to tackle these first:

  • Evaluating your niche
  • Researching products
  • Setting up your blog
  • Writing your first few posts
  • Choosing brand elements – logo, colors, fonts

Then move on to:

  • Creating social profiles
  • Sharing content each day
  • Creating your first freebie
  • Setting up your email marketing platform

In the two examples above, the items listed would be your priorities for the month. What this means is that no matter what else is happening, these things get done. When other things pop up, you reschedule them or put them aside to make room for your must-do items.

This is easier said than done, I know! But there’s a way to make sure you stay on track, and that has a lot to do with how you manage each week and each day.

Here’s that 90-Day Planner again:

Use the 90-Day Planner to create goal themes and milestones so you can get to your next stage quickly.

I like to use the planner with this time-blocking template to help prioritize my time each week.

Trust me, this dynamic duo is a powerhouse for helping you stay on track, avoid distractions, and ultimately, rock your to-do list.

What’s your plan for your blog biz? Have you created one yet? Let’s hear it!

by

Ready to supercharge your email list? Here's why I switched to ConvertKit, and how I use it to get over 1,500 subscribers a month PLUS sell my products. Click through to get started!.About 2 months ago I made the switch to ConvertKit and fell in love.

So today, I thought it would be fun to share my email marketing journey, plus the simple and effective ways I use ConvertKit to get 1,500 subscribers a month.

Here’s what I’m covering in this post:

  • Why I switched to ConvertKit (and why I stayed, even when Infusionsoft offered me a 70% discount)
  • Why I love ConvertKit
  • How I use it every day to build my list and sell products
  • How to set up ConvertKit and use it to grow your business

This post contains affiliate links.

1) First, here’s why I switched to ConvertKit

I highly recommend using ConvertKit to manage your subscribers and build your email list.

The reason is that I’ve used Infusionsoft, MailChimp, and Aweber, but none of them hit the sweet spot for me. Infusionsoft was too complicated. MailChimp didn’t have the functionality I wanted. Aweber seemed a bit outdated.

Let me share my Infusionsoft story.

I signed up for Infusionsoft a year and a half ago after taking a list-building course. My instructor used Infusionsoft and I thought Kamila’s successful… I want to be successful too. Let me try it.

So I did. Even though the monthly fees were steep, I was happy with my decision. Seeing subscribers pop up every day was a thrill. Woo! What a rush…

After a few months, though, $249 a month seemed like a lot (yes, that’s what it cost).

Still, the thought of migrating my campaigns to a new platform was a big fat turn off, so I stayed with Infusionsoft even though the high monthly fee was starting to make me sizzle.

Then one day a light bulb goes off and I decide to cancel my Infusionsoft account. By this time, I know that ConvertKit is an amazing platform with better pricing options.

That’s when this thing happens:

Infusionsoft drops their price to $199. Boom. Just like that. They even offer additional free training, which I accept because I really (really!) dread switching to a new provider.

So we’re all good until a few months later, when this other thing happens.

I see a message on my dashboard:

You’ve reached 2,000 contacts. Either delete contacts to continue (really?!) or upgrade to $349 a month (say whaaa?).

I can’t even access my dashboard unless I pay $349. Right then and there, I sign up for ConvertKit. And here’s where it gets even better:

I spend the next 3 days migrating my list, learning the ConvertKit interface (which is super intuitive), importing contacts, creating tags, testing, and so on.

Once I’m all set, I call to cancel my Infusionsoft account again.

On that call, Infusionsoft offers me $99 a month FOREVER. No increases. Ever.

Come on, Infusionsoft, really? You just bumped me to $349. Now your “customer experience” rep drops the price to less than one-third the price you bumped me to, for the same exact service? Did somebody just say “shady pricing”?

X to that.

Now, maybe I would have stayed with them for that price. But 3 days was all it took for me to become a die-hard ConvertKit fan, which I’m going to tell you all about right now.

Click here to learn more about ConvertKit’s pricing and services.

2) Next up, why I love ConvertKit and how I use it every day

There are 3 things I love most about Converkit:

  • Their insanely straightforward pricing
  • Their bend-over-backward customer service
  • The interface itself

Let’s start with their pricing:

After my experience with Infusionsoft, transparent and honest pricing is a biggie for me. Here is ConvertKit’s pricing:

ConvertKit pricing: 0-1K Subscribers: $29 a month; 1-3K subscribers: $49 a month; 3-5K subscribers: $79 a month. Click here to sign up!Easy peasy, straightforward pricing that scales as your business grows, so you don’t get walloped in the earlier stages of your biz.

ConvertKit’s customer service

ConvertKit’s support stood out to me, and I’ll tell you why.

First off, I half expected it to be lame after my experience with Infusionsoft (long waits, curt responses). But the folks at ConvertKit are on the case the minute you pop in with your question. Boom. Someone’s on the other end asking How can I help?

That’s just the tip of it. The best way I can describe it is to say that their support team feels like they’re YOUR team. This is huge when you’re a team of one or two, no? We need peeps in our corner. Until ConvertKit’s support team resolves your issue, they’ve got nowhere to be except right there in the trenches with you.

To show you how ConvertKit’s support makes you feel all warm and fuzzy, here is my very first experience:

Right after I signed up, I tested my sequences and noticed that some emails went straight to the junk folder. I was concerned about what this meant for email deliverability, so I popped into their chat support.

I couldn’t believe how thorough ConvertKit was with their response. They walked me through a few standard things to start. Then they kept digging. Here’s the first email I received from them:

ConvertKit customer support

Can you see how amazing these guys are? This one response helped me to write better emails and avoid the junk folder. From there, they continued to troubleshoot. They added over 400 test subscribers to my account with various Outlook, Hotmail, and Gmail accounts, all to make sure that my emails were indeed making it to the inbox.

That’s impressive, in my book. ConvertKit spent a whole week running tests. Just shows you how much they care about our success.

The easy-to-use interface

As a visual person, the look-and-feel of things matter. The biggest difference between ConvertKit and other email providers is the intuitive interface. I just love ConvertKit’s navigation. It’s simple and effortless. No poking around in submenus trying to find what you need.

Here’s a look at the ConvertKit dashboard:

See the blue bar at the top? Those are the sections you’ll use to grow your list and sell products. You’ve got Forms, Sequences, Broadcasts, Subscribers, Automations…all the tabs you need right at your fingertips.

This is worth a li’l happy dance. Great design = seamless experience, which is exactly what ConvertKit provides here. With Infusionsoft and Aweber, I always had a hard time figuring out what to click.

Let’s dig into each of these tabs, k?

How I use ConvertKit Every Day

Forms

ConvertKit forms

I use ConvertKit forms to create an opt-in form, which is your first stop for growing a list. You can style the form, add a custom image plus your text, and embed the form directly on your site.

But you know me…I love my Thrive Leads, so I create forms in ConvertKit that “speak to” the Thrive Leads forms. Even if you use SumoMe or Thrive Leads for your opt-in forms, you still need to create a mirror form in ConvertKit (minus the styling) which is a simple 1-2-3 process. Takes seconds.

Sequences

ConvertKit sequences

I use ConvertKit sequences to build a relationship with my subscribers by creating value-packed emails that are automatically delivered to them once they sign up. Sequences are all pre-written and pre-scheduled, which takes more time upfront for sure, but well worth it. These are essentially set-it-and-forget-it sequences that work for you behind the scenes once you set them up.

I also use sequences for my automated product funnels, which means I make money on autopilot.

Broadcasts

ConvertKit broadcasts

I use ConvertKit broadcast emails to offer even more value to my readers or share a new post or product. These are weekly or bi-monthly emails that are one-offs (separate from automated sequences). I don’t schedule broadcasts unless it’s late in the day and better to send the next morning.

Subscribers

ConvertKit subscribers

Here’s where I can see my list of subscribers, the freebies they’ve signed up for and the products they’ve purchased. I can also filter my ConvertKit subscribers by emails opened, links clicked, freebies downloaded, products purchased, and so on. This filtering is based on tags to help you segment your list and send specific announcements to only those people who signed up for X freebie.

Automations

ConvertKit automations

In ConvertKit, automations are If This, Then That conditions where one action triggers another event or state.

Think of it as an iPhone. You can’t dial anyone without putting your fingers on the keypad, right? Your iPhone sits there waiting for an action to trigger a call.

Sequences and forms are a bit like that…they wait for an action. The only difference here is that instead of taking an action, you create an action that triggers the call (or in our case, the email).

That’s what Convertkit automations are all about. You create an automation rule that says When a subscriber opts-in to X freebie, add them to X sequence. Then that action triggers the sequence to be delivered. Make sense?

4) How to Use ConvertKit to Grow Your Business

First thing you need is a freebie of some kind. It can be a cheat sheet, PDF of your post, template, workbook, Ebook…anything that provides extra value to your readers and extends on your post.

Make sure you include a call-to-action within the post. A simple Yes, I Want! graphic will work perfectly. If you need help here, I’ve got 9 ways to optimize your website where I drill down on freebies, CTAs, and more.

Once you have your freebie, it’s time to head over to ConvertKit and create your first form.

Creating forms in ConvertKit

From the main dashboard, select the + Form button.

You’ll be redirected to a page where you can select a form or a landing page.

I use Thrive Architect and LeadPages for landing pages, so a form is all I want here. If you’re looking for a landing page builder, you can easily select one of ConvertKit’s landing page templates in addition to (or instead of) the form.

Otherwise, you’re good with just the form.

ConvertKit has 3 form variations:

How to create your first form in ConvertKit. Woo!

Once you select your form, you can easily edit the text, upload your freebie graphic and change colors to fit your brand.

ConvertKit form colors

I use the name of my freebie/product as my form name.

Next, select the Settings tab. If you created a form, make sure you select “Just a form to embed on my site.” Below that, you’ll see an option to “Redirect to another page”. I like to send subscribers to a custom page where I thank them for signing up and let them know the freebie is on its way.

Make sure you select the Settings tab for your ConvertKit form!

Psst…LeadPages has beautiful thank you pages.

Almost there. Next, select “Incentive Email” from the left column. Here’s where you can select single or double opt-in. If you’re curious, single means that a person becomes a subscriber as soon as they fill out your form. Double (or incentive) requires an email confirmation first to make sure the email address is correct. This prevents your emails from bouncing and gives people a better chance to receive your freebie.

Here's the second part of ConvertKit's form settings: select single or double opt-in.

Creating your first sequence

Sequence time. This part is super easy!

Each new sequence kicks off with a mini-tutorial courtesy of ConvertKit:

Here's how to create your first ConvertKit sequence!

You’ll want to write a compelling subject and change the delay time (tip: set your first email to 0 days so subscribers receive it immediately!). Then select either Draft or Publish. Make sure you preview your email before sending it.

As I mentioned above, my emails ended up in the junk folder during testing until I adjusted the length and number of links. Bottom line, you want more copy and fewer images + links. If you stick to that, you can feel confident that subscribers will receive your emails.

Once you’re happy with email #1, select Add Email from the left side and write emails #2, #3, and so on. Depending on your sequence, you might follow up with:

  • A reminder to download your freebie
  • An exclusive tip
  • A roundup of your top posts
  • Case studies + success stories related to a product
  • Your story
  • A link to a video

Before you publish your new sequence, jump over to the Settings tab real quick:

Here's how to adjust the settings of your sequence.

Here’s where you can do things like:

  • Specify how you want your sender name to appear (I had to adjust mine to include my name)
  • Select your preferred send days and time
  • Exclude subscribers – if someone has downloaded X freebie, you can and should exclude them from X freebie sequence.

You’re doing great! We’re just about ready to wrap this up. Ready for it?

3) Set automation rules

Remember those triggers and actions we talked about? Here we go, baby! ConvertKit’s automation rules confused me at first, so if this part seems overwhelming, I get it. But really, this is the quickest part. It takes less than 10 seconds.

First, select + Add Rule. Here’s what you’ll see:

Here's how to create your first automation rule in ConvertKit. Woot woot!

For the trigger event, select “When someone subscribes to a form” and select your new freebie form. For the action, select  “Subscribes to a sequence” and select your freebie sequence.

I recommend testing your opt-in form using your own email address to make sure:

  • Your email is added as a subscriber in ConvertKit
  • You are added to the correct sequence
  • You receive the first email in the sequence

That’s all there is to it! You’ve just kicked your email funnel into high gear. So what’s next?

Get busy blogging. The more content you share, the more traffic you’ll drive to your blog, which means the more people will sign up for your list. I also recommend creating as many freebies as you can. You never know which ones will capture people’s attention and outperform the others. It’s helpful to have a few cheat sheets and Ebooks you can put into rotation.

And of course, I recommend signing up for ConvertKit. You can start building your list for only $29 a month. Click here to learn more about ConvertKit’s features and services. Woo!

by

9 Website Optimization Tips to Convert Customers | Ever feel like your website should be working harder for you? This post is for you! It includes 9 elements every blogger and entrepreneur must have on their website to generate leads and sales 24/7, even while you sleep. Click through to see all the high-converting elements!

9 Steps to Optimize Your Website For More Traffic + Customers | Ever feel like your website should be working harder for you? This post is for you! It includes 9 elements every blogger and entrepreneur must have on their website to generate leads and sales 24/7, even while you sleep. Click through to see all the steps!

Ever wonder how to optimize your website so that it does more of the heavy lifting in your business? Say, get out there and bring you some fresh leads + customers already? Or, maybe give the universe a shout-out to your superheroness?

I’m so with you on this one! Our websites should work harder. In fact, we want our websites to be the swiss army knives of the machine we’ve been working so hard to build.

The machine that’s going to drive traffic, build our audience, and make us profitable.

Today, I’m sharing 9 website optimization tips to help keep that machine running at peak performance. These tips will be especially helpful if your blog biz isn’t quite where you want it to be, or if you feel like you’re doing everything right but something is still a bit off.

You probably have questions about your website, or maybe you’re thinking…

  • I don’t have time
  • I’m done working on my site
  • How can this bring me customers?
  • Is spending time on my site even worth it?

I get it. Another thing to add to the list, right? And YES, optimizing your website for more leads and customers will take time.

Here’s the thing though:

Most people who visit your website are doing a quick fly-by, looking for something specific. Once they find it, they’ll likely peace out unless you give them such a bangin’ experience that they want to stay longer.

The beauty here is that once you optimize your website, you can pretty much set it and forget it. This is because all the heavy lifting will start happening on autopilot. You’ll have a system that builds relationships with complete strangers and a website that delivers leads + customers while you sleep.

Sound good? Here are my website optimization tips:

PART 1 – THE ART OF THINGS + LAYING THE FOUNDATION

1) A Value Proposition

WHERE TO PUT: ON YOUR HOME PAGE

A value whaaa? This is a fancy way of saying let people know that you solve one problem for one specific person. A value prop should be the first statement people see on your homepage and it looks something like this:

I help (who) do (what) so that they can (benefit).

Confused by this? I’ve got tons of value prop variations, plus a template for you in this post. Your goal here is to let your audience know exactly what those 2 “ones” are above and to clearly communicate the value you provide. What do you do? How do you help? Who do you help? 

If you need help with your one person, you can download the customer avatar template I created to help you attract the right customers to your business. Click the image below to download it.

Download the Customer Avatar Worksheet to learn how to optimize a home page with a targeted message that attracts your ideal customer.

I recommend placing your value prop front and center on your homepage, ideally above the fold (which is another jargony way of saying don’t make people scroll for it).

Now, I know coming up with this kind of statement can be tricky, especially if you have a million topics you blog about, and that’s perfectly ok. Just know that if you have a hard time building an audience for your brand, your value prop is likely at fault.

Here’s why:

You need a wrapper for all your interests…some kind of angle that your topics point to so that people know which box to place you in. Plus, having a strong value prop is the best way to check the box on homepage optimization.

Note: When it comes to website optimization tips, people often skip the value prop step and head straight for SEO (step #9 below). This is a huge mistake, in my book. The reason is that after all your hard work driving traffic to your website, if you don’t grab people right away you’ll likely lose them forever. Please, friend, don’t skip this step!

Related: How to Find Your Blog’s Niche and Focus

2) Your Story

WHERE TO PUT: YOUR ABOUT PAGE

Your About Page is where you hook people on YOU, your world view, and why you do what you do.

Don’t hold back! Your personal history has framed who you are and that’s the story your audience needs to hear. I call it The Story of You Plus Them because you’re connecting the dots between where your readers are in their journey and where you can take them.

Your About Page should communicate that you get how your audience feels. What have you experienced that may be similar to what they’re going through right now? How have you overcome your challenges? How do you personally know how they feel? What will change for them AFTER you?

Once you weave your story in a way that answers these questions, you’ll tap into how your audience secretly feels. Building an audience will become effortless because people will perceive you as having a solution and will naturally seek you out and want to work with you.

Related: What Should I include on My About Page?

3) Great Design

WHERE TO PUT: EVERYWHERE!

Wondering how to optimize a home page? It starts with knowing how you want people to feel when they visit your website. Energized and excited? Deep and mysterious? Powerful and independent?

This is true for more than just your home page. Details like colors, fonts, and graphics have a lot to do with the mood of your entire website, and more importantly, how long people hang around. Your goal is to help readers get lost in your copy, with me? You want them to experience your website with no distracting elements to take their attention away from what you want them to do.

When you think about it, the function of design is to interpret copy. Ask yourself questions like How can I turn that huge block of boring text into an eye-guzzling graphic? What design elements can I add that will make it easy for people to digest my copy?

What you’re aiming for is to create a hierarchy of importance so that people know what to read first, second, and so on. We’re talking about deets like:

  • Easy navigation
  • Clear calls to action (step #6 below)
  • Harmonious colors, fonts, and graphics
  • Use of white space
  • Strategic positioning and scale of elements

When you’re first starting out, please don’t spend too much time on this step. The reason is that it’s easy to fall into a rabbit-hole with design. In the early stage of your business, your goal should be to get out there as quickly as possible so that you can learn more about your audience.

I recommend using a theme like Divi as a jumping off point. Add your content and change the colors, fonts, and graphics. Then you’re good to go. Easy peasy.

#BOTTOMLINE Yes, design is important, but don’t spend so much time here that you put off other important things like LAUNCHING.

Related: How to Choose Colors That Will Make Your Brand Stand Out

PART II: REVVIN’ UP THE MACHINE

4) Opt-in forms + freebies

WHERE TO PUT: YOUR HEADER, FOOTER, SIDEBAR, BLOG POSTS

When we talk about how to optimize your website, this one’s a biggie. Opt-in forms and freebies are where you start turbocharging the machine and building an email list while you sleep. What’s not to love about that, right?

I include them on my home page and in as many posts as I can, without interrupting readers of course. If a freebie naturally fits and would help extend a post with even more value, I’ll include it.

I actually recommend including a freebie for as many posts as you can, which sounds like a lot more work than it is. You can start with a few that are related to your blog themes and use the same freebie on numerous posts. The double-whammy here is that the more freebies you create, the more you’ll understand what your audience secretly wants. You can use that intel to frame future products around.

Remember, freebies are a huge part of our content funnel, which I cover in this post. A high-converting freebie is:

  • Targeted – speaks to one specific person and addresses their most pressing pain point.
  • Actionable – is easy for people to digest and implement. Checklists, cheat sheets, templates and short workbooks (less than 10 pages) work well.
  • Simple – covers one simple topic rather than multiple topics. Your goal is to offer the easiest steps for people to get from A to Z.
  • Delivers results – gives people steps they can actually move forward with and see results.
  • Builds trust – establishes your authority and primes people to buy from you in the future.
  • Sparks curiosity – offers enough value to get people excited about future products, without giving away the farm.
  • Provides real value – is something that people would actually consider paying for.

For opt-in forms, I’m in love with Thrive Leads! They have so many options. You can tweak these forms all you want and then save them as templates.

Any type of form you want, Thrive can make it happen. Take a look:

  • Welcome mats – Full page opt-ins similar to Jeff Bullas’ home page. These are supposedly the highest converting. I can’t wait to test.
  • Standard pop-ups – I use these as “exit pop-ups”, where visitors are prompted to opt-in right before they leave.
  • In-content – Clicking on an image or a link triggers a pop-up. I use these for all of my content upgrades.
  • Ribbon forms – Appear as a bar across the top of your website, like the one on Twelveskip’s site.
  • Sidebars – Display on the right side of pages and posts.
  • Footers – Sit at the bottom of your site and prompt people after they read your content.

Can you see how powerful freebies are? I highly recommend purchasing the Thrive Leads’ plugin ($67 one-time fee) and experimenting with each opt-in form.

5) Landing Pages

WHERE TO PUT: THESE ARE CUSTOM PAGES

If we’re really going to make our opt-in forms stand out, we need to give them a dedicated landing page. Here’s why:

All the forms mentioned in step #7 are designed to appear on an existing page or post on your website. They’ll pop up, slide in, slide down, or hang out at the top/bottom of a page. If we really want to shake things up, we’ll put our opt-in form on an entirely separate page, so people can’t help but notice it.

How is a landing page is different from other pages on your website?

Great question! I scratched my head on this one too at first. What makes landing pages different is that they include only 3 things:

  1. Details about your freebie
  2. A call to action (step #6 below)
  3. Your opt-in form

That’s it! The best converting landing pages are all about freebies and nothing else. We’re talking no blog posts, pages, sidebars, or even top navigation. Basically, no ANYTHING that might distract people from signing up for your freebie.

So there you have it! That’s my skinny on landing page best practices. Yours can be short and sweet (an image plus a few bullet points) or long and detailed (more copy, more images, more wow).

Wondering how to make a landing page? I’ve got 2 options for you:

  • LeadPages has a huge library of high-converting templates that you can easily tweak to suit both your freebie and brand. While I like their templates, I find that customizing them takes more work than I want. Plus, the $25 monthly fee is too steep, in my book.
  • Thrive Content Builder is a relatively new plugin that’s been giving LeadPages a run lately. These guys boast a huge template library too (162 and counting) and charge only $67, with a full year of support. That’s a one-time fee and a no-brainer, right?

6) Call-to-Actions

WHERE TO PUT: EVERYWHERE

As people read your content, you want to encourage them to take another step. The way to do that is to use a combination of buttons, links, and copy that calls them to action (hence the term “call-to-actions” or “CTAs”).

CTAs have the smallest amount of copy you’re likely to write, but don’t let that fool you! This is one of those cases where big things definitely come in small packages. Here are a few CTA examples:

  • I’m In!
  • Heck Yes!
  • Hook Me Up!
  • Get Started Here

You’re probably thinking Why are CTAs such a big deal? Can’t I just say “Download” or Buy Now” and that’s it?

It depends. Sometimes that will work and other times not so much. I recommend brainstorming your CTA a bit more. If you hang in there, you’re likely to come up with text for your CTA button and heading that will get people fired up to sign up.

Take a look at Melyssa Griffin‘s website. See how she prompts people to Take Action: Click An Option Below…? It doesn’t get any clearer than that! Follow this example with your call-to-actions and you’ll be buildin’ your machine, quick like.

You want these babies ev’rywhere:

  • On your home page
  • About page
  • Contact page
  • Blog posts
  • Opt-in forms
  • Landing pages
  • Thank you pages
  • Sales pages

Remember, CTAs are a huge part of creating an effective content funnel. People need to be drawn to both the copy and design of your call-to-action. This is the way you’ll be able to capture their attention long enough to guide them through your sign-up process.

Related: How to Build Your Blog Audience (Like You Mean Business)

7) Thank You Page

WHERE TO PUT: THIS IS A CUSTOM PAGE

When people opt-in, you need a way to assure them that their freebie is on its way. That’s where a thank you page comes in. You literally say something like Thanks for signing up! Your freebie is on its way! And leave it at that.

Nope, sorry. In reality, we can’t leave it at that. 🙁

We need to dig into the real potential of thank you pages and help people take the next step. After all, they’ve already raised their hands and said yes, so they’re likely ready to build a relationship, or maybe even purchase a low-cost product. Now we’re talkin’.

This page has some serious lifting to do! First, think about what you want people to do. Then make sure your thank you page includes:

  • A confirmation message
  • Specific instructions on what to do next
  • A clear call-to-action (step #6 above)

Speaking of CTAs again, here are some great call to actions for this page:

  • Ask people to whitelist your email address
  • Share on social media
  • Register for a webinar or event
  • Purchase a low-dollar offer
  • Purchase a related or affiliate product

Whatever you do, please make this page a priority! This is a huge website optimization step. Don’t back-burner it or treat it as an afterthought. Your thank you page doesn’t need to be long and it doesn’t need to be pretty. It just needs to prompt people to take a very specific action.

8) A sales process

What I mean by this is that you need a system to deliver your freebie, prime people for future products, and nurture the relationship you’ve started to build with your subscribers. That’s where automated email marketing comes in.

What you want to do is to create a 2-email sequence (one to deliver the freebie and one to introduce an offer). Now I get that delivering a freebie doesn’t sound like a sales process, but let’s take a closer look, k?

First off, you send an email that delivers your freebie. No brainer, right? You’ll want to tag subscribers with this particular freebie and then you can:

  • Send them weekly updates and blog posts
  • Tell them about a product you’re creating that is related to the freebie and offers tons more value
  • Tell them about a service you provide, again related to the freebie
  • Share an affiliate product that will help them implement an action step in your freebie

Can you see how this is shaping up into a bangin’ sales process?

Now that you know your audience and what they’re trying to achieve, your job is to build a relationship with them and get them excited about buying.

Of course, I’m not suggesting you bombard subscribers with salesy emails, but you get my gist. Setting up an email sequence to deliver your freebie is the first step in building your sales process, and it’s all going to happen on the same platform.

Looking for an email service provider? I recently switched from Infusionsoft to ConvertKit and am loving it. MailChimp is a good option here too.

9) Plugins

WHERE TO PUT: SEE BELOW

Let’s take a look at some plugins that will help turn your website into a sales machine. I’ve already shared Thrive Leads and Thrive Content Builder, which you can purchase at Thrive Themes. Here’s how to use other plugins that will turbocharge your website:

Shareaholic

Put at the bottom of your posts

See the social media buttons at the bottom of this post? Those are share buttons from Shareaholic, which is a free plugin. Woop Woop! Share buttons encourage people to share your posts and send a strong social signal that your content is popular.

You can also place share buttons at the top of your posts or on the left side. I’m excited to try Social Warfare, but right now I’m shying away from their $25 monthly fees.

Contextual Related Posts

Put below your share buttons

A lot of what we’re doing with plugins is encouraging people to click through to other sections of our website. That’s exactly what Contextual Related Posts does best. Once you install this plugin, you can display 3-4 related posts based on the content of your current post. It’s easy to tweak the design too.

Google Analytics

Add to the <head> tag of your website

If you hired a sales person, you wouldn’t cross your fingers and hope for the best. You would track and measure their performance. The same is true with your website. You have to know which pages are most popular so you can optimize them for even more conversions.

Many themes have a clear section for adding Google Analytics, so you may not need this. But in case things get wonky and it’s not as easy as it seems, install this plugin, add your code, and you’re all set.

I recommend logging in to Google Analytics to check your site’s performance at least once a month.

Yoast SEO

Nothing to “put” here. Simply follow the SEO prompts at the bottom of the WordPress edit window.

Popping up in search engines doesn’t happen overnight, but anything worth having is worth waiting for, right? That’s how SEO works. You lay the groundwork, plant your seeds, and then wait for spring.

I’ve been spending a lot of time on SEO lately, and let me just say that it’s a big deal.

Get more traffic? Check.
Get clear on your ideal customers? Check.
Create better content? Check.

If you’re wondering how to make a blog post SEO-friendly and haven’t already installed this plugin yet, I say get on it. What Yoast SEO will do is prompt you with a checklist of things that will help you optimize your blog posts. Once you see a green light (right up there near the Publish button), you’re all set.

While this handy tool doesn’t replace SEO keywords or even Google’s ranking algorithms, it will help you optimize your posts with SEO-friendly content, title, headings, tags, descriptions, images, and more.

Need more SEO tips? I cover the basics of it here. If you want, you can also download the SEO checklist I created so you know how to get your posts ranked on Google. Click the image below to download.

SEO Checklist For Creating An SEO-Friendly Website

Related: 12 Blogger Plugins to Skyrocket Your Blog

Related: 7 Things Every Blogger Should Do After You Hit Publish

There you go! Those are my 9 website optimization tips to help you put your blog on autopilot and generate leads and sales while you sleep. Nite nite.

by
15 Ways to Make Your Brand Stand Out | Struggling to attract your dream customers? Ready to stand out and get noticed online? This post was created just for you. It include 15 things bloggers and entrepreneurs can do to stand out above the rest and effortlessly attract your ideal customers. Click through to see all the tips!

15 Ways to Make Your Brand Stand Out | A step-by-step guide to help you effortlessly attract the right people to your business, including branding tips, personal branding tips, branding design, branding identity, and a customer avatar worksheet you can start using today! #branding #brand #personalbranding #designlovers

Does the thought of creating images, brand statements, and style guides put a big smile on your face?

I wrote this post a while back about creating a branding system for your business, and since then I’ve learned so many things that I can’t wait to share with you.

Now, to be fair, I can’t say that branding is my favorite topic just yet. To do it right, you’ve got to be relentless about every single detail and element. Ugh.

And does “branding your blog” even sound half as sexy as getting thousands of subscribers?

No to that…

But that’s not the question we should be asking. The real question is Why do we need to brand ourselves at all?

I’ve been thinking about this one for a while, and here’s what I’ve got:

  • First off, if we don’t define our brands, other people will do it for us, and that might not be a good thing.
  • If we’re going to stand out the way we truly want, branding is something we can’t afford to overlook.
  • Branding with purpose and intention will help us attract more of the right people to our blog.
  • We want visibility, baby!

We’re not building wallflower businesses here, k? We’re building climb-to-the-top-of-the-mountain, shout-me-loud brands that people notice.

So what are the things you can do to make sure your brand stands out above the rest? Let’s take a look!

1. Be consistent

This is one of the most important aspects of building a strong brand. There are a gazillion ways that people will find you and a gazillion different brands out there.

How do you rise above all that noise?

Pay attention to everything. Deets like your website, social media, fonts, colors, vibe, voice, the people you hang with, the emails you send, the way you respond to blog comments…all of it frames the way people think about you and your brand.

Your goal should be to present a consistent and harmonious brand image everywhere, online and offline.

For example, if you saw your pin in your Pinterest feed, would you immediately recognize your brand? That’s the kind of consistency and detail we’re aiming for!

The best way to stay consistent with your brand is to use The Build My Brand Toolkit and choose styles for everything…colors, fonts, images, social media, messaging, web copy…all of it. It’s like a “brand in a box” FULL of everything you need to build an epic brand that attracts your ideal customer. It may be just what you’re looking for! Learn more about The Build My Brand Toolkit.

2. Take a stand

You may not think this is an important step, and I get it. Trust me though, it’s a biggie.

Not only for the reasons listed here but because taking a stand will help you guide your brand in the right direction. Think of this as if you’re drawing a line in the sand between your tribe and everyone else.

Everything you do with your brand is going to etch that line deeper and deeper. With me?

Being 100% confident in what you stand for is one of the things that will help you effortlessly attract more of your dream customers. Those who heart what you heart will naturally be attracted to your brand’s purpose.

No better way to stand out than that, in my book…

3. Let your personality shine through

So, this thing just happened that’s a perfect example…

I’ve been creating some nutrition products with my brother, Dave, and yesterday he sent me a video to review.

Now, I didn’t have the heart to tell him this, but I started watching the first video and nearly fell asleep in less than 20 seconds.

His voice was literally knocking me out cold! It was completely dull, flat and lifeless. I honestly didn’t even want to hear what he was saying.

The funny thing is that I was so mesmerized by his earlier videos… I listened straight through each of them, stopping and pausing to take notes and rewinding to make sure I got all of it.

See the difference here? I wanted to hear more vs. couldn’t listen to another minute!

#LONGSTORYSHORT It’s your shiny personality (even more than what you say) that makes your brand truly stand out. Don’t be afraid to show the real you! Your audience will love you all the more for it, plus you’ll have a much easier time driving traffic to your posts. Promise.

4. Be your brand every minute

Hmmm…this one can be scary.

Truth is that building an epic brand isn’t something that just happens. You have to steer the ship, and one of the best ways to steer it in the right direction is to live and breathe your brand ALL THE TIME.

When I asked my brother what happened with his videos, he said that he just “wasn’t into it anymore”. He’d been working on those video trainings for so long, he just wanted to be done already.

Sound familiar?

We’ve all been there, where you feel like you can’t muster up the energy for another post, podcast, video or freebie. Creating content requires a huge amount of effort!

But what happened with Dave is an example of what happens when you forget to be your brand every minute.

Your content will start sounding off-brand and just plain icky, like you’re talking to a corpse. Definitely not the way to make your brand stand out!

#MORALOFTHESTORY Don’t push yourself through a funk just to “get it done”. This is one of those things where, if we really want to stand out, we have to be fired up and in character all day, every day. If you need to, walk away for a bit and come back when you feel more energized.

5. Tell your story

Want to really stand out among the hundreds of people in your niche doing the same thing as you?

It’s right there on your About Page! Bump.

No one in the universe has the exact same story as you, special girl. When you share the why behind your brand, and the experiences that make you so uniquely qualified to solve X problem, that’s where the magic really happens.

When you think about it, telling stories is a natural exchange. It’s what we all do when we make new friends. See how I worked my brother’s bit into this post?

What ways can you infuse your story into your content? How will you shake hands with your peeps to let them know that you get them and give them a peak into your world too?

6. Host a challenge

This one is so exciting! I’m about to launch my first challenge and have to admit I have a butterfly-in-my-stomach feeling around it. Wonder if you guys are going to like it or not? Guess I’ll find out soon!

If you’re curious, it’s the Higher Purpose, Higher Profit Challenge. It’ll walk you important things like:

  • Narrowing down all of your amazing ideas to just one
  • Finding the sweet spot in your business
  • Gaining clarity over the one thing you were born to do
  • Building a tribe around your brand

If you’re interested in this, let me know in the comments and I’ll keep you posted when the challenge starts.

I get excited by challenges because I think they’re a great way to connect with you guys and get a feel for where you’re at in your business, what you’re struggling with, and how I can tailor my content to help you.

7. Create a brand style guide

I know you’re probably thinking Do I really need a style guide right now? There are so many other things I have to focus on with my blog business. I can’t even get my head around this yet!

I’m with you on this one. I didn’t even think about creating a style guide until I was 2 years into my business.

Here’s the thing though:

I started noticing that my brand was looking a bit fragmented and all over the place. I was feeling fragmented too, and I knew my confusion was seeping into my brand materials.

Every time I created a pin, I’d start with a blank canvas, which for me was a big huge playpen. Every pin was an entirely new creation and experiment. Looking back, everything took much longer as a result. Oooh, let me try this pretty font. I really like this photo too, can I make that work? My pink color won’t work with the photo, though. It needs a peach color – lemme change it real quick…

Can you see things unraveling here?

There’s nothing wrong with creativity like this. But when you freestyle your brand in this way, things can start getting confusing for both you and your audience FAST.

So if you want to really stand out (and I know you do!), you have to create clear boundaries around your brand’s style.

It’s ok to experiment a bit until you find your voice, but at some point, you’ll need to pull in the reins and decide exactly which colors, fonts, imagery, and graphics you will use for your brand.

Since we’re on track to build an epic brand AND blog biz, and since all successful brands use style guides, we need one too, don’t ya think?

A style guide is just ONE of the many brand elements you’ll create with The Build My Brand Toolkit. It’s a complete done-for-you branding system that includes all your visual brand elements (logo, colors, fonts, social media templates, style guide) PLUS your brand copy (About page, Home page, blog tone and style) and more! Click the image below to learn more.
The Build My Brand Tool Kit gives you everything you need to brand yourself like a pro! Click here to learn more.8. Check your online presence

Next up, take a look at your entire web presence and make sure it all fits your brand’s style and purpose.

Here’s a quick list of places to look:

  • Blog or website
  • Blog posts
  • Blog post images
  • Secondary post images
  • Opt-ins + forms
  • Forms
  • Buttons + links
  • Landing pages
  • Pins
  • Social media image templates
  • Social media profiles

I’m sure there’s more to add to this list. If you think of any others, please share!

As you go through everything, ask yourself these questions:

  • Do I have the same colors, fonts, and graphics everywhere?
  • Will people be able to spot my pins right way?
  • When someone reads my blog, is it fun and relevant to them?
  • Are there any odd graphics/images that jump out in an icky, outdated way?

You know what to do here…update, tweak, edit, delete. Woop Woop!

9. Update bios and descriptions

Your biz probably has experienced a lot of twists and turns as you’ve learned more about your audience and your business.

So my question for you is:

Are your bios and descriptions right there with you every time you shift gears or are they a few steps behind? If you’re like me, you check your Twitter profile every now and then and think Huh? That’s not me. That was like 6 months ago.

Let’s whip our bios into shape. We want to take people on our amazing ride, not leave them behind, right?

Here are a few places to look, edit, update:

  • Author bio
  • Blog sidebar bio
  • Speaker bio
  • Media kit
  • Social media profiles
  • Blogger outreach
  • Short description
  • Long descriptions

10. Master social media

Gotta get visible, baby!

Speaking of which, I wrote this post on creating a social media strategy that will help you stand out, get visible, and drive traffic.

What you want to do is to pick 1-2 platforms and really master those first. Don’t worry about trying to be everywhere at once. It’s not going to work (trust me, I’ve tried). Once you’re really making progress on those, move on to the others.

If you plan on starting with Pinterest, here’s how to get massive traffic from it.

What you’re really going for is to create a social media system where you engage and share on autopilot. That means your goal is to spend as little time on social media as possible. Social media can be overwhelming and time-consuming, so you don’t want to fall into a rabbit hole with it.

Ok, don’t shoot me for saying this, but…

When you’re starting out, you will need to spend more time than you want. If you hang in there with me though, this is another one of those things that will save you incredible amounts of time later on, once you set up scheduling, automation, and maybe even outsourcing. Pinky swear.

If you really want to level up your social media game, grab this social media cheat sheet and content calendar with 24 days of content to share.

A social media cheat sheet for bloggers and entrepreneurs so you know what to post and when, plus tools to help you automate everything from scheduling, to growth and engagement, and creating images.

11. Blog consistently

The second half of visibility, and something we can’t forget, is to post consistently.

It doesn’t have to be every day, and it doesn’t have to be 2x a week like some other bloggers tell you. I’ve tried like crazy to post more than once a week and just can’t do it! Grrrr…so frustrating!

Still, staying consistent with my blogging schedule (1x a week) has made it possible to grow my traffic to over 35K in just a few months.

So, we get it. We know that we have to blog regularly.

I’m so excited about the new content calendar template I created. It will help you plan the content you’re going to share so you’re always one step ahead of blogging instead of five steps behind. Been there, done that! You can download the done-for-you calendar template right here.

You’re probably thinking How do I get ahead of blogging? I always feel like I’m falling behind schedule!

Honestly, I’d love to know the secret to this one myself! Seriously though, there are a few things we can do to maintain a consistent schedule:

  • First, block out time at the beginning of the month to write all of your blog posts (you can use my time blocking template if you want).
  • Keep a laundry list of blog post ideas, arranged by theme. Use Evernote or Google docs for this.
  • Gather ideas in Trello. I’m so pumped about Trello, guys. I’ve just taken a peak and can’t say a whole lot yet, but it looks like you can create boards/cards for just about anything. Editorial calendar, anyone?
  • Create a weekly schedule where you write, proof, SEO, create images, and promote, all on separate days.

That’s all I have so far, but I’ll be looking into more ways to get ahead of blogging, because we need it!

Related: 32 Insanely Easy Ways to Boost Your Blog Traffic for Free

12. Watermark your images

Yep, you have to brand everything.

Add your logo, colors, fonts, and other brand elements to your blog and social media images. This way people will recognize your brand in their feeds.

And if you’re curious about how to share photoshopped images on Instagram, I highly recommend Planoly for uploading and scheduling posts directly from your desktop. Woo!

Related: How to Create Branded Social Media Images with Photoshop

13. Host a webinar

Another one I’m excited about. I’m no master of webinars yet (Amy Porterfield is all over this one). Buut, I have done 2 and they were much easier than I thought. Scary, but easy.

Here’s why you and I both want to do more of them:

Everyone’s blogging.
Not everyone is webinar’ing
.

So if we host more webinars, we’re sure to stand out from everyone else.  Let’s set a goal to do at least one webinar by the end of the year, k?

14. Review your offers

Silly question, would you rather be:

  • A commodity (just like everyone else)?
  • The go-to-authority (people seek you out for your expertise)?

Uh, duh… Of course, you’re the expert.

That means you have to be fierce about narrowing down your offers to just those things that you’re crazy passionate about and/or know really well.

The reason is that when you try to be all things to all people, you actually water down your brand and confuse the customers you most want to attract. They just won’t get that you’re a good fit for them.

The way to switch that all around is to review your offers every 3-6 months and make sure that they:

  • Fit your current brand statement and mission
  • Are unique enough to charge premium prices
  • Solve one specific problem for one specific person

If you want help here, grab my Find your Niche workbook, which covers all of this and more. Click the image below to download.

Click here to download my Find your Blog Niche Workbook!


What you’re aiming for is to wrap your offers in a pretty peach bow (insert your brand color), so your peeps know what box you’re in. 🙂

15. Update blog categories

Categories are easy to overlook because, well, you just don’t think about them every day, right? I happen to be going through a rebrand right now, which is why they’re fresh on my mind (and how I know that as your blog biz shifts, your blog categories will too).

Is it better to have tons of categories or just a handful?

It really depends on your preference, but here again, I recommend cutting the fat where you can. The more focused you can be, the better.

First of all, when you give people too many categories, they won’t know what to click on. Even I’m confused by the laundry list I see when I’m selecting categories for my posts.

Since we’re really shining brightly now, let’s get rid of this last fuzziness, shall we?

Take a look at your categories and narrow them down to just the ones that are relevant to your brand and audience.

Tip: If you have a WordPress blog, leave your existing categories as is, meaning don’t delete. It gets a little funky with SEO and XML sitemaps when you do this. Instead, add new categories and then manually update your posts.

So there you go! Those are my top 15 ways to make your brand stand out. Which ones are you working on?


by
Time Blocking Tips for a Super Simple Weekly Schedule | Feeling overwhelmed by all the things you have to do? Not sure how you’re going to get them all done? This post will help! It includes 12 productivity hacks for entrepreneurs and bloggers to help you simplify your week and get tons of stuff done, PLUS a free time blocking template. Click through to see all the tips!

Weekly Time Blocking Template for a Super Simple Schedule | Feeling overwhelmed by all the things you have to do? Not sure how you’re going to get them all done? This post will help! It includes 12 productivity hacks for entrepreneurs and bloggers to help you simplify your week and get tons of stuff done, PLUS a free time blocking template. Click through to see all the tips!You know what every entrepreneur has in common? We all use a weekly schedule. We also have a gazillion things to put on the schedule and not enough time to get to everything.

But feeling scattered, flustered, and generally overwhelmed can be one of the worst feelings, especially when you feel like you’re doing everything *right* to take your business to the next level.

Having a to-do list that crushes you – instead of you crushing it – is just not going to work.

A while back I shared the block scheduling template I use to organize my week and get things done.

Hands-down, that is my most popular post to date. So if you feel like you’re juggling too many things, you’re not alone, sister.

So today, I’m sharing a handful of things that will help you get the most benefit from the time blocking template and block scheduling in general. My goal is to help you get everything done in a way that makes you feel calm, centered, and in control of your week.

Now, you may be thinking That’s easier said than done, Sandra! Been there, done that.

I hear ya. There’s a way to make sure you stay on track with your schedule, and a lot of it has to do with how you manage time blocking, which I’m going to show you how to do that right now!

Click here to download the time blocking template and start planning your week.

[ SETTING GOALS AND TASKS ]

First things first, we need to set some goals so that we have a clear focus:

1) Create a high-level plan

Before we start time blocking, it’s important to have high-level goals and milestones in mind for what you want to achieve. If you’ve followed my last post, you already have or are working on your 12-month plan (at a minimum, your 3-month plan). This will make is so much easier to plan your week, because you’ll have clearly-defined focus areas and priorities.

When you’re creating goals and milestones, there’s no need to be super specific. That will come later. What you’re aiming for here is to get a bird’s eye view of your business and the general things you should working on.

2) Make a list of tasks

Next up, break down your big vision goals into weekly tasks so you can start achieving them.

Yep. I’m sayin’ it again because I really want you to get this. Make sure you set tasks for each of the four buckets from our Blog Profit Plan (content, traffic, subscribers, profit).

Beyond that, the most important step here, and what you can’t forget to do, is to prioritize the tasks on your work schedule template. Some things on your list will be a high priority and others not so much. Your high priority tasks are the ones you MUST do, no excuses! That means when other things come up, you postpone them or put them aside so you can address the things you absolutely have to get done.

I know, so much easier to say than to do! This is one of those things that will make a world of difference if you can stick to it.

Essentially, you’ll be breaking down your tasks like this:

  • Must-do: will take over 2 hours
  • Must-do: 1-2 hours
  • Must-do: 15-30 minutes
  • Nice-to-do: over 2 hours
  • Nice-to-do: 1-2 hours
  • Nice-to-do: 15-30 minutes

If you want, you can use different colors for must-do vs nice-to-do tasks so you can differentiate them.

Let me clarify one thing that will help you get the most benefit from time blocking:

Nice-to-do tasks are just that: it would be nice if you can get to them. That means it would be a major perk if, once you complete your must-do’s, you have extra time to crush these too.  If you don’t get to them, no sweat. You’ll simply roll them over to the next week (I’m going to show you how to do that next).

Must-do tasks get scheduled first. Nice-to-do’s get put on the calendar next. With me?

3) Start time blocking

Nothing makes you feel more defeated than when you have a million things to do and at the end of the day you haven’t gotten to one of them. No more of that noise with time blocking, k? We’re going to know how much we can really get done on any given day so that we can feel pumped and excited!

How do we do it?

Great question! First off, we’re going to create time blocks for each task.  Then, we’re going to get very specific with what we plan to do and make sure we account for every minute of our workday.

HEAD’S UP. You want errrrthang in there. Even personal tasks.

So if your daughter’s play date is on Wednesday at 3 pm, make sure you block out time for it. Dropping shirts off to the cleaners on Tuesday? Block it out, baby! You’d be amazed at how much you can get done when you put it ALL on your calendar.

It you want, you can use my time blocking template to create your weekly schedule. Click the image below to download it.

Download my Time Block Template to help you increase productivity and get even more stuff done each week!


I want you to be super successful with time blocking. In the next steps, I’m sharing productivity hacks and tips that will help get the most benefit from it.

Let’s start working the template.

[ HOW TO WORK THE TIME BLOCK TEMPLATE ]

4) Schedule must-do’s when you’re most productive

This one’s a biggie: Schedule must-do tasks during your most productive hours.

Are you a night owl? Block out time to create content at night. Do you like to do your deep work before the world wakes up? Make sure you use that time to do the things that ONLY YOU can do. Don’t waste it on checking your email or Instagram.

5) Schedule tasks at the same time each day

Let’s say you like to create content in the morning, break for lunch at 1:00, and manage client projects and meetings in the afternoon, and workout at 6:30pm.

These are called recurring tasks. Try to block out the same time for them to give your days structure and help you get into a routine.

For instance, I spend ten minutes on social media in the morning, and another ten minutes at night when I’m catching up on Hulu. I also like to coordinate with my team in the morning. I spend the rest of the day creating content and working on client projects.

I recommend planning everything on your weekly schedule template like this, even those events that involve other people (that you can’t reschedule or cancel). Think of them as “recurring events” and plan them at the same time.

6) Include everything that might pop up

This is jumping off from the previous step.

What derails my schedule more than anything else are the things I forget I need to do. Like running to the bank, working out, picking up a prescription, going to Home Depot. I call them the incidentals.

Incidentals need to be on your schedule. Otherwise, you’ll think you can write that entire blog post today but whoops! You can’t really. That oversight bleeds into the next day, and the next, and so on.

Once you start getting off track like this, it’s easy to feel defeated. Better to plan for everything and set yourself up for success.

7) Focus on one task at a time

Whatever you do, stop multi-tasking. Right now! There’s no way you can email a client, jump on Facebook, create an Instagram image, schedule your social media, and write a post at the same time.

So stop thinking that you can, friend!

Instead, focus on one thing at a time. It’s on your time schedule template, which means you’ve made it a priority and identified that it needs to get done. Now it’s time to follow through with it. This is where done means done (not “almost done”, not “about to start”). Force yourself to finish one task before you move on.

And if you don’t get to the next task for two weeks, that’s perfectly okay.

8) Give yourself enough time to complete tasks

Some of your two-hour tasks will wind up taking you eight hours. Heck, you may not even finish them today.

Those gaps that can mess up your schedule and make you feel defeated, even when you’re crushing your to-do list.

The best way to avoid this is to be as accurate and realistic as you possibly can. Make sure you block out enough time for each task. Then pad in some wiggle room.

For instance, if you plan on spending two hours to create a lead magnet, block out four hours for it. If you don’t know how long something will take, triple your time estimate. Let’s say you need to schedule time to outline your first course. Instead of blocking out two hours, block out six hours.

Whatever you do, don’t trick yourself into thinking you can get an eight-hour task done in three!

I speak from experience on this one:

I’d block out three hours to write a post because I wanted to write it in three hours. To this day, my posts take me between five and six hours to write. And I’ve tried so many tricks to speed things up. Never happens, friend!

Point is, by wishing I could write my posts faster I would load up my schedule with more tasks:

  • Write post: 3 hrs
  • Social media graphics: 1 hr
  • Lunch: 1/2 hr
  • Create a freebie: 2 hrs
  • Record a video: 2 hrs

Can you see how going “overtime” on any one of these tasks can throw out your week, in a minute?

Try to be realistic when you’re using the time blocking template.

9) Turn off your cell phone and email

Like the plague!

Let’s face it, it’s waay easy to get distracted. I even find myself LOOKING for distractions.

I’ll check my junk mail, Pinterest, Facebook, Instagram, anything I can get my hands on. I’ll remember the eggplant lasagna recipe I want to try. That I forgot to text Laura. That I need to call John real quick.

We’re all victims of shiny object syndrome, especially with new tasks. When it’s too far, large, hard, confusing to tackle, we start reaching for busy things so we can feel like we’re being productive.

Being busy does not equal being productive.

So close your email, turn off your cell phone, and log out of Facebook and Instagram (yep, even the apps).

Don’t turn them on until you get your deep work done. You need to focus on what’s in front of you so you can get it done.

Your texts and emails will be there later. Promise 🙂

10) Review and reschedule

There will most definitely be tasks you can’t get to. You can count on that. 🙂

Whatever you do, don’t get flustered by it. That’s why we’re throwing a time blocking party. Woop Woop!

At the end of each day, review what you got done and reschedule anything that you didn’t. This way, you’ll wake up fresh the next day, ready to pick up where you left off.

Psst…Make sure you block out time to review your schedule. It usually takes me 15 minutes at the end of the day to review my schedule and shuffle things around for the next day.

11) Train your friends + family

You have your week schedule template, but let’s be real. You’re a one-person team, and only you know when and IF you need to get something done.

Remember, you’re answering to yourself now. Your friends and family may not think the time spent on your blog biz is valuable. Or, maybe they think working from home means you can run to the dry cleaners anytime you (they!) want.

(This is especially true if your biz is new and you have yet to earn money from it.)

Here’s where you have to play two roles:

Role one: Employer
Role two: Employee

As the employer, you decide which tasks need to get done. As the employee (hey there, that’s you too!), it’s up to you to get them done.

The only way you’re going to reach your goals is if you make them happen, so say no to random asks that interrupt your schedule.

You’ll likely get push-back here. But if you say no long enough, the asks will stop coming and this step will get a whole lot easier. Pinky swear.

12) Organize your workflow

This is a biggie. Much bigger than I thought initially.

Where do you keep all the ideas that pop in your head? Do you use Evernote?

How do you manage projects/team/tasks? Do you use Trello or Asana?

What about your files? Are they in Dropbox, and if so, how well are they organized?

Having a cluttered desktop is the enemy of an effective weekly planner template, including the time blocker. I know this to be true.

I’m notorious for creating a new Word doc for every new idea (gotta jot it down quick, right?). When I see them on my desktop the next morning, I’m instantly overwhelmed and flustered. It’s a whole different ball game when I take the time to place the docs in folders that make sense, with names that I recognize and understand.

I recommend coming up with standard workflows for all things administrative – right down to naming conventions – so you have what you need, where you need it, and when you need it (not a minute before). This will help you approach your day with a clear head so you can knock items off your list quickly.

If you want, you can use the time blocking template I created to help you plan your weekly schedule. Click the image below to download.

Download my Time Block Template to help you increase productivity and get even more stuff done each week!

There you have it! What’s your favorite time management tool? Have you tried time blocking?

by

4 Focus Areas to Build Your List Fast | Ready to get serious about getting more email subscribers? This post will help! It includes the exact 4 strategies I used to 10x my email list. Click through to get started growing your listYou know you need to grow your list, but what if you’re putting a lot of energy into it already and still only seeing 2-3 signups per day?

To that I say I feel your pain, friend. I was there not too long ago, and today, I’m growing my list at about 600-900 per month. Let me help you do the same…

Here are 4 focus areas for building your list and hitting your $$ goal:

1) Narrow down your niche

Why is this even important?

Because if you’re not growing your list as fast as you’d like, it could be that people don’t know how to digest what you’re writing.

People have a limited amount of space in their minds and need to be able to put you in a box. Give you a label, type thing. A girlfriend is different than a wife, a boy is different than a girl, a chair is different than a table. You get the gist. A travel blog is different than a cooking blog.

This doesn’t mean you can’t write about multiple things, but it does mean that people need to know what they are getting from you (and that niche is not a four-letter word!)

Plus, if YOU don’t even have an understanding of your own category, how can you expect others to? I’ve had so many clients come to me wondering why their content isn’t sticking, but then they stammer and stall when I ask them what they do and who they do it for.

To be fair, I’m at fault here too. When I first started blogging, I thought I was writing for my person but I was missing the mark entirely. Once I got my focus on, my list literally doubled, tripled and quadrupled.

#MORALOFTHESTORY Defining your one person and your one thing should be at the core of your list-building strategy.

2) Step up your social media game

Hopefully you’re optimizing your posts for SEO so people can find you through Google and Yahoo. But search traffic can take some time to build up. You have to be posting regularly and for some time before Google takes notice. In the meantime, start creating your own traffic source via social media.

Wanna know what that looks like?

Something like this:

  • You are everywhere, but then you pick 2-3 channels to become a ninja master of…You start building your audience, your business and your list at the same time.
  • You follow people who follow others in your niche. You follow people with relevant hashtags or keywords in their profile. You follow people who follow and comment on your posts.
  • Every time you publish a new post, share it everywhere. And then share it again a few days later. And then a week after that. And then one month later. I’m not saying you stalk people with your content, but the truth is you can’t be bashful about it. Feeds move quickly and your post can virtually disappear the minute you share it, so share it again and again to give it the best chance of people finding it. This blog promo plan will help you get started.

3) Create click-worthy freebies

Adding freebies (content upgrades) to my posts is the #1 thing that’s skyrocketed my list.

Ideally you’ll include a freebie in every blog post. Yes, that’s a lot to tackle but just so you know, it’s something to work toward. You can kick it off by adding a freebie to 5 of your most popular posts. If you’re curious, head over to Google Analytics (Behavior>Content>Landing Pages) to see which of your posts have the most page views.

What types of freebies to create?

The sky’s the limit. Cheat sheets, a PDF of the post, templates, swipe files, blueprints, checklists, Ebooks. Anything that will help your audience progress along their journey in a meaningful way. You don’t have to go crazy with it. Up to 10 pages is fine. It can even be a single page as long as it’s helpful. You don’t even need a fancy design. I know many successful bloggers copy their posts into Word, save as a pdf, and that’s it.

How to create your freebie?

My favorite tool is InDesign. There’s also Canva, Powerpoint, Keynote, Google Docs, Google Slides, and others.

Note: Not all freebies are created equal. Sign up rates depend largely on how relevant your post is to begin with, and how much your audience has a need for your freebie. Which, my friend, takes you back to tip #1.

4) Crank up the visual volume

This is a biggie. Such a biggie, and it’s still sinking in even for me. How your images look makes a huge difference in how much traffic your posts get.

You may know this already…over 75% of my traffic is from Pinterest, so it’s a no-brainer that I focus most of my efforts there.

HOLD UP – 75%?

Yep. Pinterest is huge for traffic. You definitely wanna get in on it. I literally spend hours tweaking, testing, refining, editing, chopping up my pins like some neurotic warrior princess.

And here’s how I know what visual content can do for your list:

A few months ago, I shared a pin that I knew would help my audience in a big way, and I wanted to share it in a BIG way too. So I saved my pin and kept checking in every day to see how many saves it got. After 2 weeks, it only got 400 saves and drove a tiny bit of traffic to my site. That bugged me, because a lot of people were missing out on my ridiculously helpful tip 🙂

So I created a second pin. This time I was more graphic, more descriptive. I made sure people knew what was behind the click and why they should take action. I even highlighted important points from my post. I went all out – there was no way people weren’t going to click, I thought.

And then poof! Just like that…

4 hours after I shared this new pin, it had more saves than the first one. PLUS, 15 people signed up within the first hour I shared it. Now get this. I was paying to promote my first pin, something like $200 a month. This new pin got more saves and shares than the pin I was paying for. That’s the power of visual content. I didn’t need to spend money to promote my pin anymore, because now I was getting crazy traffic.

#TIPOFTHEDAY Play around, look at other popular images, try different things, ABT (always be testing) and all that. If you know your post is what your audience needs, don’t settle for mediocre visuals. Make sure you shout it out loud and strong so it grabs people’s attention. Sometimes you have to shake things up a bit, right?


by
Font Pairings for the Web, Social Media and Blog Images! Plus, a FREE downloadable font inspiration kit to experiment with! Click through to see all the free fonts!

Hey there! My new kit, the Build My Brand Toolkit, is a ridiculously in-depth, step-by-step system FULL of everything you need to build an epic brand that stands out online. It may be just what you’re looking for! Learn more about the Build My Brand Toolkit.

I’ve been in a bit of a font craze lately, hunting for the perfect fonts to use for Pinterest and Instagram, and today I’m sharing some gems I discovered so you can use them too! If you want to rev up your creative genius even more, head over to dafont.com or Google fonts to find others you like – they’re all free. Woo hoo!

8 Font Pairings for Social Media + Blog Title Images:

Free Fonts and Font Pairings for Blog Images and Social Media | Get my complete font inspiration kit here. It's a great resource when you're looking for free fonts!Click here to download:

Helena Script;   Nexa Light;   Sweet Pea;   Marchy Script;  Playball;   Aaargh;   Gardenia;   Keytin;  Alex Brush;   Ecuyer Dax;   Chamomile Tea;   Thirsty Script;  Melanie BT;   KG Skinny;   Angelface;   Bebas Neue

8 Font Pairings for Web Headings + Text

Free Fonts and Font Pairings for Web Headings + Text | Get my complete font inspiration kit and resource to help you choose fonts for your brand.

Click here to download:

Montserrat;   Merriweather;   Minimo;   Pontano Sans;   Playfair Display;    Tradition Sans XLight;  Libre Baskerville;   Josefin Sans;   Melbourne;    Fauna One;   Raleway;   PT Sans;   Oswald;    Source Sans Pro;   Noto Sans;   Esteban

Fonts are just ONE of the many brand elements you’ll choose and create with the Build My Brand Toolkit. You’ll have an entire done-for-you branding system for all your visual elements (logo, colors, fonts, social media templates, style guide) PLUS your brand copy (About page, Home page, blog tone and style) and more. Click the image below to learn more!

The Build My Brand Tool Kit gives you everything you need to brand yourself like a pro! Click here to learn more.Some things to keep in mind when choosing fonts:

  • Make sure they’re super easy to read (no strain on the eyes, please!)
  • They should complement each other beautifully.
  • Test each character in a font family to make sure everything looks cohesive. Some fonts can have odd characters and numbers, like a  cap “G” that just looks funny, or a “17” that drops below the baseline and is hard to read. Play with the font a bit to make to make sure you’re happy with all of the characters and you won’t have any surprises later on.
  • Get creative with social media share images and blog title images. For branded quote images, why not try a bold condensed font paired with a delicate script? This will help you decide which of your title words you want to emphasize and draw attention to.
  • For your website, you can be creative with headings (think block-style or handwritten type). But for web text, stick with a simple sans-serif font. You want your readers to have an amazing experience when they interact with your brand without struggling to read what you’re saying.
  • You’d be surprised at how many interesting font combos you can create by using just one font family. To get the most out of each font, try to select a font family with many different weights (light, medium, bold, and black, etc). Open Sans and Source Sans Pro are great places to start here.
  • For logos, think about the uses and applications you’ll need for it ahead of time. I’m talking about more than your website here…uses like favicons (the icons you see in the web browser), social profiles, branded share images, and more. Your brand name and logo should be instantly recognizable, even in tiny pixels.

Want the Build My Brand Kit?

You’re seriously gonna looove it (I reach for mine all the time!). Learn more about the Build My Brand Tool Kit.

by