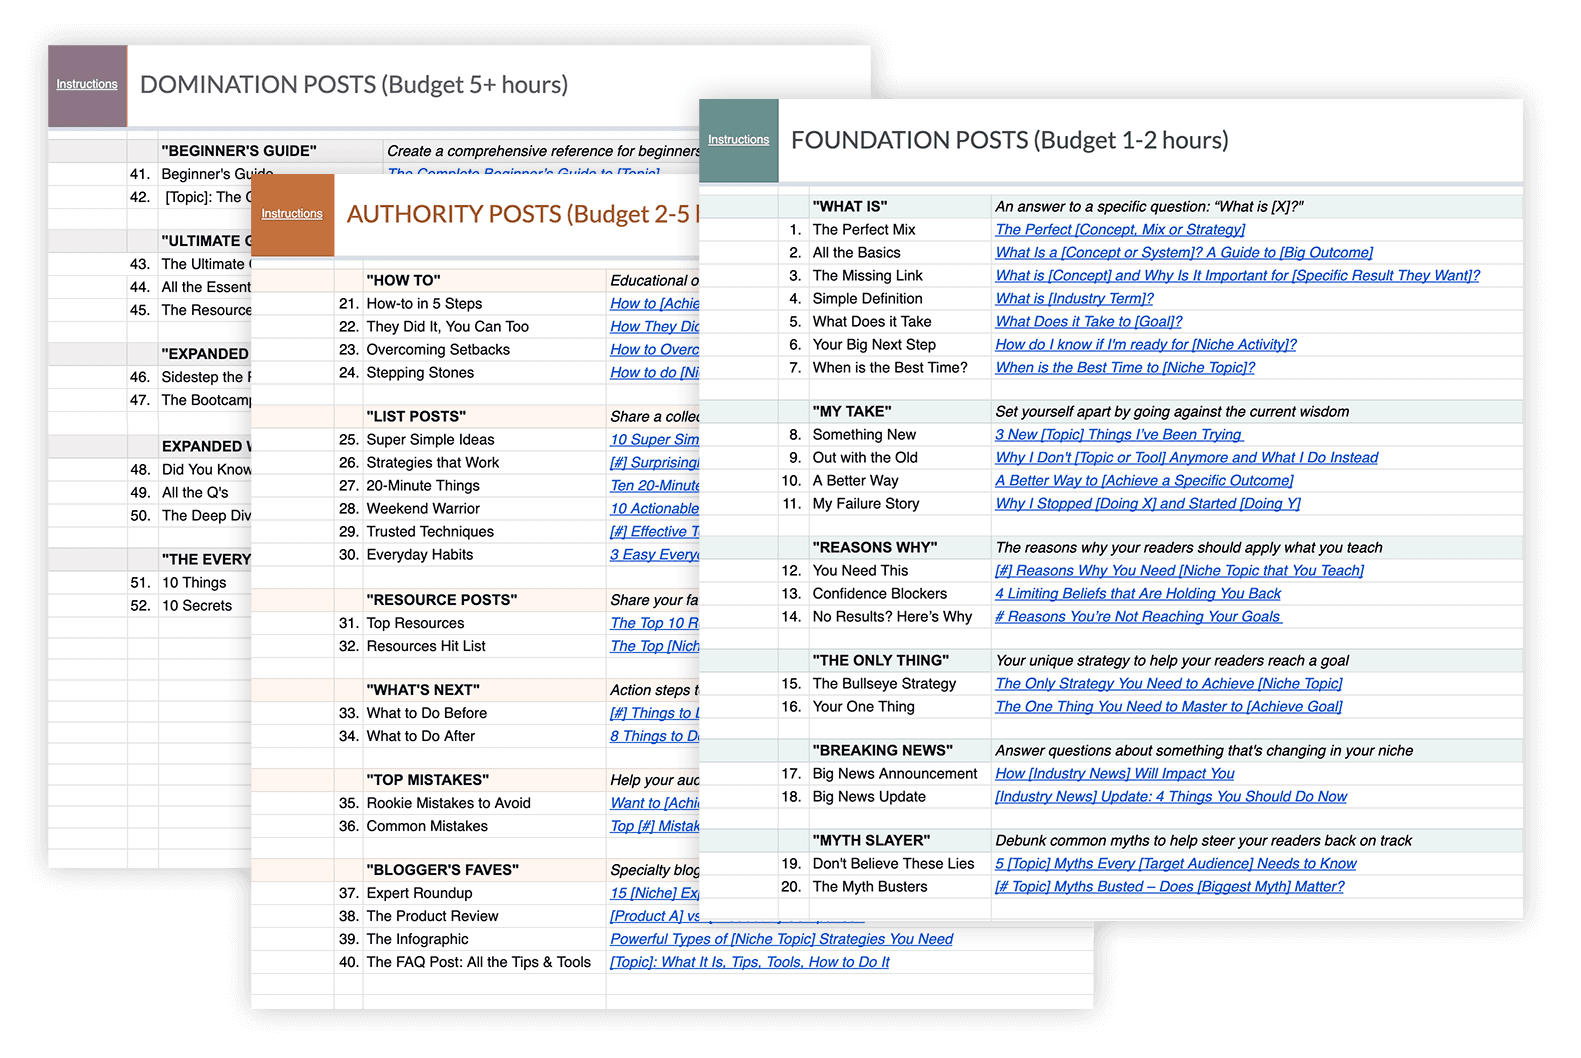
Note: The following blog post is an excerpt from the bonus lessons inside our bestselling Blog Post Vault.

List building tactics come and go, but content upgrades provide so much value to you and your site visitors that it’s safe to say this method of list-building is here to stay. If this is a new concept to you, let’s start from square one…

What is a Content Upgrade?

A content upgrade is a free opt-in incentive that relates to a piece of content in the top of your marketing funnel, usually a blog post. Because it’s highly relevant to the content they’re already consuming, it’s a no-brainer for them to sign up so they can continue getting help with the topic.

The idea is, your blog posts help your reader solve a problem part of the way —get an answer to a question, get instructions for how to do something, learn a strategy for achieving a goal, etc. — and your content upgrade will help them take the next steps.


Think about it this way…

If somebody is reading your post, you know something about them. They’re interested in the topic and have questions and problems that relate to that topic… otherwise, they wouldn’t be there. And when you know something specific about what your audience needs, it’s easier to create lead magnets that allow you to keep helping them.  

Content upgrades help your site visitors take the next small step. You’ll offer it for free with an invitation to opt-in to your mailing list and from there you can continue helping and nurturing them with emails.  

For example…

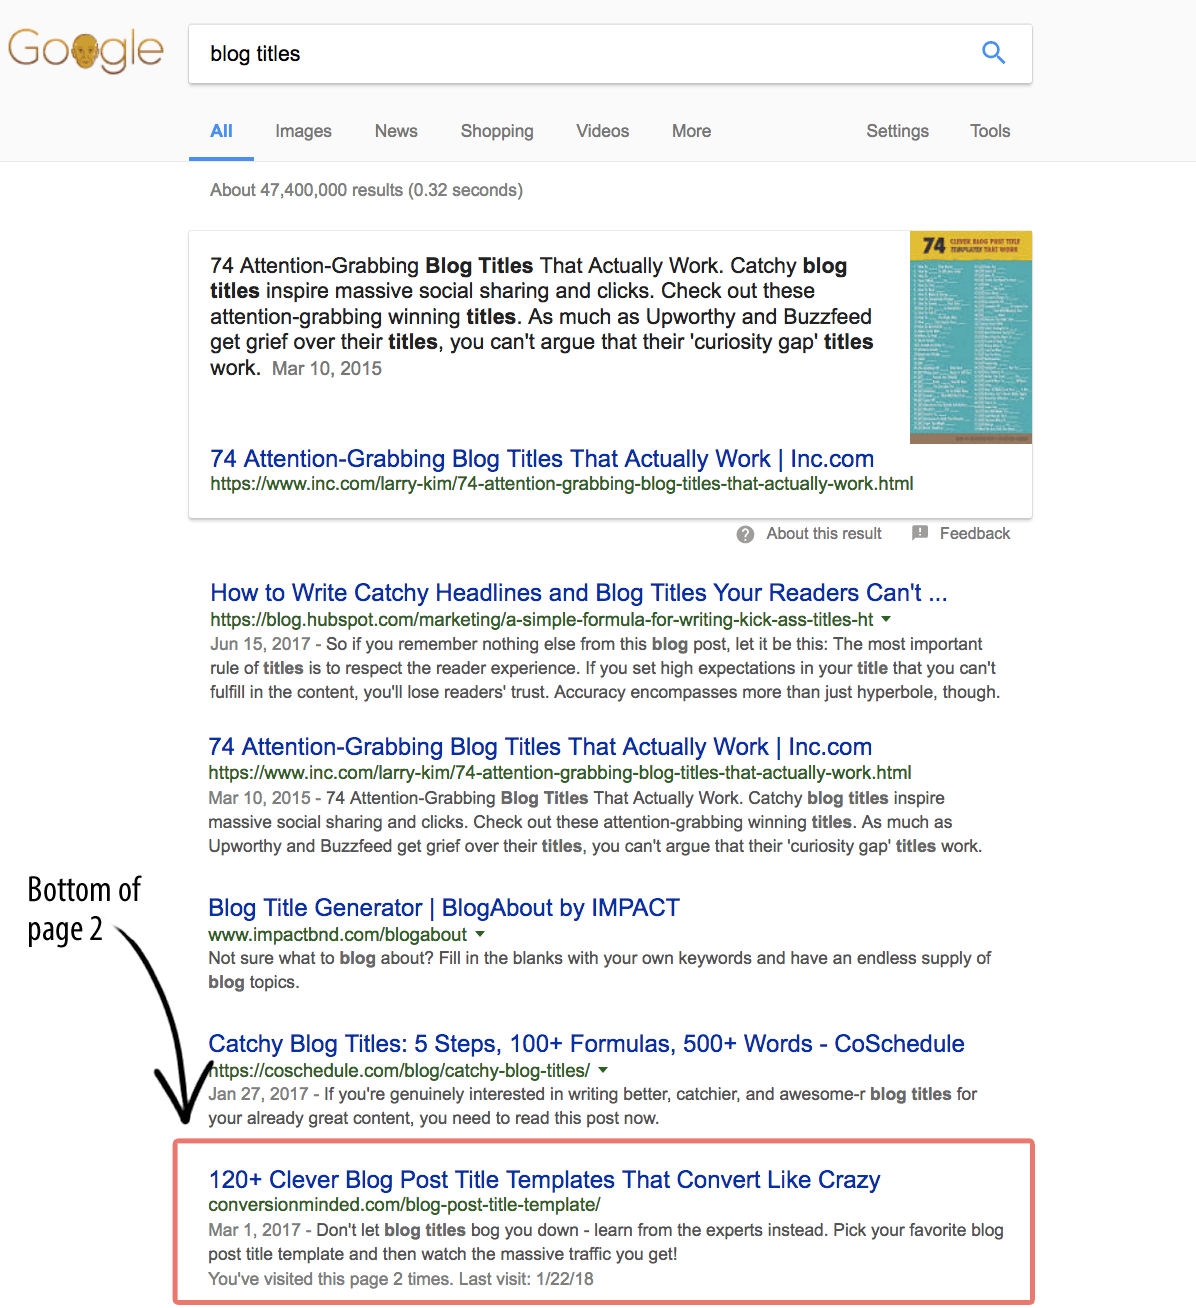
Say you’ve written a blog post about creating click-worthy headlines for blog posts. You address why it’s important, give examples of effective headlines, and share your favorite tools and resources for coming up with scroll-stopping headlines. 

At this point, ask yourself:

  • What do they need to know next? 
  • What will help them put these concepts into action? 
  • What’s the “easy button?”

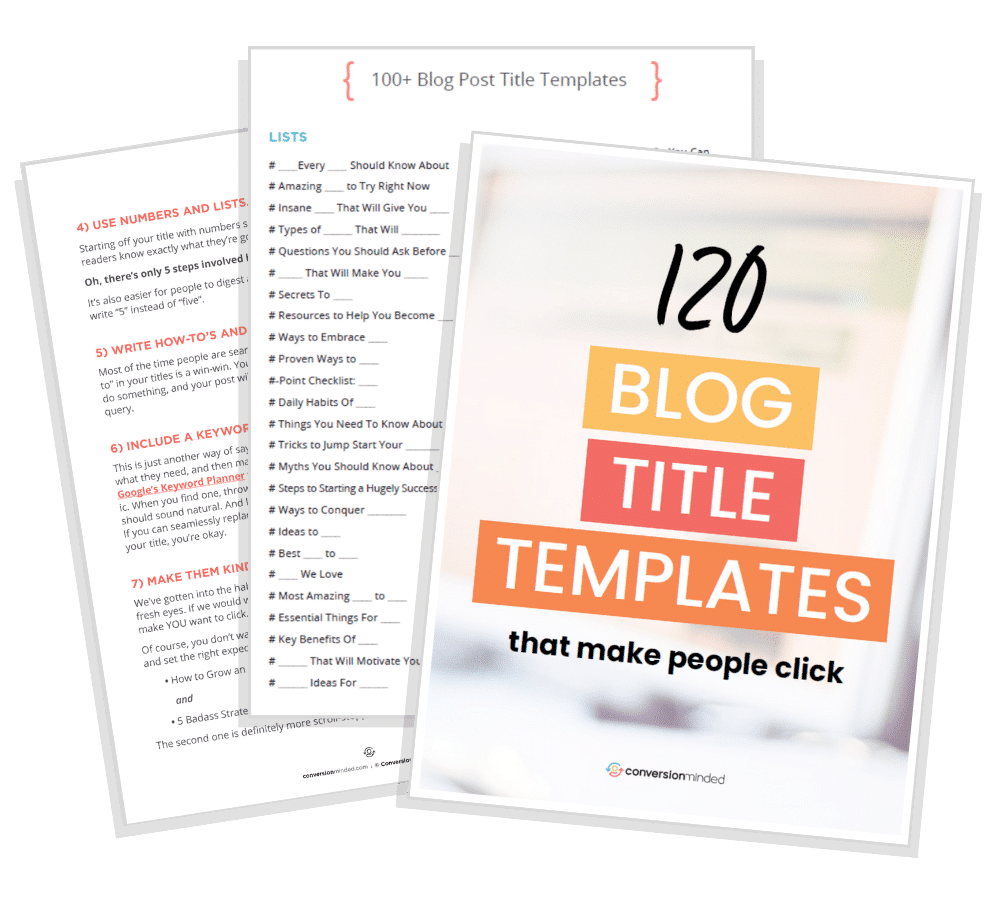
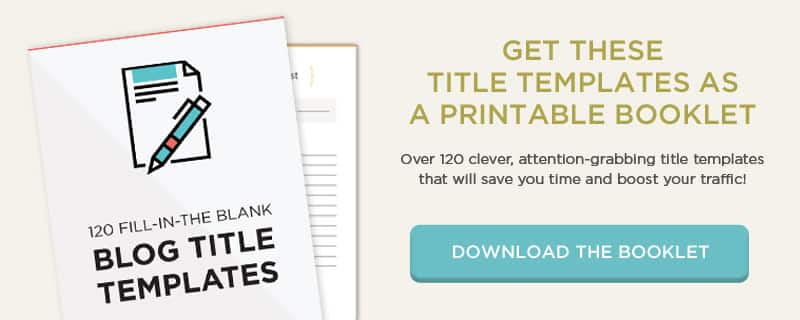
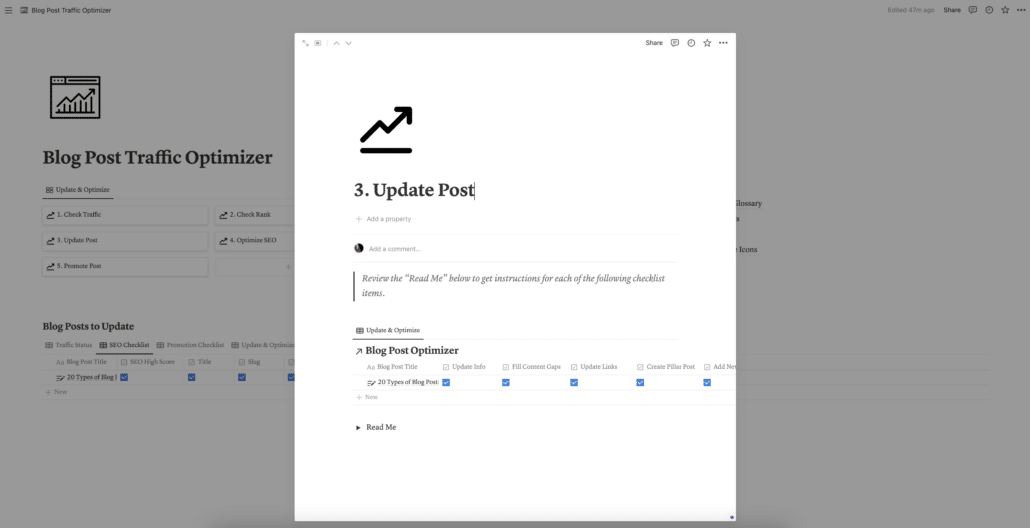
In this scenario, a relevant content upgrade might be a .pdf of proven headline formulas, a list of power words, or a swipe file of your highest-converting headlines. (This is an actual content upgrade example from a blog post we wrote called, “120 Blog Post Title Ideas”)

Download this booklet of over 120 fill-in-the-blank blog post title templates that work!

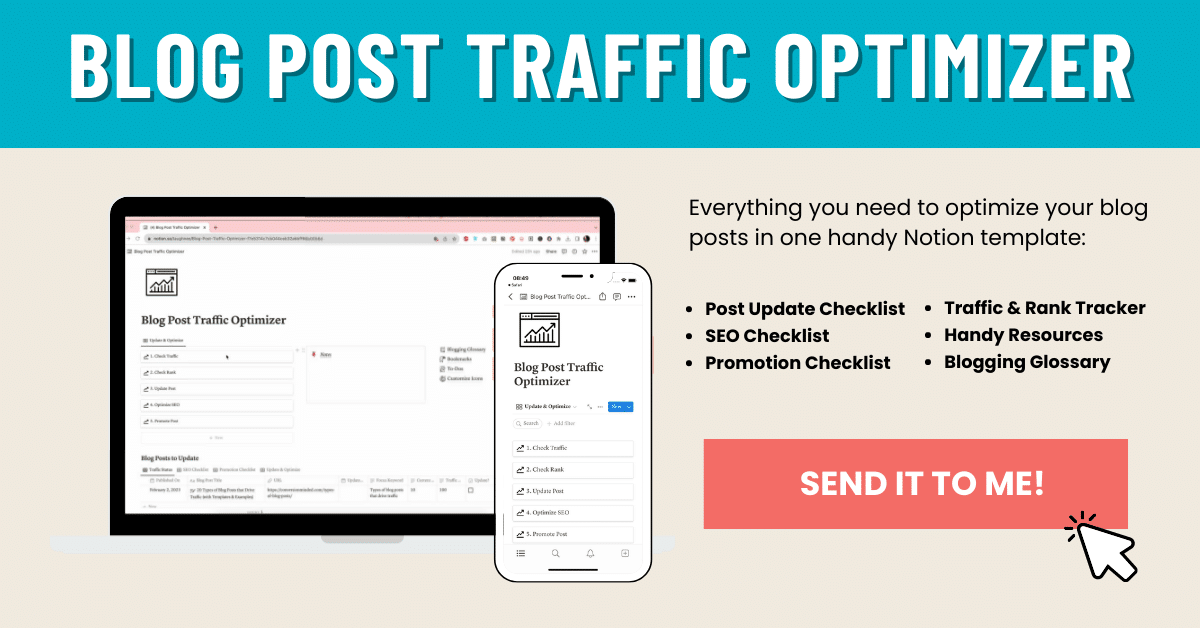
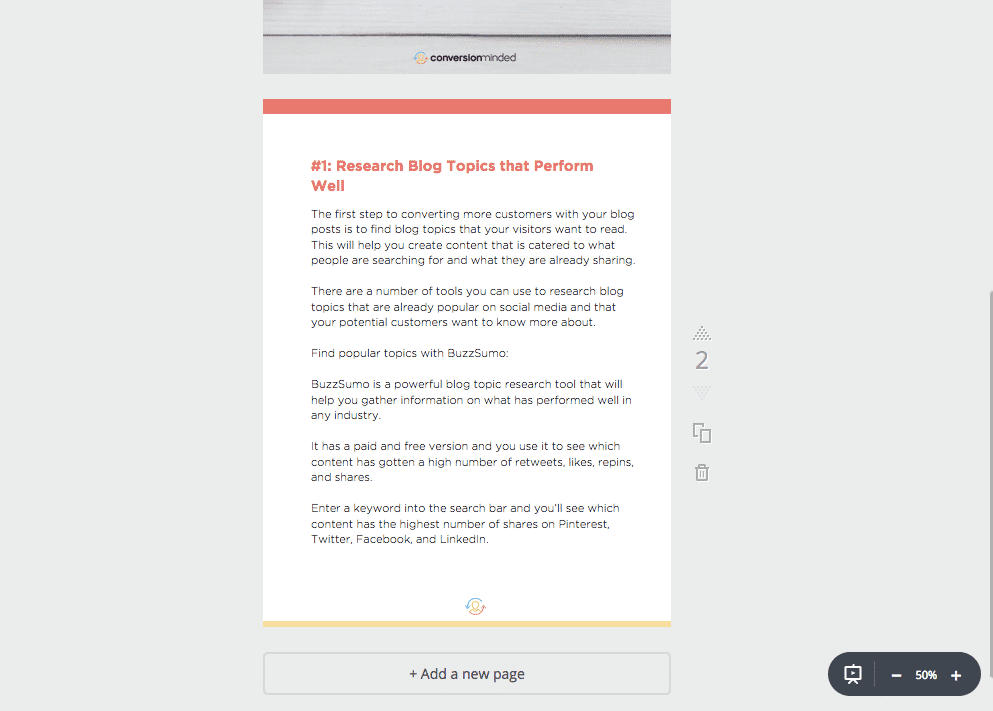
Inside our Blog Post Vault templates, our students are prompted to promote their freebies within in the body of their blog posts. As a general rule of thumb, the more relevant the freebie is to your post’s topic, the more likely your readers will be to opt-in.


Every one of your blog posts should be taking people to the next step (to get on your email list), otherwise, you’re giving away free value but leaving money on the table.

If you don’t already have a relevant freebie, the easiest, fastest, and most effective ways to generate leads and build your list is to create a content upgrade.

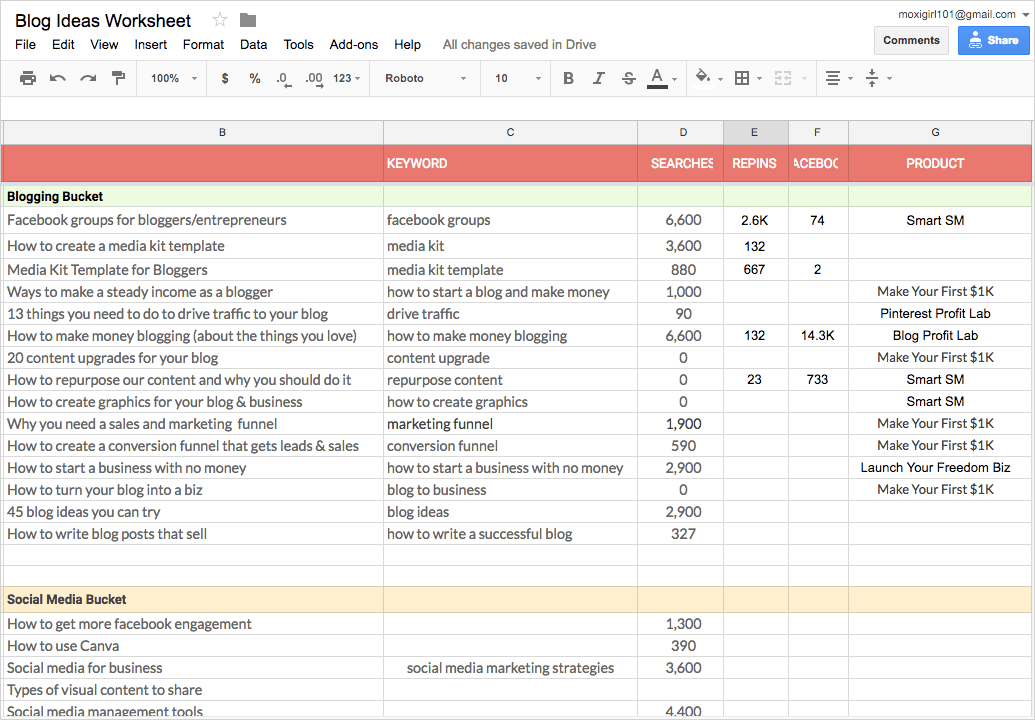
Content upgrades should be quick for you to create. Things like checklists, spreadsheets, templates, cheat sheets, and worksheets all work great. There’s no need to fuss or invest a lot of time, it just needs to be relevant and helpful. 

Some of our most successful content upgrades took us less than an hour to create!

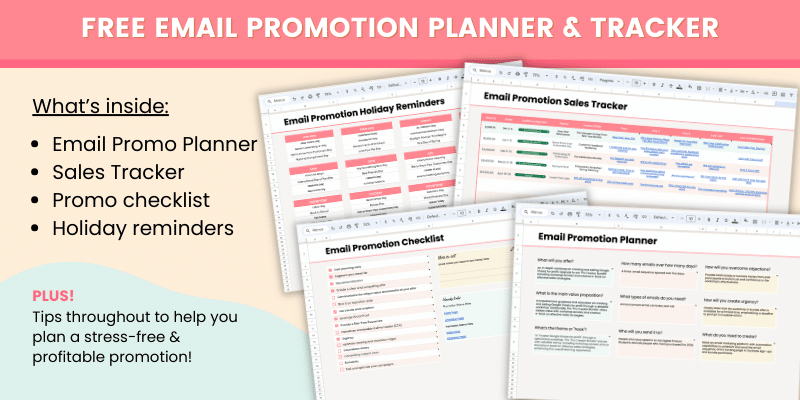
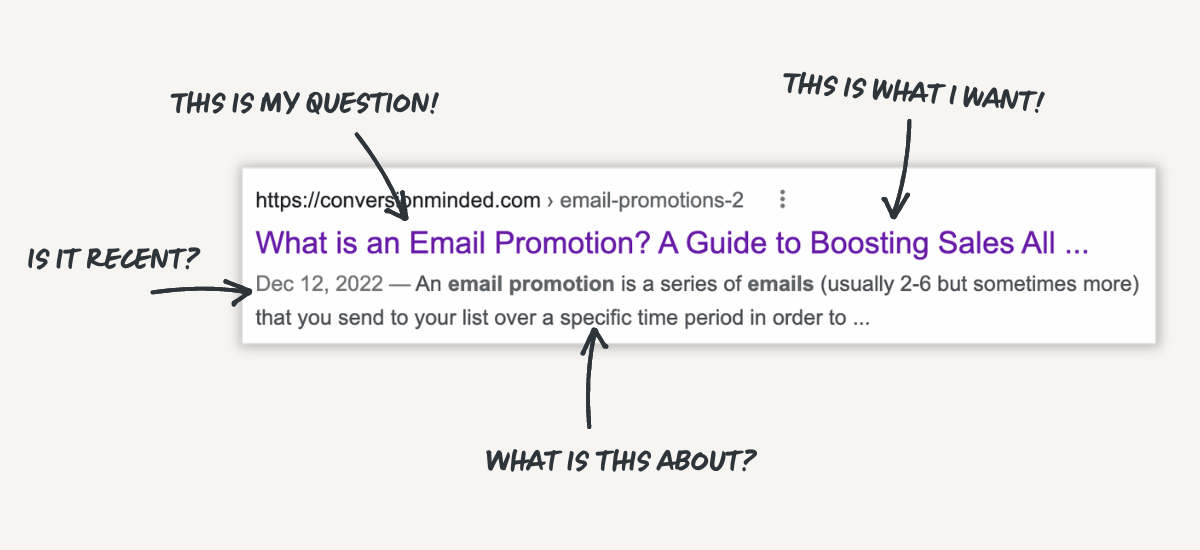
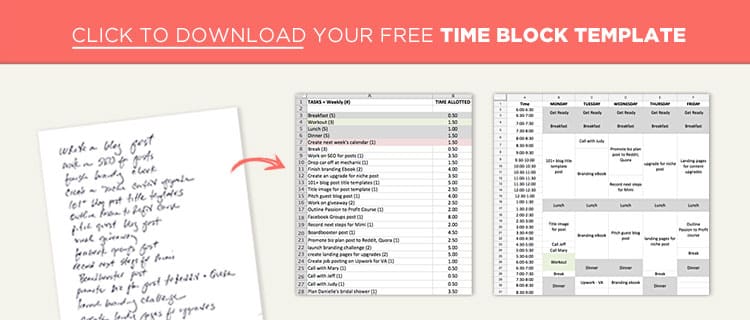
In our blog post, What is an email promotion? A guide to boosting sales all year long we shared how to run seasonal flash sales and promotions with email. When it came time to create a content upgrade, we decided to offer a spreadsheet based on our own system for running promos so our audience would be able to plan and track their own.

Super handy and valuable and took less than an hour to create:  

Why Content Upgrades are So Effective

#1 You will grow a more targeted and qualified email list 

Because content upgrades are highly relevant to a piece of content, you automatically know quite a lot about the person who signs up. It’s a great way to make sure you’re attracting the right people on to your list. 

#2 They breakthrough the “tactic fatigue” that happens with other list-building methods 

Trendy list-building tactics often work well in the beginning but don’t necessarily work forever. Once people see a fancy new gimmick multiple times, they usually start to become blind to them. We’ve found that content upgrades have converted consistently well over many years of blogging because they’re so tailored to the reader’s current needs. 

#3 They can be created super quickly

If you’ve ever invested a ton of time creating a super valuable lead magnet but your audience just didn’t go wild for it, you’re going to love content upgrades.
 
Creating simple, easily-digestible, hyper-relevant, bite-sized nuggets of value is a win-win for everyone. 

Since they’re quick and easy to create, even if nobody signs up, you can keep experimenting until you find something that does. The more you do this, the more you’ll learn about your audience and the more intuitive it will be to create lead magnets that convert well. 

This leads us to… 

#4 Test different lead magnets easily 

If we only had one opt-in incentive, we’d still only have our friends and family on our list. 

Our secret to creating a targeted, engaged email list of over 30,000 subscribers is that we focus on creating lots and lots of smaller, content-relevant, highly-consumable opt-in incentives.

If something isn’t converting well? We don’t take it personally, we just go back to the drawing board and try again. 

#5 They create a better user experience

Interruptive tactics such as scroll mats and pop-ups that appear the second you land on a blog post annoy users. Many people will instinctively click to close them before even reading them (that is if they don’t click away from the post altogether). 

Content upgrades are not interruptive or annoying. They blend seamlessly into your content and are a great way to build your list while also creating an amazing experience on your website. 

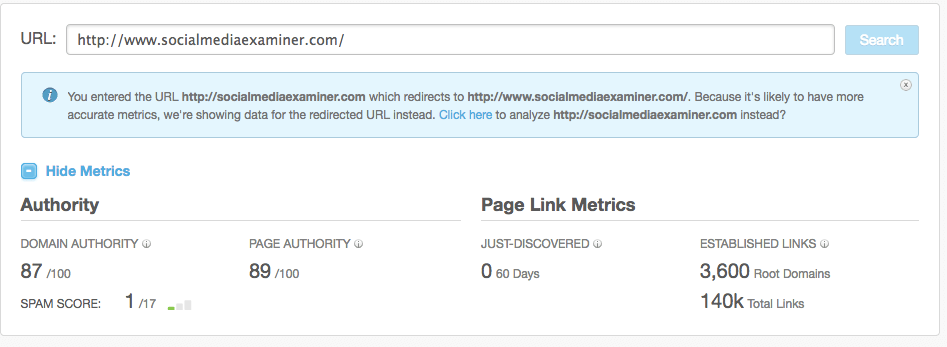
Creating a great user experience will help you more easily earn the trust of your audience, build a list of people who actually want to be there, and can even boost your page views and search rankings. 

8 Examples of Proven Content Upgrades You Can Try:

#1. Worksheets

Worksheets are a great way to help people work through problems. Ask good questions and provide them with space to brainstorm and write their answers.

Interactive .pdfs (meaning the user can fill out the form fields from a browser), Google Docs, and even printable worksheets all work great.

💡 Tip: When doing a printable worksheet keep it simple. Don’t use big ornamental blocks of color or graphics that force your readers to eat up all their printer ink.

A free tool you can use to upload .pdfs and create fillable form fields is PDFEscape.
https://www.pdfescape.com/

#2 Audio Files

If you have an exercise or story that would work well for people to listen to while they’re out and about doing other things, consider creating an audio file.

It’s easy to do with free tools you probably already have on your computer, like Quicktime.

You can either deliver the audio file as a downloadable .mp3 file or upload it to a site like SoundCloud (free!) and embed the player on a landing page.

#3 Video Tutorials

If your blog post provides the reasons why your readers should do something, a no-brainer content upgrade is a tutorial that shows them how to do it.

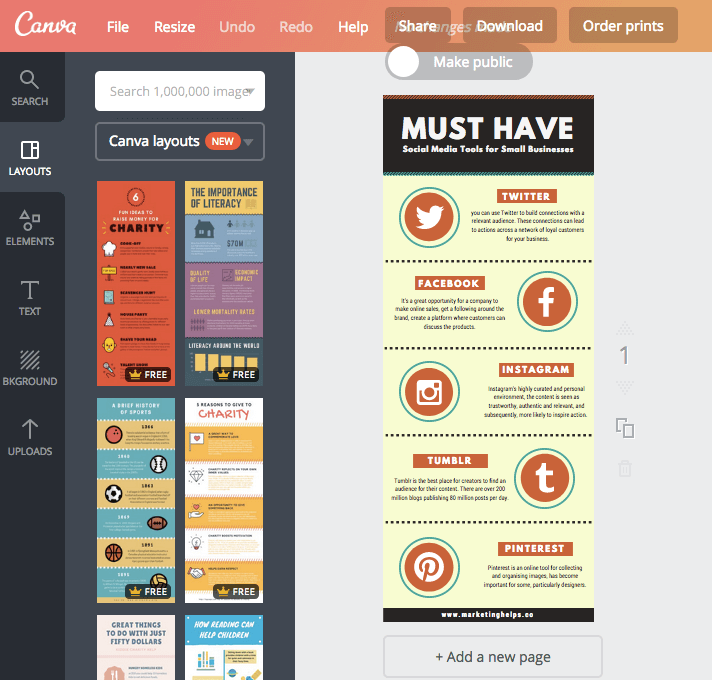
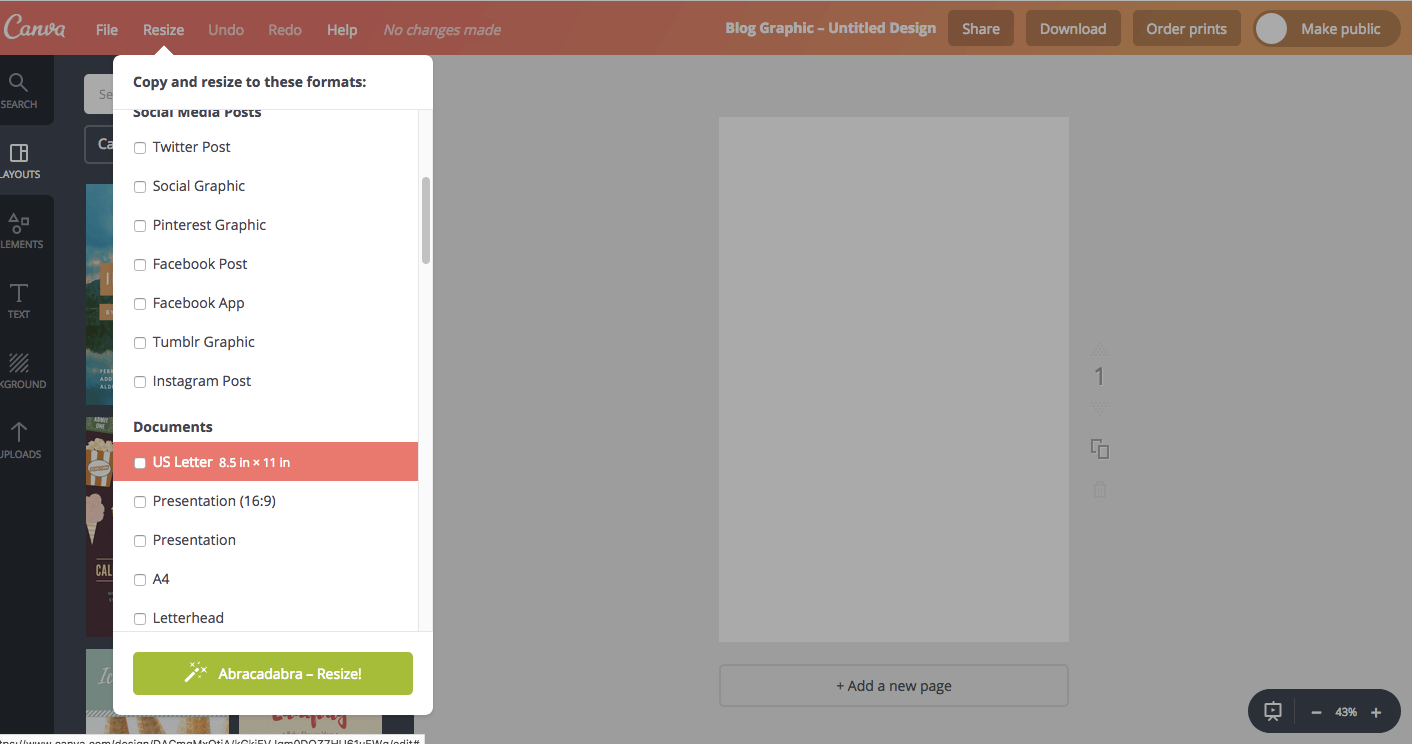
Again, you probably already have software that comes included with your computer for recording video such as QuickTime. You can also use a tool like Loom to do short screencasts, Canva’s “presentation mode” to record a slide deck presentation, or even record a video from Zoom.

For video editing, it can be a steep learning curve to use professional editing software if you’ve never done it before, but luckily, there are so many user-friendly video editing apps on the market today that make it so easy! 

We use ScreenFlow or CapCut… sometimes we even do simple video edits in Canva!

CapCut is free and very easy to use but only available for mobile/tablet devices. DeScript is another highly-recommended editing tool to check out. 

When you’re done creating your video, you can upload it to a site like YouTube or Vimeo.  Change the settings to “private” if you’d like to make it exclusive for your subscribers, and then, share a link in your welcome email. 

#4 Templates

People looooove templates. Anything that gives people a starting point makes for a great content upgrade. They’re easy to create using Canva and you can share a template link right on a thank you page and/or in your welcome email.

#5 Swipe Files

A swipe file is a collection of ideas that people can “steal” and use, saving them the time it takes to do the research or create something from scratch.

Say you’ve written a blog post about color theory in graphic design. A content upgrade might be a swipe file of color palettes with color codes people can use in their designs. 

Think about ways you can make someone’s life easier, save them some time, and consolidate information in one handy swipe file for them to refer to over and over again.

#6 Scripts & Formulas

This might just be my favorite. Help people write or say things faster and more effectively by giving them scripts and formulas to follow.

For example, copywriting formulas like headlines and sales pages; sales scripts, customer service email scripts, and so on.

Say you have a blog post called “How to know it’s time to fire a client” that talks about dealing with difficult client situations. You might include a content upgrade with email or conversation scripts — give people ideas for exactly what to say or write when confronting a client they need to fire.
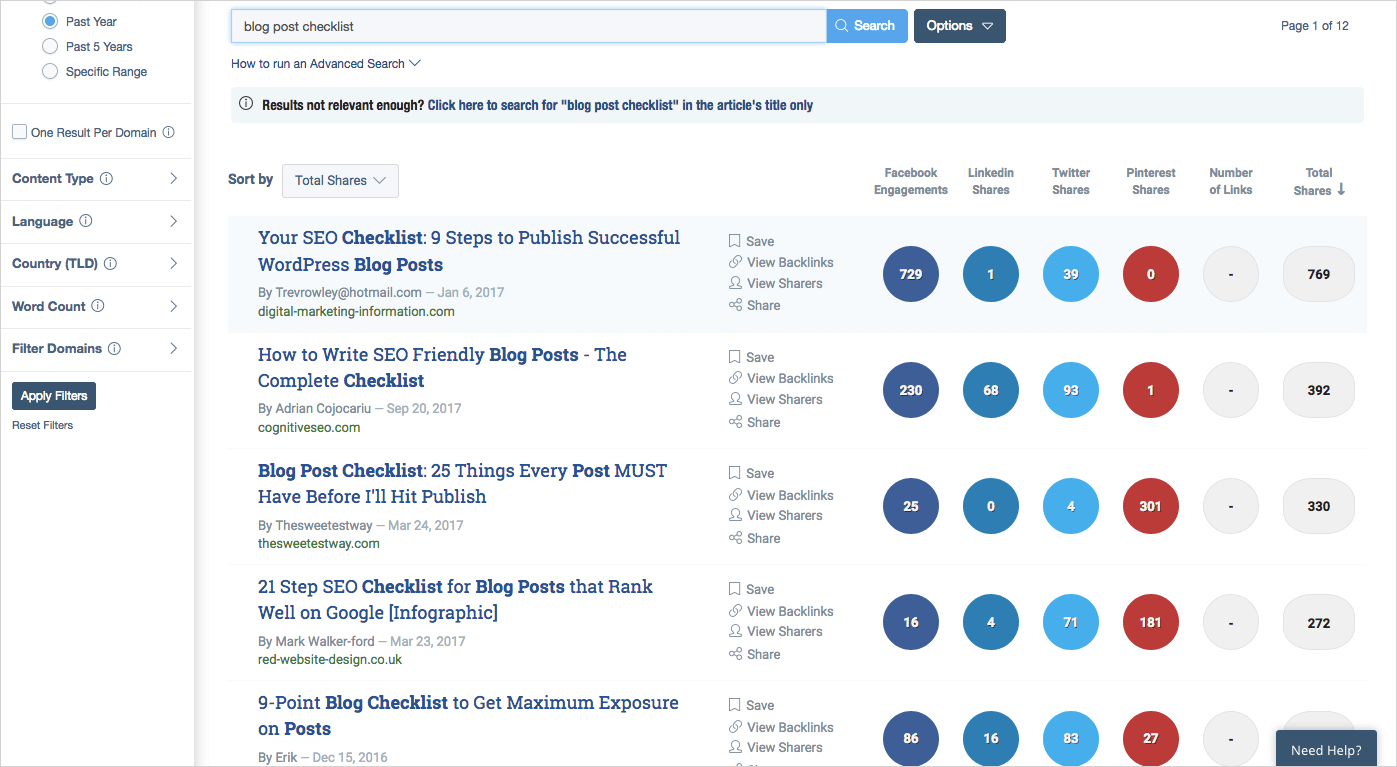
#7 Checklists

Checklists are a great way to break down the information into logical steps and action items — helping your readers put what they’ve learned into action.

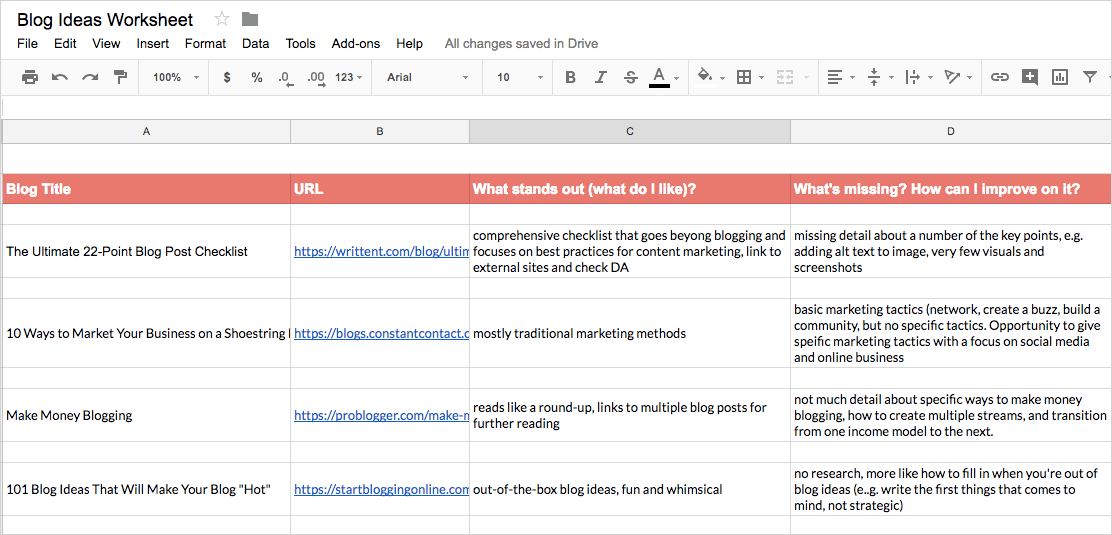
The following example is from Backlinko. Their checklist content upgrades are beautifully designed and memorable.

#8 Planners

Planners help your readers take action and can be delivered as .PDF documents they can print out or interactive .PDFs they can use on their device.

The following example is just a simple 4-page planner with instructions and space for readers to brainstorm offers in their value ladder.  You can see it in action in our post How to create a value ladder of offers to scale your service business


What You Need to Create Content Upgrades


To create content upgrades and promote them in your blog posts you just need four basic components: 

#1 A relevant freebie

We’ve already gone over several examples of content upgrades so you should have a pretty good idea by now, just remember to keep them simple, useful, and relevant. 
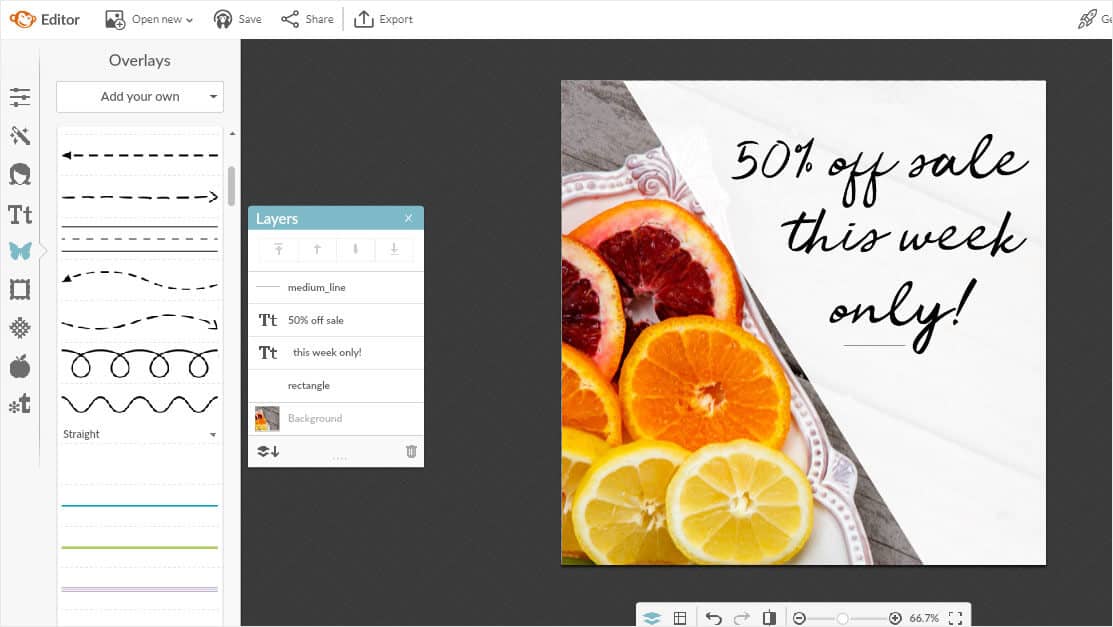
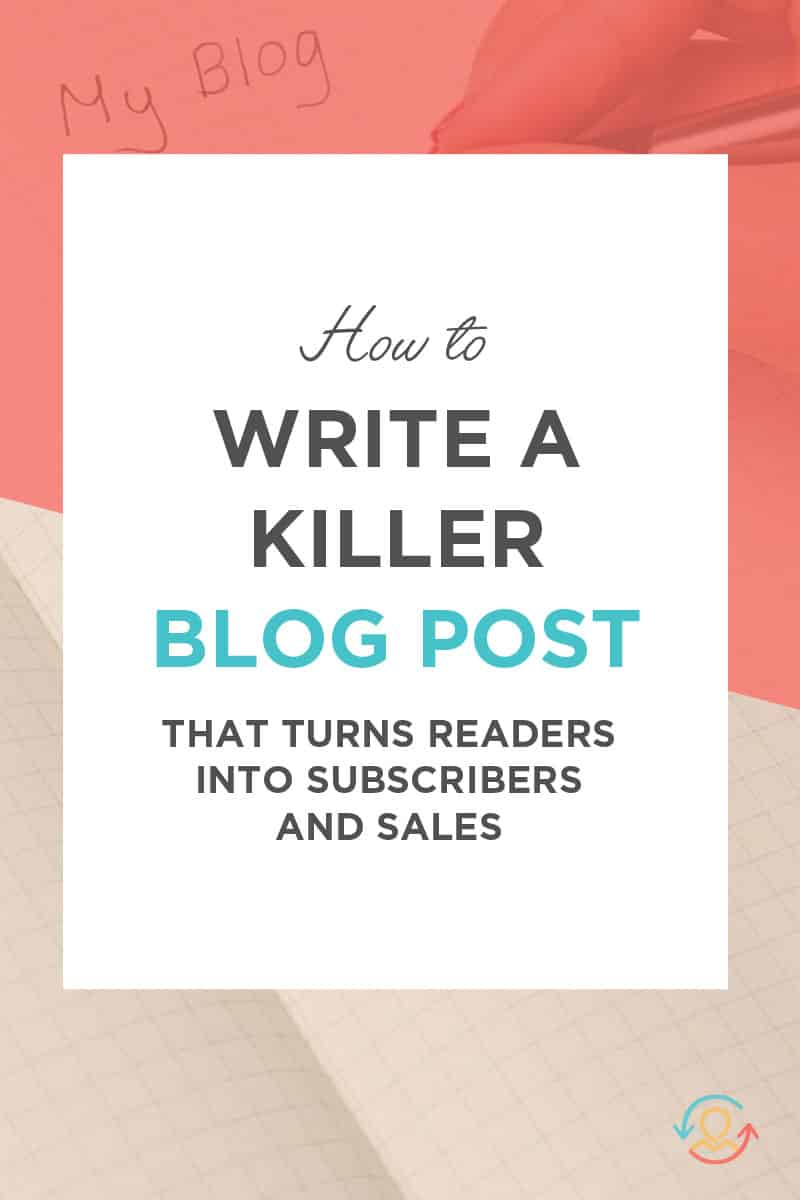
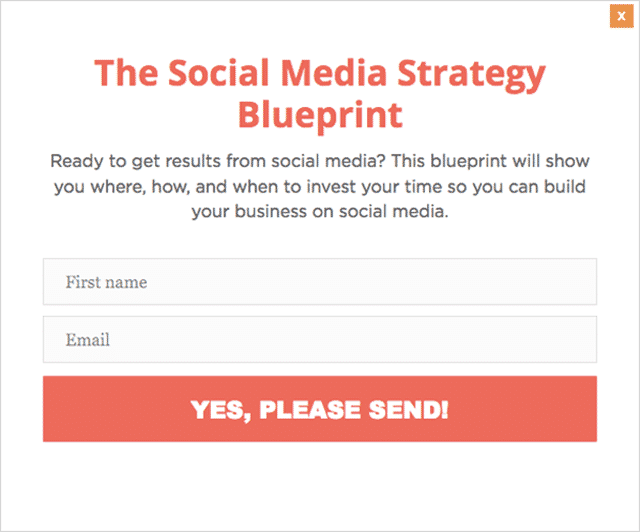
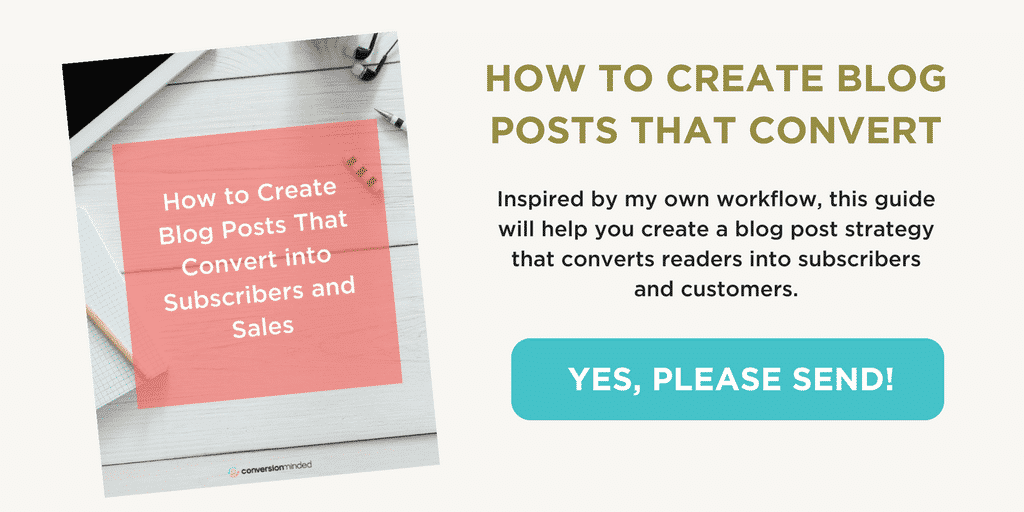
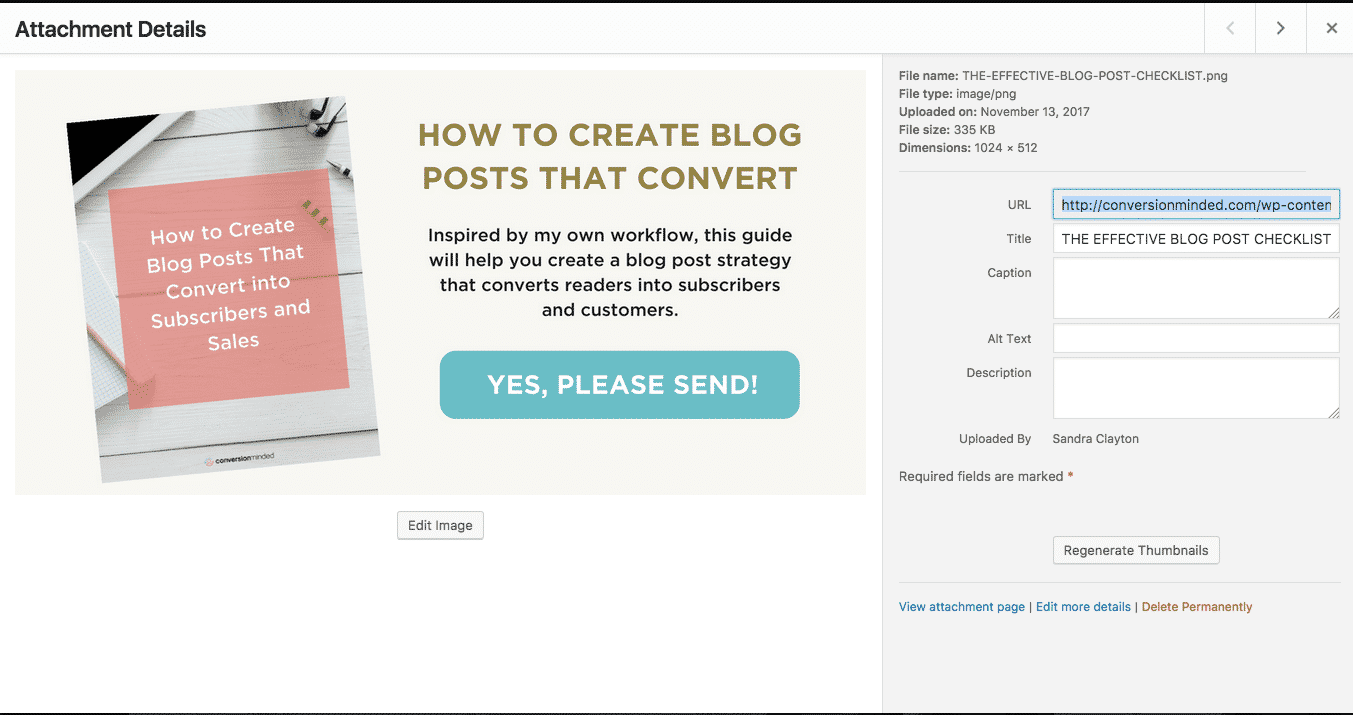
#2 Opt-in graphic 

This is a graphic you’ll use to showcase your freebie to give people a visual of what they’ll be getting. You’ll want to use the graphic in your opt-in form to really catch your reader’s eye.

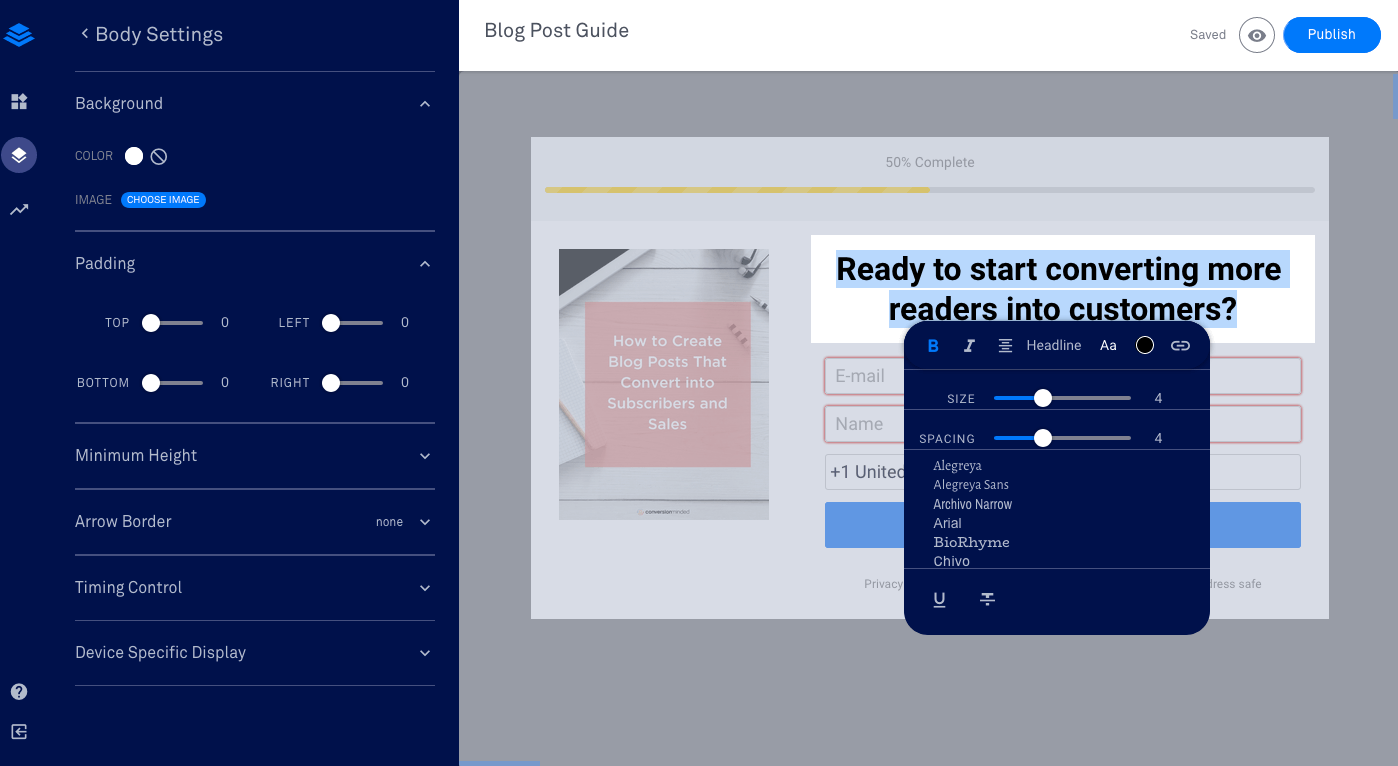
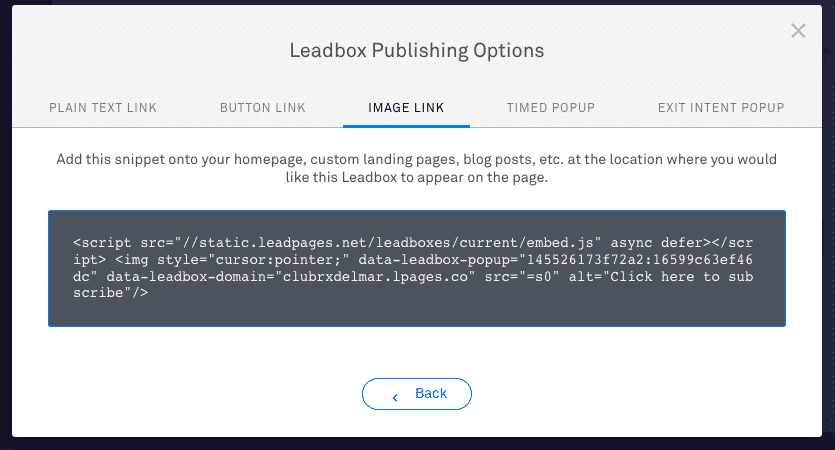
We like to create graphics in Canva that can be inserted into our posts so they really stand out. When the graphics are clicked on, a pop-up form appears for them to enter their details and subscribe. In order to achieve that effect, we use a plugin called ThriveLeads, which leads us to…

And here is the final result (you can click on it!):

Get the Digital Product Launch Blueprint from ConversionMinded

#3 Email Form 

We love ThriveLeads because it makes it easy to set everything up quickly and gives us ultimate control of how our freebies look in our posts so we can really “sell it” with the design.

(If you have our Lead Magnet Marketing Bundle be sure to check out the tutorials on this, we show you how to integrate your opt-in graphics with your email service step-by-step.)  

Alternatively, you can also check out OptinMonster and Sumo or even keep it super simple and check the options available from your email service — there, you should be able to upload your graphic to an embeddable form that you can insert into your posts. 

If you don’t already have an email service, we recommend checking into either MailerLite or ConvertKit. Both are beginner friendly and free to start. 

#4 Freebie Delivery

Delivering your freebie to your new subscriber is as simple as setting up a welcome email and providing them with instructions on how to access it (usually a link to the actual freebie). 

Check with your email service for instructions on how to set up an automated email to connect with your form. That way, your content upgrade will be delivered to your new subscribers in a “set it and forget it” way. 

Repurposing Content Upgrades

One last tip before we wrap things up…

Sometimes it makes sense to use one content upgrade for multiple posts. As long as it’s relevant, you can use your content upgrades again and again wherever it makes sense to include them. 

In fact, if you find that a lot of people are opting-in to a content upgrade in one of your posts, look for other posts where you can include it or even create more blog posts that relate to the topic.

Remember that whenever people opt-in to a content upgrade, they’re raising their hands and saying, “Yes, I need more help with this!” —so they can really help inform your content strategy too.

And if you’re getting lots of traffic to a post but nobody’s opting into your freebie, try experimenting with something else. Content upgrades make it easy for you to work quickly, so keep experimenting and keep learning more and more about what your audience needs.

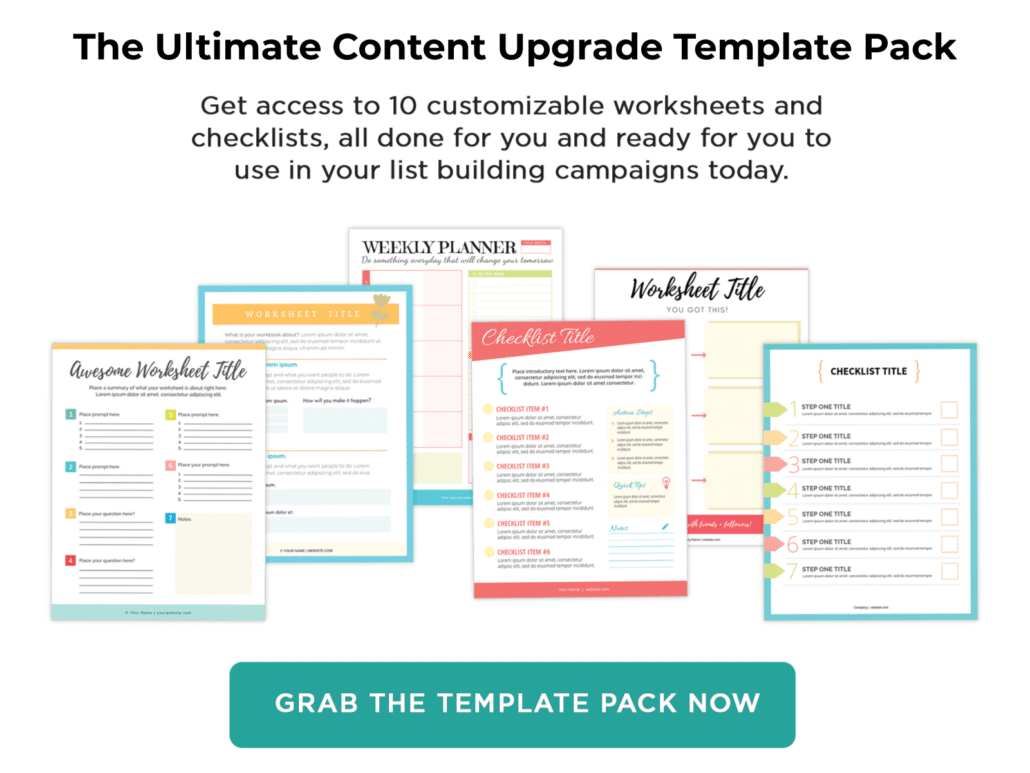
Download Your FREE Content Upgrade Templates

download the free content upgrade template pack
by

You want to know something? An attention-grabbing blog title can literally make people swerve over to read your post.

Let’s say you’ve just spent hours writing an insanely epic and remarkable blog post, and after a lot of sweat and tears you’re ready to share it with your readers.

Real quick question before you hit publish:

Do you want your post to live a lonely life tucked away in your blog archives or a happy life surrounded by your biggest fans?

Of course, you want your post to be the life of the party. 🙂

Sharing posts with killer blog titles is one of the easiest ways to invite fans to your blog party. I know this for sure because my posts used to be lonely.

Here are some examples:

  • 8 Ways to Create A Buyer Persona Template
  • 7 Steps to Being a Great Content Creator
  • Get More Leads from Outbound Marketing

Want to click on any of these? I don’t either. What the heck is a buyer persona template? And why do you care about “being a great content creator”? No kidding… I wrote this title and have no idea what it even means!

Okay, so I get it, you get it. Titles like these are lifeless and uninspiring.

Let’s flip the switch and turn them into attention-grabbing, must-click titles.

In this post I’m sharing 9 blog title tips I’ve learned, plus over 120 fill-in-the-blank templates based on proven copywriting formulas that you can start using today.

Ready? Let’s dig in…

10 Copywriting Secrets for Writing Blog Titles That People Click

1) Know who you’re writing for

This sounds basic, and yet the #1 thing both bloggers struggle with is defining the “one person” we’re talking to. This lack of clarity translates into a dull blog post title. But when you’re crystal clear on who you’re speaking to, you can even include your audience in the title to grab their attention.

Here’s an example: The Ultimate Blog Post Checklist for Entrepreneurs and Bloggers

If you’re an entrepreneur or a blogger, this post is worth a look!

2) Write a post that solves a problem

Yes, this is more about content than your title. The reason I’m including it is because when your post solves a specific problem for your person, your title will practically write itself. Here are some questions to ask before your write your next post:

  • What are my readers struggling with right now?
  • What do my readers most want to do?
  • How does this post help them do it?

When you approach your content like this, you’ll have very little tweaking to do with your blog title. Which leads me to my next tip…

3) Focus on the benefit

The biggest problem with the examples I shared earlier is that they’re missing their better half – the Why. People have to know why they should take the time to click and what’s in it for them . . . you get the gist.

Take my first example: 8 Ways to Create A Buyer Persona Template

If we turn that into: 8 Ways to Create a Buyer Persona And Get Clear On Who You’re Selling To

Ahhh, there we go. That’s what was missing before. Might be worth a click now, no?

4) Use numbers and lists

Starting off your title with numbers seems to be a natural attention grabber. I think this is because readers know exactly what they’re going to get. Plus, it sounds like a simple read: Oh, there’s only 5 steps involved here? Lemme check that out quickly…

It’s also easier for people to digest actual digits than words. When writing your blog title, write “5” instead of “five”.

5) Write how-to’s and guides

Most of the time people are searching for how to do something specific. Including “how-to” in your titles is a win-win. Your readers will know that your post is going to help them do something, and your post will attract search engines because it matches their “how-to” query.

6) Include a keyword in your title

This is just another way of saying think about how people search, what they’re looking for, and what they need. Then make sure that search term is in your title.

It’s super easy to use Adword’s Keyword Planner to research the most popular keyword related to your topic. When you find one, throw it in there, friend! Be careful not to force it, though. Your keyword should sound natural, and really, some titles won’t be a good fit for keywords. If you can seamlessly replace a term with your new keyword and still retain the context of your title, you’re okay. Make sense?

Also, if possible, place the target keyword near the beginning of the title to emphasize its relevance. (This is called “front-loading” your keyword). This small tweak can really help to make your titles more competitive on the search engine results page where people aren’t reading every word, but just scanning the page and looking for their target keyword.

For example, “Healthy Smoothie Recipes: 10 Delicious and Nutritious Blends” puts their target keyword right up front, versus “10 Delicious and Nutritious Blends: Healthy Smoothie Recipes” which takes a bit more effort to get to.

7) Make them sexy

Nothing wrong with sex appeal, amirite? I’ve gotten into the habit of stepping back from my blog titles and looking at them again with fresh eyes. Then I’ll ask myself: Would I HAVE to click on this? Am I salivating over this title?

Of course, you don’t want a title that’s misleading. Your title should always be accurate and set the right expectations. Still, there’s a big difference between:

How to Grow an Email List

and

5 Badass Strategies for Growing Your Email List

The first one sounds wimpy and sad. The second one is sexy, y’all. That’s the kind of confident you want.

8) Use a working title

I say this because many times I’ll sit down to write a post with a general idea of what I want to say but it still needs shaping. Maybe I’m not sure what my angle is yet, or how to make it insanely valuable for you guys.

In other words, I’m not really sure where my post is going yet. So I’ll start with a working title that describes it well enough. Then, when I’m finished writing my post, I’ll research keywords and rewrite my title.

Using a working title helps you to think about your content and title as 2 separate entities, which they really are. First, focus on writing epic content. Then write an epic title for it.

9) Keep it short

Your title should be short enough to convey your message and descriptive enough to pique someone’s interest. Under 60 characters is a perfect length. Longer than that is okay, but your title will be cut off in search results. (Which is another reason why “front-loading” keywords – see #6 – is a a good habit to get into.)

Not sure how long your title is? Use this length counter to find out.

10) Create curiosity

Nothing makes a title more irresistible than curiosity! You don’t need to create curiosity in every title you write, but when it makes sense, experiment with words like “secret,” “unlock, “mystery,” “reveal,” and “discover.”

“Secrets” is one of our favorites! For example, I might write a blog post about the most important things to be aware of when creating and selling digital products. A title that evokes curiosity might be,”Making Money with Digital Products: 3 Biggest Insider Secrets Revealed” — if you’re creating a digital product, you definitely don’t want to miss out on the secrets to profits, right?

Asking a question is another great way to create curiosity. Think, “Are You Making These 3 Traffic-Killing Blogging Mistakes?” — if you’re a new blogger, you don’t want to be making any traffic-killing mistakes, so you won’t be able to resist clicking!

Okay, that’s about it for the tips! Let’s take a look at the title templates.

If you want, you can use the printable PDF I created so you can have these templates handy for your next post.

👉 Click here to download the title templates as a printable booklet.

Fill-in-the-Blank Blog Title Templates

LISTS

# ____Every ____ Should Know About

# Amazing ____ to Try Right Now

# Insane ____ That Will Give You ____

# Types of ______ That Will ________

# Questions You Should Ask Before _____

# _____ That Will Make You _____

# Secrets To ____

# Resources to Help You Become _____

# Ways to Embrace ____

# Proven Ways to ____

#-Point Checklist: ____

# Daily Habits Of ____

# Things You Need To Know About ____

# Tricks to Jump Start Your _______

# Myths You Should Know About ________

# Steps to Starting a Hugely Successful ________

# Ways to Conquer ________

# Ideas to ____

# Best ____ to ____

# ____ We Love

# Most Amazing ____ to ____

# Essential Things For ____

# Key Benefits Of ____

# ______ That Will Motivate You Today

# ______ Ideas For ______

# Ways to Avoid _______ So You Can ___

# Factors for Getting _____

# Little Known Techniques For ____

# Elements of The Perfect _____

# Experts Reveal How to ____

# Lesser Known Tools for _________

# Questions Answered About _______

# Free Ways to _______

# Insider Secrets to Achieving _________

# Proven Methods for Accelerating ______

# Tricks for ______More Often

# _____ You Can Create, Even If _____

# Principles for _____ with _________

# ______ You Can ________ Today

# Insider Tips to _______

# ______ That Will ________

# _______ That Work Every Time

# ______ Strategies for _________

# of the Best _______ We’ve Ever Seen

# _____ Hacks to Radically Improve ______

# _____ You Don’t Want to _______

# Wittiest ________ To ________

# ______ You Should Never ________

# Things You Need to Do to Start ________

# Share-Worthy ________

# ______ You Can Do With ________

HELPFUL TIPS

# _____ Strategies to _____

# _____Tactics to ______

# _____ Ways to ______

# _____ Formulas to _____

# _____ Ways to ______

# _____ Tricks to _____

# _____ Tips For _____

# Exclusive ______ From a ______

Start a _____ in ______ Easy Steps

Completely Change Your ______ With _____

The Top 100 _______ You Need to ______

______ Steps to _______

What to Wear to _______ When _______

Become a ______ in 10 Minutes a Day

Staying Sane When ________

Behind-the-Scenes _____ From _____

HOW TO’s

How to _______ Fast Using ______

How to Completely Change ____

How to Create ____ That Gets ____

How to Get More ____

How to Quickly ____

How to Use ______ to Stand Out

How to Tell If ______

How to _______ in ______

How to ______ in 9 Easy Steps

How to Boost ______ and ______

How to _______ Like a Pro

How to Rock ________

How to Unlock _________

How to Turn _____ into _______

How to Build a _____ You Can Be Proud Of

How to Skyrocket Your ______ With _______

How to ________ in [#] Minutes or Less

How to _______ When You Feel

How to Master _______ in [#] Steps

How to Create _______ For Your _______

How to _____ And Why You Should Do It

How to _____ That Gets _______ In ______

How to _____ on a ________

RESOURCES + TUTORIALS

The Only Guide You’ll Ever Need for _____

Beginner’s Guide to _________

The Ultimate Checklist/Guide for ______

Tutorial: ________

The Essential Guide to _______

A Cheat Sheet For _______

Non-Techie Guide to _______

Create a Kickass _________

The _______ Guide You Need to Read

QUESTIONS + CURIOSITY

Why Are ______?

____ vs ____: Which is Better For _____?

Not Enough Time for ______? Try ____

Why Should You Want to ______?

Should You Create _____ to ______?

Is _____ Affecting Your ______?

What the Heck Is ______?

Not Enough Time for ______? Try this ______

Are you Doing ______ Wrong?

Are You Missing These _____ to _______?

MISCELLANEOUS

What No One Tells You About _______

You’re Doing it Wrong: ______

You Won’t Believe _______

Amazing Secrets Of ______

Myths About ____

Why I Don’t ______

Why _____ Beats _____

The Only Tip You Need to ______

Best Tip Ever: _____

A Simple _____ That’s _____ And ______

Why You Need a _____ and How to _____

The Only ____ You Need to ______

My Biggest Mistake with ________

Mistakes that _______ Never Make

Insider Secrets From _____ About ____

Why No One is _______ Your _______

Everyone Does ______, You Should Do

Adjectives + Descriptive Words

Don’t be afraid to step out and use some bold and descriptive adjectives to grab people’s attention. I use adjectives like Amazing and Awesome a lot, and you should too. Here are a few you can use to fill in the blanks on the templates:

  • Amazing
  • Awesome
  • Sexy
  • Must-Have
  • Need-to-Know
  • Great
  • Exclusive
  • Superb
  • Handy
  • Surprising
  • No-Nonsense
  • No-BS
  • Essential
  • Inspiring
  • Epic
  • Legendary
  • Remarkable
  • Pleasant
  • Easy
  • Insane
  • Green
  • Form-Fitting
  • Trendy
  • Organic
  • Adorable
  • Craz
  • Most Popular
  • Most Effective
  • Smart
  • Greatest
  • Wittiest
  • Outrageous
  • Weird But Effective
  • Wearable
  • Beautiful
  • Bad-ass
  • Wrong
  • Unique
  • Foolproof

Don’t forget to save the free printable PDF above to your computer (it includes all 120+ fill-in-the-blank blog title templates, all 35+ of the descriptive words, plus extra bonus title tips). I use this booklet every time I hit a wall with blog titles and run out of blog title ideas (really every time I write a post!). It saves so much time. 👇

Download this booklet of over 120 fill-in-the-blank blog post title templates that work!

For even more time-savings, check out bestselling Blog Post Vault. It includes 52 plug-and-play blog post templates you can adapt for your niche topics to build your SEO foundation, establish authority with Google and potential customers, and when you’re ready — dominate in search for competitive keywords in your niche.

Our student Molly says,

The Blog Post Vault by ConversionMinded is the only blog post writing and planning system you will ever want to buy. It’s priced affordably well and is jam packed full of a very well thought out system using Google Drive as a home base and smart linking to develop a tidy blog post creation workflow. This is not your average blog post content system and it will free up your brain when needing to create a consistent, well organized blog content writing and posting system. Thank you and so happy I found this resource, the timing could not be better in my life right now. 🙂

You can learn more about The Blog Post Vault here. 

by

One of the unexpected consequences of blogging for any length of time is that sooner or later, part of your job becomes updating the content you’ve written. While updating older blog posts may sound like a chore, trust us when we say it can pay off big time.

Not only does keeping your blog posts up-to-date increase your chances of becoming a trusted resource in your niche, it can lead to tons of increased traffic and engagement.

Think of it this way…

Instead of constantly churning out new content that may or may not rank in search or resonate with your audience, doing a blog post update means you can press the pause button every six months or so to review, refresh, and revive your most popular older blog posts to drive more traffic, generate new leads, and even monetize that content!

If you’re ready to dive into the deep, dark archives of your blog, this post will walk you through how to update your older posts as efficiently and effectively as possible in order to get more value from the content you’ve already written.

Let’s dive in!

STEP #1. Prepare For Your Update

Check Google Analytics to Find Top Performing Blog Posts

This may seem counterintuitive, but you want to update your rockstar blog posts first.

So the first thing you want to do is check your traffic in Google Analytics for the last 3-6 months to see which of your older posts are driving the most traffic. Then, make a note of the top 20% of blog posts because those will get updated first.

You want to follow the 80/20 rule with this process and focus on your top-performing blog posts because they have the biggest potential for traffic and sometimes even small improvements can yield exponential traffic results.

Making improvements to posts that are already performing well will help you get even better results. You want to take your winners and turn them into world champions. 🏆

A page inside our Blog Post Traffic Optimizer Notion template showing the first step is to check google analytics for current traffic.

Check Current Keyword Position + Rank in Search

The next thing you want to do is check to see which of your posts are ranking in search and prioritize updating and improving posts that are not yet appearing on page #1 of Google.

*You can use a tool like Small SEO Tools to type in your focus keyword to quickly see if you’re currently ranking.

Let’s say you have a blog post that’s currently ranking at the top of Google’s page #2. An improvement that nudges you onto page #1 will make a huge difference in search traffic.

So when you see an opportunity to improve a ranking blog post, you want to think like a competitor and do everything you can to make your post better than what the competition ahead of you is doing.

Now, you can’t control things like domain authority just by updating a blog post, but remember that even if you have high-authority websites with a lot of name recognition ranking ahead of you, Google looks at a ton of different factors.

Its goal is to send its users to the blog post that’s most helpful to its users and if you’re already ranking, you’re doing something right in Google’s eyes. Stay focused on what you can control – making it even more helpful.

Look at your competition in Google SERP (search engine results page) as if you’re a member of your target audience who has the question your blog post answers. Then ask yourself:

  • What do their titles look like? Which one makes you want to click through the most?
  • What do their meta descriptions sound like? Which one seems like the best fit?
  • How long and detailed are their posts?
  • What visuals and other helpful elements have they included besides text?
  • What questions did they answer or sections did they include that you missed?
  • What lingering questions were you left with after looking at their posts and how can you fill those gaps with your post?

The idea is that you want to think of ways to make your title and meta description more enticing so more people are choosing yours to click on and then make sure you fulfill their expectations with your post.

Use a Spreadsheet to Keep Track of the Blog Posts You’re Updating

As you determine which of your blog posts you’ll focus on, put them in a spreadsheet with handy links, current traffic, and rank so you can go through them one by one as you’re updating them and the next time you do an update, you can monitor your results.

Better yet, grab our free Blog Post Traffic Optimizer. It has everything you need to keep track of as you’re performing your update including checklists and the resources you need handy.


“The

STEP #2: Update Your Blog Posts Starting with Top-Performers

Update Outdated Information

The first and most obvious thing you can do is review your older content for outdated information and revise it to keep it current.

Some content is naturally “evergreen” so the tendency is to just set it and forget it, but even reviewing your evergreen content after a period of time usually sparks new ideas for things you can add to make your posts even more current and valuable.

For topics related to things like technology, trends, and tactics, you’ll want to check those to make sure you’re providing the most up-to-date advice and information.

Fill In The Gaps (These Tools Will Help)

Look for ways to add substance to the post and beef up the content outline and add more value. Check out these tools to help:

AnswerSocrates:

One of our favorite ways to do this is to go AnswerSocrates.com and type in our focus keyword to download a .CSV spreadsheet of all the questions people are searching for as it relates to this topic. Highlight any questions you missed that you can add to your post.

Google SERP:

You can also find related questions right in the Google SERP. Just type in your focus keyword and pay attention to the “people also asked” section:

Google Search Console:

You can also go to your Google Search Console and look for keywords you’re ranking for and make sure you’re answering the specific questions people are searching for. You’ll often see that you’re ranking for a search query you’re only indirectly answering. Answer them more directly!

For example, we have a post about brand personality and people were finding that post by searching, “What are some examples of brand personality?” only we didn’t have any examples in the post. During an update, we added a section with examples and it bumped that post up in search to page #1 and brought in a ton of new traffic!

ChatGPT:

ChatGPT is a super useful research tool and perfect for this task! You can provide it with your focus keyword and ask it to generate a list of all the questions and related questions people have about your topic. You can copy and paste your blog post into the chat and ask for its feedback. And once it knows what’s in your post, you can tell it to give you ideas for things you can include to make it more useful to your target audience.

Update Internal Links

One of the best ways for Google to understand what your site is all about so they know which topics you’re an authority on is to do strong interlinking between related posts on your blog.

This informs Google that you’re writing a lot of content around a specific area of focus and you’re an expert on these subjects.

Internal linking is a huge priority for SEO, but it takes going back into those older posts and making sure you’re linking back to your newer stuff and visa versa.

⚠️ Do NOT just install a “related posts” plugin and call it good. Those are notorious for slowing sites down and it’s just a lazy way to go about it (believe us, we’ve tried to get away with it 😂).

YOU need to be steering people in the right direction and telling them where to go next within the context of your post. We promise the extra effort will bring you more page views.

When it comes to linking, it’s all about improving the user experience. You’re not just trying to get them to visit a second page, you’re providing them a path to relevant information and helping them solve their problems — making your blog a go-to resource they trust and want to return to.

The cherry on top is that the more relevant internal links you have, the more likely it is that people will click through to a second page, and this helps not only your page views, but it sends a signal to Google that you’re creating a great user experience. This signal helps to increase your organic rankings, giving you a chance to get more visibility and reach more potential customers.

Add New Freebies & Content Upgrades

Keep an eye out for opportunities to add any new and relevant freebies you’ve created since first writing your post. As long as they’re helpful to the reader, it’s absolutely okay to provide multiple opt-in incentives throughout your content.

If you have a post that drives a lot of traffic but you notice that it doesn’t include a relevant opt-in incentive, definitely take the time to create and add one.

An easy and fast way to do this is to create a content upgrade. Think about what would help your reader take action on what they just learned and keep it simple! Things like checklists, trackers, worksheets, and swipe files all work great as long as they’re super relevant to the post.

Make It More Visual

Take a look at your blog post as if you’re a new reader landing on your website for the first time.

Are you greeted by a big, daunting wall of text? Long paragraphs without headlines or sub-headlines making it feel like it’ll be a chore to get through?

If so, break up your content to make it more visually interesting and easier to “skim and scan” and get a good sense of what your post is about without having to actually read it.

Piquing interest is the first step, then, people will be more likely to really dive in and spend time on your blog post.

Keep in mind that getting good results in search isn’t just about keywords – that’s only one tiny piece of the puzzle. Pay more attention to making it helpful and pleasant to read because Google is smart enough to figure out what your post is about.

Think about ways to make your blog posts more visual and easy to digest:

  • [ ] Break up long paragraphs into shorter paragraphs
  • [ ] Add meaningful headlines, sub-headlines, bullet points, and bold key phrases (sparingly)
  • [ ] Add charts, graphics, screenshots, photos, memes, photos, illustrations
  • [ ] Anything that’s not a paragraph of text…

⭐ If you’re using Gutenberg, there’s a treasure trove of things you can do to add visual interest to your posts. Check out the Gutenberg Ultimate Blocks plugin.

Improve Your Calls to Action

Make sure you have a strong call to action at the end of your post and throughout your post as well. If you’re not telling your readers exactly what to do next, chances are they won’t take any action and they’ll click away and never come back.

Find as many places as you can to guide your reader to the next step…

  • [ ] Get on your mailing list
  • [ ] Read related articles
  • [ ] Check out a related product or service
  • [ ] Leave a comment
  • [ ] Follow you on social media

Keep in mind that phrases as simple as “keep reading” or “let’s dive in” are mini calls to action. Telling your readers exactly what to expect and then inviting them to continue reading is a great way to hold their attention and keep them engaged.

For example, “In this post, we’re going to show you how to update your posts efficiently and effectively. So let’s dive in!”

Or, “If you’re not sure how to go about this, I’m about to break it all down for you step-by-step, so keep reading…”

This reduces the anxiety people have about potentially wasting their time on a piece of content that won’t give them what they need.

Update the Post Date

People tend to prefer and trust content that has current information, so if you’re keeping your content updated, consider using the plugin Last Modified Info. Rather than displaying the original published-on date, it will display the date as “last modified on [date]” so your audience knows you’re keeping things fresh.

You can also “republish” your blog posts by changing your original published date to the current date after you’ve done your update.

STEP #3: Optimize On-Page SEO

Optimizing your blog posts for SEO is something you normally do before you hit publish for the first time, but as you’re updating your older posts it’s good practice to see if you missed any details that can be improved!

Here are some questions to ask as you’re reviewing your older blog posts for SEO optimization opportunities:

Are you using an SEO plugin?

RankMath is our preferred tool but Yoast is another popular option. You’ll be able to enter your target keyword so it can give you suggestions for areas you can improve your post.

While you’re shooting for a “high score” here, take their recommendations with a grain of salt. If it doesn’t make sense to you, or if you feel like it would diminish the user’s experience, don’t do it. Hitting a “high score” does not guarantee results in search, these tools simply offer best-practices guidance.

Is your focus keyword in the title?

Ideally, it should be at the beginning, but think like a competitor here… Go to the Google Search Engine Results Page and type in your focus keyword and see what’s there. Which title grabs your attention and makes you want to click? How can you make your title even better than that? If you want a different title to appear in search, you can set the “SEO Title” in an SEO plugin like Yoast or Rankmath.

Is your focus keyword in the URL?

Simple URLS that include the focus keyword in the slug work best, so if you have a URL that’s really long and doesn’t include relevant keywords, you might want to update it so it’s short & descriptive.

⚠️ Caution: If you update a URL after it’s been published for any length of time, you must set up a redirect or the original post indexed in Google will send people to an error page. If you’re using WordPress, you can use RankMath to manage redirects from old URLs to new & improved ones.

Are you using descriptive ALT text for your images?

This is the text that describes the image for people who are visually impaired and using a screen reader so they can understand what’s pictured in the image. Making sure your site is accessible to everyone is a good signal for Google.

Are you using keywords in your image names?

Remember that Google allows people to search by images too, so you want to make sure those come up when people are typing in your focus keyword and viewing image results. **We generally use the title of our post as our featured image name and related keywords for any secondary blog images. Note: image names should all be different.

Are you using keywords and related keywords in your headings, subheadings, and body text?

Be mindful not to “write for Google” — if you engage in keyword stuffing, Google will penalize you. Write for humans using appropriate keywords in your headings and subheadings in a way that helps them find what they need quickly and easily — that will create that great user experience Google is looking for. 👍

Is your meta description optimized?

A meta description is a concise snippet of text that appears under the post’s title in SERP and helps users understand what the page is about before clicking on it.

Meta descriptions are not a direct ranking factor for Google, but they play a very important role. Users use these descriptions to decide whether to click on your post or the competing posts that appear near yours in SERP, so make sure you’re using them to describe what they can expect if they click.

Are you linking to other, relevant pages on your website?

This is a great signal for Google because it lets them know what topics you’re an authority on and helps them categorize your site.

Are you linking to other, relevant external web pages?

It’s another good signal for Google if you’re linking to reputable, relevant websites that will help your readers.

⚠️ Avoid linking to low-quality or spammy websites.

Pssst, if you’d like to take this SEO checklist with you, it’s included in our Free Blog Post Traffic Optimizer so you can check these things off for every post you’re updating.

STEP #4: Actively Promote Your Updated Posts on Social Media & To Your List

Remember that SEO traffic isn’t the only traffic! Now that your posts are refreshed and optimized, it’s time to actively promote them to your email list, pin them on Pinterest, and promote them on social media. Any platform that allows users to “click away” from their website is where you should be regularly sharing your best content: Facebook, Intagram Stories, Pinterest, Linkedin, and Twitter.

And don’t forget to optimize your social media bios so your “link in bio” also includes links to your top-performing blog posts (you would be surprised how much traffic this will drive back to your site!)

BONUS STEP: Create A Pillar Post (Optional But Ideal)

One way to do even more valuable internal linking and get some sweet action with Google is to create a pillar post. A pillar post acts as an internal hub that links all of your related subtopics together.

As you’re reviewing your older blog content, see if it makes sense to group together related blog posts into a single comprehensive post that covers a broader topic. Look for common themes, overlapping information, or a broader theme that your previous posts touch on.

Inside the Blog Post Vault we have templates that make this as simple as creating a collection of “X Things” or “X Secrets”… for example:

  • 10 Things You Need To Know About [Focus Keyword]
  • Everything You Need to Know About [Topic]: 10 Secrets

This strategy is often referred to as “cluster content” or “topic clustering” and is a common approach to creating a pillar post.

Once you’ve identified a cluster of related topics, select a central theme that ties them all together. For example, we have many posts about online marketing…

A topic cluster might be ways to market your business on a budget, and a pillar post might be something like:

“10 Ways to Market Your Small Business on a Budget” where we introduce each topic and provide standalone value, but then link out to previous blog posts to learn more — e.g.:

  • To learn more, read our post “How to Get Started with Email Marketing”
  • To get up to speed quickly, check out “The Beginner’s Guide to SEO”
  • For more details, visit “How to Create a Social Media Strategy”

…and so on.

Not only is this tactic effective for SEO, it provides your readers with an easy way to access information and drill deeper into your archives if they want to keep learning. The more time they spend on your site the better because that sends even more good signals to Google that you’re providing a great user experience.

Remember: while a pillar post can include links to narrower topics, it should also offer value on its own, even for readers who don’t click through to the linked posts. This can involve summarizing key points from the linked content, providing additional insights, or presenting a broader perspective.

Ready to start getting more traffic to your older blog posts?

Don’t forget to grab our FREE Blog Post Traffic Optimizer dashboard for Notion

We hope you found this helpful! We hope you find lots of opportunities to get even better results with the blog posts you’ve already written.

And don’t forget to grab our FREE “Blog Post Traffic Optimizer” Notion template we’ve prepared just for you to make this process easy-peasy.

Not only will you have a checklist for all the things you can do as you refresh and revitalize your older posts, you’ll also be able to optimize new posts for search, keep track of the ways you’re actively promoting and driving traffic to your content, and keep track of your traffic and search engine ranking progress you’re making over time.


Click here to grab it now and let us know if you have any questions in the comments!


“The
by

Note from Taughnee: I used the “Confidence Blockers” template from The Blog Post Vault in combination with ChatGPT to write this post. The result is a 100% original piece of content using my own perspectives and experiences. But with the help of these tools, I was able to write a really solid first draft of over 2,500 words in around an hour. From there, I was able to just focus on the personal insights and anecdotes I wanted to share and put the text into my own writing voice. This is still a relatively new workflow for me but it’s helping me create blog posts in around 1/2 the time and most importantly — making the entire process much more enjoyable. 🙂


If you’ve been doing everything “right” with your blog but still not getting the results you want, I know how easy it is to get discouraged. There’s so much conflicting information out there it can make your head spin.

When I first started blogging, I read every piece of expert advice I could get my hands on to help me crack the blogging code, and it always went a little something like this: 

  • Expert #1 would say to write short posts every single day
  • Expert #2 would insist the best thing to do is to only write super long posts
  • Expert #3 would claim the secret is to focus on keyword research
  • Expert #4 would advise not to pay attention to keywords 

I tried every fresh tip, new angle, and “ultimate hack” in the book and still felt invisible, overworked, underappreciated, and demoralized. For a loooong time. 

It wasn’t until I stopped worrying so much about “expert advice” and started blogging in a way that worked for me that I really hit my stride and started gaining traffic momentum, subscribers, and sales. 

I’ve said it many times – blogging is a long game. Without plenty of good old-fashioned perseverance and a whole lot of patience, the temptation to give up can be irresistible. 

The biggest lesson I learned in all my years of blogging is that it’ rarely a lack of talent, strategy, know-how, or technical expertise that holds you back … it’s your mindset.

If you’re not seeing the results you want from your blog, it’s time for a gut check. Do any of these sound familiar? 

  • “I don’t have anything unique or interesting to say.”
  • “I’m too busy to stay consistent with blogging.”
  • “If I put my opinions out there, people will figure out that I’m a fraud/criticize me.”

If that sounds like you, you bet your bottom dollar those beliefs are standing in the way of you doing the things you need to do to drive traffic, attract customers, and get your business visible with blogging.  

And here’s the thing: you CAN do this. It’s simply a matter helping your audience and doing it consistently (which can mean whatever you need it to mean). 

Never forget there are people out there just waiting for you to show up and tell them your way of approaching things, help them work through a problem in the way only you can, and let them know about your products and services too. 

It’s time to bust through those mindset issues that are getting in the way of getting your business in front of more of the right people.

Ready? 

Limiting Belief #1: I’m not a good writer

If you don’t think of yourself as a good writer, you’re not alone – many, many people feel this way. 

Let’s face it: 

  • It’s low-key terrifying to put yourself out there.
  • On the internet. 
  • Where everybody (including that mean girl from high school) can see it.

But here’s the thing. You don’t need to be a perfect writer to create engaging blog posts. You just need to be helpful and I promise you that you absolutely have something to share that will help people. 

Here’s what you can do:

Ask yourself why you think you need to be a good writer. Is it because you feel like you won’t be taken seriously if your writing isn’t perfect? Or is it because you’re comparing yourself to other bloggers? (Tsk, tsk.) 

Now think about what it would be like to write without the pressure of being a “good” writer. What would it be like to just share your ideas and insights with your audience, without worrying about how it sounds?

Now for a secret: You don’t need to reinvent the wheel. There are proven blog post formulas you can follow that are structured for engagement and conversions. Rather than sitting down trying to come up with some brilliant piece of writing out of thin air, you can start with what already works.

Even though I really enjoy writing, this was a game-changer for me in my blogging journey. It liberated me from the “blank page of doom” so I could focus on providing value and optimizing my posts without carving into my personal time to get it done.

If you want to give this a try, grab our free blog post templates below and you’ll see what I mean: 

And for heaven’s sake, use technology to help you! Why not? Even the best writers in the world still need editors. 

Grammarly and Hemmingway are two great tools that can help you catch grammatical and spelling errors and make suggestions to improve readability. 

The only thing you need to do to get more visible is to show up for your audience. They don’t need you to be perfect, but they do need you to come out of the shadows. 

Limiting Belief #2 – No one will read my blog

“I’ll get to blogging as soon as I finish responding to all these emails” 

Sound familiar? 

We all have an endless list of things we need to do, but if you’ve been avoiding putting yourself out there because you’re worried blogging will just be a wasted effort, it’s time to get to the bottom of why you feel that way… 

Maybe you’re… 

  • Worried you don’t have anything interesting to say
  • Nervous that people will figure out you don’t know what the heck you’re talking about (oh hello, imposter syndrome!)
  • Scared that you won’t be able to say something that hasn’t already been said a thousand times before 

It’s just a fact of human nature that we put off things that scare us. But those things are usually the very things we need to be doing in order to level up. 

Here’s what you can do:

Challenge your belief: Is it really true that no one will read your blog? Do you have proof? Is it possible that you’re underestimating your audience?

Focus on your niche: Trying to appeal to everyone means you won’t appeal to anyone in particular. Instead, focus on specific topic areas and an audience niche you can serve. What are their pain points, challenges, and interests? How can you help them solve a problem or get a result they really want?

Take action: The best way to overcome your fear of no one reading your blog is to just start writing and publishing posts. Even if you don’t have a huge audience right away, every post you publish is a chance to grow your authority with Google and connect with your readers. In time your audience will grow. 🌱

Limiting Belief #3:  I don’t have time

Saying you don’t have time is really saying it’s not a priority.

The truth is, if you really want to achieve your goal of driving organic traffic and getting visible with a wider audience of potential customers, you have to make it a priority. 

Even if you’re busy running a business or managing other responsibilities, carving out time for your blog is an investment in free traffic in the long run. 

Here’s a real example of what I mean: 

Every week we get sales on products we’re doing absolutely nothing to promote, we don’t even have them listed on our shop page. How are customers finding these products? 

Through links I included on blog posts I wrote more than 5 years ago. 

Did I know at the time it would pay off like that? Nope. I was crying about how hard I was working and how nobody was reading my blog. 

Luckily, I was self-aware enough to know that this was just my mind playing tricks and I needed to trust the process and keep going. 

Here’s what you can do:

Start small: You don’t need to devote hours every day to your blog. Even just 30 minutes here and there throughout your week can make a big difference. One way to approach this so you don’t get overwhelmed is to:

  • Choose a topic
  • Outline it into logical sections with headings for each 
  • Write for 30 minutes at a time under each heading (think of them as “mini blog posts”) 

(Spoiler alert: if you set an intention to write in small sections for 30-minute sessions, you’re very likely to get into a state of flow and keep going.) 

No need to clear your schedule and devote all your attention to blogging, it’s about working in a way that’s doable.

“Reverse-prioritize” your tasks: If you find yourself tackling “urgent” things first, you’ll never find the time for “important” tasks like blogging. Put blogging at the top of the list – either one morning per week or schedule blogging appointments with yourself and stick to them –  trusting yourself that you’ll get to all the urgent things. 

And you will. Because they’re urgent. You always manage to handle what you need to handle. 

Use time-saving tools:  For example, use a social media scheduling tool like Metricool (affiliate link) to handle promoting your posts on an evergreen cycle and keep the traffic flowing in. Use templates like you’ll find in The Blog Post Vault to help you write faster. Use them in combination with ChatGPT to take the stress and overwhelm out of the writing process and get you quickly past any “stuck” points. 

Limiting Belief #4: I don’t know how to get traffic

It’s a common misconception that getting traffic to your blog is knowledge only veteran bloggers are privy to. 

In reality, it’s pretty simple: consistently publish quality content on related niche topics.  

I know, I know, you’ve heard that before but maybe not why that’s the case…

Creating lots of content on related topics builds what’s known as “topical authority” – a ranking factor with Google. 

It means that Google will begin to recognize you as an expert in a particular niche or topic area (and your readers will notice, too). 

When Google sees that you’re publishing lots of quality content on a topic, it begins to trust your blog as a reliable source of information which means it’ll be more likely to show up in search results.

For smaller bloggers especially,  building topical authority is one of the most effective ways to compete with bigger players and grow your blog traffic organically. 

And remember… 

Not every post needs to be a monumental effort. Writing posts on smaller, less competitive niche topics will build on one another and those should only take an hour or two to write.

After we threw out the “post every day!” and “only publish when you have invested months writing the best blog post there ever was!” advice, we landed on a content mix that hit the sweet spot: 

  • ⅓ Foundation posts: quick posts that answer less competitive niche questions
  • ⅓ Authority posts: that go into more detail on related niche topics, and 
  • ⅓ Domination posts:  longer, “best content on the internet on this topic” posts
The Content Library inside The Blog Post Vault is organized into Foundation, Authority, and Domination posts

Note: the ⅓ ⅓ ⅓ formula takes word count into consideration. Foundation posts are around 1,000 words but Domination posts might be 5,000 or even 10,000!

Most of our blog posts are Foundation and Authority posts. They build credibility with our audience and Google and they don’t take forever and a day to write.

When we’re really ready to go after big traffic and highly competitive topics, we write a Domination post. Even 2-3 of those per year can bring tons of traffic if they rank. 

So if you’re struggling to get traffic to your blog, it may simply be because you’re…

  • Not publishing enough content
  • Trying to tackle topics that are WAY too big for where you’re at in your blogging journey or the time you have available
  • All over the place with your topics rather than creating more content that’s related to other popular content you’ve written 

Pssst: If you want to give our content mix method a try, the best way to do that is to check out The Blog Post Vault. We’ve baked this strategy into the cake and have included 52 plug-and-play templates that prompt you through proven post structures you can customize for your niche. 

You can use them like I do in combination with ChatGPT

  1. I start with the template
  2. Get the gist of what I want to say down very very roughly, and then
  3. Spend my time editing rather than reinventing the wheel. 

This way, I spend my time focused on sharing personal anecdotes and adding value rather than struggling to get started or trying to organize it into something that flows cohesively.

Here’s what you can do:

Focus on “realistic consistency.” Set realistic goals and don’t bite off more than you can chew with your publishing schedule. 

If you can only manage one blog post per month and you have to break it down into mini work sessions, that’s fine. It’s a myth that consistency means once per day or once per week even – consistency just means being, well, consistent in whatever schedule works for you.

Think of it this way…

When you’re through writing even just one blog post that helps your audience in some way, now it’s a content asset that will drive traffic to your business for years to come – one that you can promote in a myriad of ways and even repurpose for other things. 

Be proactive. Share your blog posts on social media platforms like Instagram, Facebook, Twitter, and Pinterest. And don’t just share it once and call it good! Treat each post as “Evergreen” content and share links to them on a regular basis – at least once a week – on all of your social media platforms. Use MetriCool (affiliate link) to automate that for you. 

The Autolist feature in Metricool shares our blog posts to social media in a recurring way and without being spammy

Related reading: 20 types of blog posts that drive traffic

You got this!

It’s time to turn your limiting beliefs into empowering beliefs and I know you’ve got this. 💪 

The next time you find yourself procrastinating on your blog, think about what may be holding you back. We all have limiting beliefs, it’s what you do to overcome them so you can reach your goals anyway that counts.

Challenge yourself to think differently, make blogging a long-term commitment that works with your schedule (don’t be afraid to take things at your own pace!), and focus more on publishing helpful content than chasing every new tip, trick, and tactic that crosses your path. 

There’s an old saying… “Bloggers blog.” 

So get to blogging!  🎉

To help you on your way, be sure to grab our FREE blog post templates to help get into a new routine you can easily manage. 

by

Note from Taughnee: I used the “Super Simple Ideas” template from The Blog Post Vault as a jumping-off point for this post. The final result is 100% unique content using my own experience, knowledge, and voice. From start to finish it took me just a little over 3 hours to write over 4,000 words, which is (much) less than half the time it would have normally taken me. 🙌 


If you have your heart set on blogging as a way to drive organic traffic to your business and reach new customers, it’s really not as daunting as people make it out to be…

😩Some bloggers seem to effortlessly churn out content, but I struggle to even write a sentence!
😩I’m afraid I’ll spend a bunch of time writing a post and no one will even bother to read it
😩Just thinking about squeezing blogging to my already-packed schedule is overwhelming, ugh! 

Sound familiar?

Most small business owners struggle with  limiting beliefs like this because let’s face it – blogging is not your central focus. You’re busy with more important priorities. 

And even if you’re a veteran blogger, we all have gaps in our knowledge that prevent us from getting the results we want – more leads and sales from free traffic!

The truth is, writing blog posts is just the tip of the iceberg. Gaining momentum happens when you start paying attention to the details most bloggers tend to gloss over. And it’s no surprise they do – organizing your thoughts and typing them into the computer machine is time-consuming enough. 

Given that the whole point of blogging in the first place is to help you expand your customer base and grow your email list without paying for traffic…

And considering it may only take a tweak to what you’re doing to really start gaining traction… 

Our challenge today is to figure out what might be missing in your strategy. 

By the end of this post, you’ll… 

👉Understand how to get your ideal audience clicking on your content in the first place
👉Keep them captivated from the first second they land on your website
👉Know how to structure your content in a way that guides them to the next steps ($$$)
👉Keep improving your results with every post you write 

Sound good? 

Then grab a cup of coffee (or your beverage of choice!) and settle in to learn 10 tips for creating blog posts that attract and convert your ideal customers, starting with… 

1. (Really) Understand Your Audience

Understanding your audience is the bedrock of great content but really understanding what makes them tick is an art. The more you practice honing in on their needs and desires, the more intuitive it will become.

Start by paying attention to the things they’re saying. Listen closely to the comments they leave on social media, the questions they ask in emails, and the feedback they leave on your blog…

  • What are their concerns or questions? 
  • What’s resonating with them? 
  • What’s helping them move forward? 
  • What’s standing in their way?

By making it a habit to really listen to them, you’ll begin to understand what they want from your content.

If you don’t already have an audience, you can join groups or communities where your ideal readers are likely to hang out and take note of the questions, comments, and conversations that are taking place. 

The idea is, you want to join in on the conversation going on in their minds with your content. 

Another helpful thing you can do is create an audience persona — a fictional representation of your ideal reader. By visualizing one person, you’re better able to empathize with what they need and write with them in mind rather than a vast, generic “target audience.”

Think about…

  • What are their goals and aspirations?
  • What are their interests? 
  • What are they trying to do? 
  • What frustrates them?

Writing directly for one ideal reader will help you stay focused on them and helps you connect with your audience on a personal level – building the “know, like, trust factor” you need in order to create a loyal following of people who are interested in being a customer. 

2. Choose the Right Topics

When choosing topics for their blog, business bloggers tend to go one of two ways:

1) They focus exclusively on keywords and create content for search engines rather than humans, or
2) They just start writing about stuff they know –  willy-nilly and when inspiration strikes or when they’re in the mood to wax philosophical

The problem is: if your audience doesn’t recognize themselves in your topic – if it’s not something they’re already looking for, struggling with, or super interested in already – it won’t capture their attention and they’ll just keep scrolling. 


In fact, let’s do this quick exercise right now: 

Visualize your person scrolling social media on their phone – bombarded with a constant stream of notifications, annoying ads, and friends from high school posting political opinions that make their blood boil…

A Google Calendar alert dings to let them know their Zoom meeting is about to start, they just remembered they forgot to ask their husband to pick up milk on the way home, their kids start screaming in the background… 


Utterly. Distracted.   

Then, a link to your blog post appears on their screen…

What happens next? 

Do they filter it out because it’s just more noise that’s not relevant to them?


Or does it stop them in their tracks: 

  • “I’ve been meaning to learn more about this!” 
  • “I’ve been wondering about this! How did they know?” 
  • “I’ve been struggling with this for ages, I need this!” 

That “Hey, this is for me! It’s exactly what I need!” is what you’re shooting for and picturing this scenario will help you decide whether a topic is worth your time to write or bound to be yet another wasted effort. 

Another huge mistake bloggers make is trying to come up with completely original content ideas rather than figuring out what topics are already in demand. 

Instead, focus on creating content you know is popular with your target audience and put your unique spin on it. Research what they’re consuming and look for gaps and opportunities that you can fill with your own experience and perspective. 

Use tools like AnswerSocrates, Google Trends, SEMRush, or BuzzSumo to get to the bottom of what the popular topics in your niche are. Analyze your competition to see what types of content they’re creating and scope out their comments section to see what people are saying – what’s resonating with them? 

It may seem like adding topic research to your to-do list is more than you can afford, but it’s actually much more costly to write an entire blog post that’s not going to grab your audience’s attention. 

3. Make it Easy to Skim 

Did you know the average user spends just 15 seconds before deciding whether to stay on a web page or leave? 

We like to play it safe and use a “5-second rule”: If it’s not clear to them within 5 seconds that the blog post is going to deliver on its promises, they’re going to hit the back button. And making your content easy to read, skim, and scan is priority #1 when it comes to keeping readers on your website. 

Studies have shown that readers are more likely to engage with content that’s structured in an organized way, which means always use a proper document outline.

A document outline breaks your content into logical sections and sub-sections, making it easy for readers to navigate at-a-glance and get right to the information they came for.

Screen capture from the HTML document outline training inside The Blog Post Vault

You also want to avoid using too many colors, fonts, and bolded text and use a legible sans-serif font (or a serif font designed for screen reading) to avoid visual clutter and to make reading more comfortable. 

Creating an enjoyable user experience will pay off with a lower bounce rate and a higher time on page – which sends good signals to Google, too. 

If formatting is not your cup of tea, these pre-formatted blog post templates have the document outline already set up, include prompts for remembering to put visuals in strategic places to break up big walls of text, and are structured for maximum readability and engagement. 

4. Get More Clicks with Optimized Headlines and Meta Descriptions

Catchy headlines and clear meta descriptions are essential for getting more clicks and boosting your blog traffic.

After writing an epic blog post, it’s understandable you may be tempted to treat this like an afterthought, but these small pieces of copy will make or break it for you because they’re the first things people see. 

In other words, before you can wow them with your content, you first need to get them to click through. 

Think about a time when you were scrolling through the Google Search Engine Results Page. What made you click on one link instead of another? It’s not always about which one is ranking the highest, right? Chances are it was the headline and meta description.

Now think about your headlines and descriptions as heading into battle with all of your competition. Yours should be compelling enough to entice your audience to click through and your meta description should give them a clear description of what they can expect if they do. 

The picture below illustrates what we have to work with, so making the best of this tiny space can go a long way in making your blog post the one people want to click on. 

Before you hit “publish,” take a moment to type your topic into Google and see what’s there. What catches your attention? What can you do to make your headline and description more enticing? Consider using: 

  • Active verbs (“Understand Your Audience” versus “Understanding Your Audience”) 
  • Numbers (“X ways to achieve a goal”) 
  • Power words (“The Ultimate Guide to [Topic]”) 

For your descriptions, this is one of our favorite ways to use ChatGPT! Give it a summary of your blog post and ask it to provide you with options for your meta description – then choose the one that catches your attention and makes you want to read it.

If you’re not sure how to add a meta description to your post, use a plugin like RankMath because it makes it easy peasy to do right inside your WordPress post editor. 

5. Write in a Conversational Tone 

Writing in a conversational tone builds a personal connection with your readers and makes them more likely to take action, stay on your site longer, sign up for your mailing list, check out your offerings, and so much more.

Remember, people buy things from people they know, like, and trust, and using a formal tone only creates distance.

Where business bloggers tend to go wrong is trying too hard to sound like an expert. Instead, focus on writing like you’re giving advice to a friend. 

Writing Tip #1. Use relatable language you feel comfortable with

If you wouldn’t say “I was like yaaaaas, boss babe! Smoochies!” to someone face-to-face, then don’t put it in your writing. But you don’t need to sound like a corporate robot in order to sound professional either. 

Writing Tip #2. Avoid using jargon or technical terms 


Avoid words your readers may not be familiar with – and be aware that you may not even realize you’re using terms commonly used in your industry but not by your audience.

In case you’re not sure, you can ask ChatGPT and then ask it for suggestions for how to say it in a way that’s more approachable for your audience: 

Writing Tip #3: Keep it concise

Remember, people are busy so they’ll quickly become annoyed if you take too long to get to the point. If you love using as many words as possible as much as I do ​​🤪, it’s just a matter of getting your thoughts out in the way you need to and then editing it down. For example…

Instead of saying…


“It is essential to acquire knowledge of the appropriate approach towards writing in a conversational tone for the purpose of maintaining reader engagement”

You might say… 

“To keep your readers interested, write like you’re having a chat with a friend. Use simple words and avoid using jargon they might not know.”

Pro-tip: say it out loud. Does it feel awkward? It’s probably because you’re using too many fancy words when you could just say it simply. #fancy-pants

Writing Tip #4. Use contractions 

Contractions are a natural part of spoken language and using them in your writing can help make it feel more conversational. 

Think “you’ll” instead of “you will” and “don’t” instead of “do not.” 

I’ve been practicing this one for years and I still don’t catch them all, but give it a try – you will  you’ll see that it makes a big difference in the tone of your writing. 

6. Make it Visual

The internet has shortened all of our attention spans (*shakes fist at TikTok*), so hitting your readers with a big wall of text is just going to make them groan and abandon ship. 

Remember: you’ve got 5 seconds to hook them in and one of the first things they’ll look for is whether it looks like it’s going to be easy to read… 

This is where visuals can help!

By breaking up your text with images, graphics, and other visuals, your readers will be more likely to stay engaged with your content. This means increased time spent on your site and the more likely they’ll be to convert into subscribers and customers.

And the cool thing is, adding visual interest to break up your text can take many forms, including:

  • Relevant photos and graphics to enhance your readers’ understanding of the content
  • Screenshots or screen captures to illustrate concepts and provide examples
  • Callouts and block quotes to highlight key points or quotes to draw your readers’ attention to 
  • Subheadings to break up your content into smaller, logical, easy-to-digest chunks 
  • Bullet points and numbered lists to summarize key information or provide step-by-step instructions
  • Content upgrade opt-in graphics or forms: to provide readers with a free tool to help them implement what they learn in your post
  • Videos or .gif animations to demonstrate concepts in a dynamic way
  • Charts and graphs to illustrate important data so it’s easier to understand 
  • Quotes from experts to lend credibility to your content
  • Turn statistics into graphics to call attention to relevant data so readers don’t miss it 
  • Interactive elements to encourage readers to participate such as “click to Tweet” or quizzes and polls
  • Infographics to help convey complex ideas in a way that is easy to grasp
  • Get creative!  Remember that anything that is not a paragraph of text can help break up your content 
 Examples from The Blog Post Vault templates

7. Call Your Readers to Action

By including clear calls-to-action (CTAs) in strategic places throughout your posts, you can guide your readers toward the next step in their journey to become a loyal follower, email subscriber, or even a customer.

Start by identifying the goal you want to achieve with your content. Do you want your readers to…  

  • Download your free guide? 
  • Spend more time on your website and click through to read another post?
  • Check out your relevant offerings?

Once you’ve identified your goals, write CTAs that clearly communicate what you want your audience to do and why they should do it. 

⚠️If you don’t ask, and if you don’t tell them exactly what to do, they won’t take any action at all. And we’re pretty sure clicking away from your website never to return is not your goal.  

Use language that encourages your readers to take a specific action and wherever possible – really sell it. Tell them the value they’ll get on the other side of the click… 

  • Want an easy way to [achieve result they want]? Our free guide breaks it down into five easy steps. Download it here to get started!
  • If you’ve tried [to achieve a result they want] in the past but it didn’t work out, check out this post to learn a simpler method that worked miracles for me
  • If you’ve been stuck in a rut when it comes to [niche topic], I invite you to book a consultation with me and I’ll help you decide your next step so you can move forward

I think you’ll agree these are more enticing than “click here” – yes?

The placement of your calls to action is key as well. Consider the context of your content and the behavior of your readers – they should be strategically placed throughout your post where they’re most likely to be seen and acted upon.

For example, you can include them…

  • In the body of your content whenever you’re making a relevant point
  • At the end of your post so you don’t leave them guessing what to do next
  • As an exit-intent pop-up to invite them to join your mailing list and continue learning about the topic

Have you noticed that I’ve already placed several calls to action in this post? It may not be obvious because I’ve asked you to click on things in context when it was hyper-relevant to what you were reading so it wouldn’t seem intrusive or distracting. 

One of the key features we baked into every blog post template in The Blog Post Vault are prompts to remind you to continuously call your readers to action. 

It’s super easy to get so focused on providing value that you completely forget about the reason why you’re writing the blog post in the first place: to provide your readers with a path forward on their journey to become your customer. (Not just read your post and peace out.) 

8. Promote Your Posts

In case you need to hear this (and we all need to hear this): If you want to grow your blog and reach potential customers, you need to be proactive in promoting your posts. 

While search engine optimization (SEO) is important, it’s not enough to rely on Google to send you traffic. SEO is a long game and there are no guarantees your content will rank on page 1 of Google. 

Get your blog post out there and in front of people – there are tons of ways to do it!

  • Email your list and tell them why it will benefit them to read it
  • Link it from an automated email welcome sequence after someone opts in to a relevant freebie
  • Share it on social media platforms that allow “clickable links”: Instagram stories, Pinterest, Twitter, Facebook, and LinkedIn
  • Use relevant hashtags to reach a wider audience
  • Tag other bloggers or influencers in your post to increase its visibility where appropriate
  • Create a guest post for another blogger or industry publication in exchange for linking back to yours

And don’t just share it once and call it good! Promote your content for as long as it supports your business goals. We included an “Evergreen” category in our Content Calendar System precisely because it’s so easy to forget about sharing older content. We wanted it to be right in the calendar to remind you to keep at it. 

Even if you’re not using CCS, you can keep track of your “Evergreen” content using a tool like Google Sheets, Trello, or Notion — the important thing is to keep all of your links handy when you’re creating and scheduling social media posts. 

Try to share links back to your blog at least once per week on all your social media accounts. Keep promoting them over time (the traffic will add up!) and visit and update older content to keep it fresh and relevant. 

And if you just can’t imagine finding the time to do any of these things, try this… 

MetriCool (affiliate link) is a social media scheduler that allows you to set up “Autolists” to promote blog posts on an evergreen schedule (a.k.a. “set it and forget it”). This feature saves a ton of time and ensures your content is being regularly promoted to your audience without having to think about it. 

We have lists set up for our products, freebies, and lead magnets for Twitter and Facebook and once we add them to the list, MetriCool handles rotating them all through the schedule we set up – all on autopilot. 

This way we don’t have to worry about being spammy but we also don’t need to worry about forgetting to promote our content either.  Win, win! 

9. Streamline Your Workflow

By now you might be wondering how you’re going to find the time to pay attention to all these details, I know, I’ve thrown a lot at you today. 

That’s why it’s so important to get organized and use the right tools to help you with your workflow. You need to be as efficient as possible so you have the bandwidth to put your attention on the things that actually move the needle,  not just busy work.

Here are a few of our favorite tools that streamline the time you spend writing and promoting your posts: 

  • The Blog Post Vault: This epic collection of 52 customizable blog post templates are all written in a conversational tone with prompts to guide you through customizing them for your niche, with reminders to insert visuals and calls to action in strategic places, and formatted to maximize reader engagement and conversions. To really supercharge productivity, we use it in combination with…   
  • ChatGPT: This AI tool is a perfect sidekick when using content templates like The Blog Post Vault. The templates keep us focused and provide the strategy, but ChatGPT works as a “writing assistant” to help us with research and quickly move past writer’s block. We’re saving a boatload of time, and if you want to learn more about how we’re using it, check out this post 
  • Notion: Notion is our favorite tool for staying organized with blogging tasks. Having an editorial calendar and a system for tracking the posts we need to promote shaves off hours each month. If you prefer Asana, Trello, or Google Sheets that’s cool too – work with the tools that work best for you. The key is to have some kind of “dashboard” of everything you need to keep track for your blog right at your finger tips. 
  • Canva: As a former graphic designer and Adobe loyalist, I can hardly believe how much Canva has won me over and how strongly I recommend it now. This graphic design tool just makes things so much easier and faster. Even if you have no experience with graphic design, it’s a piece of cake to create beautiful images and graphics for your blog and social media
  • MetriCool (affiliate link): There are tons of social media schedulers out there but we’re all-in with Metricool lately. We love that it comes with social media analytics and the ability to set up “Autolists” that promote our content in a “set it and forget it” way. And the best part is that their free plan is incredibly robust, so there’s nothing to lose if you want to give it a try! 
Our Blogger’s Dashboard for Notion helps you stay organized and make the most out of every blog post you write

10. Measure Your Results

Now for the secret sauce of a successful content strategy. If you want to win your audience over and keep them coming back for more: measure your results using a tool like Google Analytics. 

This, again, is something that most bloggers don’t bother with – huge mistake. When you’re aware of which posts your audience is flocking to, all you need to do is simply continue helping them with related content. No more guesswork, hurrah!

Using data to help you figure out when your audience is raising their hands and saying, “Yes! This is what we need help with!” (which is what they’re saying when they read a post) is the most effective way to understand your audience so you can give them more of what they want. (See Tip #1) 

Conclusion

To quickly recap… 

By paying attention to details like these,  creating content that attracts and converts your ideal audience will quickly become second nature:

  • Understand your audience – always be listening to what they’re saying they need help with
  • Identify the right topics  – don’t just write what you know, write about what they already want (using your knowledge) 
  • Make content easy to read – break up text into logical sections so they can find what they came for quickly and easily and don’t use 37 fonts! 😉 
  • Write conversationally to create a connection with your audience and keep them engaged
  • Use visuals to break up big walls of text and to help your readers understand complex topics 
  • Call them to action in strategic places to encourage your readers to take the next step with you
  • Promote your content proactively and automate where possible using tools like MetriCool (affiliate link)
  • Streamline your workflow with the right tools so you have the time you need to attend to everything on this list
  • Measure your results so you can double down on what’s working and better understand your audience

There you have it! 

Will you be using any of these tips to create your next blog post? Let us know in the comments below!

And if you’re eager to write blog posts that attract your dream customers but you’d much rather just have an easy button, The Blog Post Vault is it. 

You’ll be able to effortlessly write a high-quality blog posts:

👉Without having to worry about forgetting any important details that keep readers engaged…
👉In a fraction of the time it would normally take…
👉And for half the price you’d pay a writer to create just one single blog post (starting at just $49 lifetime)

🙌

We hope to see you inside! 

by

Note from Taughnee: In the following blog post, I used ChatGPT to help me research the limitations and advantages of using it for content creation in combination with our “Big News Announcement” template from the Blog Post Vault. The final post is 100% original content using my own voice, unique perspectives, and personal insights. But, using these tools helped me stay focused so I could write, edit, and format over 2,800 words for this post in less than 2 hours (about ½ the time it would have normally taken me). 2023 is wild! 

Have you heard the buzz about ChatGPT? If so, you’re probably wondering how it’s going to disrupt just about everything – including creating content for your business. 

If you’re like us, you’re probably feeling a mix of emotions about it: incredibly excited about the potential of ChatGPT and the ways it can be used to increase productivity… but also a bit concerned about the fact that the robots 🤖🤖🤖 are finally taking over. 😂

All over the world right now, content creators, copywriters, and content marketing businesses like ours are wondering how this new technology is going to impact them. 

Some creators see dollar signs: “Cool, I can sell content services and have ChatGPT do all the work!” (which we strongly believe will lead to customer mistrust). 

Some are fearful they’ll need to adapt, learn new skills, or even become obsolete. 

Here at ConversionMinded, we’re super excited about the ways ChatGPT is already helping us create content more efficiently and take time-consuming, costly, and mundane tasks off our plates.

As for our concerns, ChatGPT seems to be on our side so that’s something. 😉 

Image of ChatGPT: "Will ChatGPT replace human content creators?" Response: "ChatGPT can be a helpful tool for human content creators, but it cannot replace the role they play in the creation of content."

In this post, I’m going to share my insights and thoughts so far on the best ways to use ChatGPT to speed up content creation and some limitations to be aware of too. 

But first… 

What is ChatGPT and how can it help with content creation tasks?

ChatGPT is a language model that can generate human-like language. Ask it questions or provide it with “seed text” and it will respond to you as if you’re talking to a real person. 

What’s “seed text” you ask? Well, let’s ask ChatGPT!

An image of a ChatGPT conversation. "What is seed text?" The response is "Seed text, also known as a 'prompt,' is a piece of text or set of words used as input to a language generation model."

Think of it this way: it’s like having an assistant who’s read every article and discussion on the internet about your topic and can now give you a “best guess” answer to any question you have. 

The applications are vast, but for now, I’m just going to keep things focused on using ChatGPT for content creation since that’s what you’re here for. 😉  

You can use ChatGPT to help you with all kinds of content for your business, including:

  • Headlines and alternative headlines  
  • Product and services summaries
  • Customer service responses
  • Social media posts
  • Ad copy
  • Emails
  • Blog posts
  • Translations
  • Scripts for videos and podcasts 
  • And much more! 

And the language it produces actually sounds just like a human wrote it! 

Mind. Blown. 🤯

But before you get too excited, keep reading because there are some limitations you need to be aware of before diving in… 

The Pitfalls: 2 Ways ChatGPT Actually Slows Down Content Creation 

You’ll find that your role using ChatGPT will be to provide it with lots and lots of input and really good prompts – otherwise known as “prompt engineering.” 

A chatGPT conversation. "What is prompt engineering" "Prompt engineering refers to the process of designing and refining the questions or prompts that a language model such as GPT-3 is trained on."

In other words, you’ll have to train ChatGPT how to give you results you’re happy with (which is a new task and a new skill you’ll need to learn and it can easily eat up even more of your time if you’re not careful).

Way #1: It often returns inaccurate or unhelpful responses

ChatGPT was trained using billions of text data found on the internet, but, it only has information up until 2021, which means it doesn’t know anything about the world after that point.

Right now, it can only generate responses based on the information it was trained on and heads up – it’s very often inaccurate (it generates lots of stuff you can’t use). 

To get more meaningful and useful responses, you need to teach it about your brand, offerings, and audience and by providing it with seed text so it can learn from you. Not only that, but you’ll have to start from scratch with every new chat session. This process takes time.  

Keep in mind… 

  • ChatGPT does not have information about current events 
  • It can’t access the internet on its own to get up-to-date information 
  • It wants to be helpful so it’ll give you information as if it’s accurate and it will sound very convincing  
  • It can tell you something is possible to do with ChatGPT but it may not actually be possible
  • It will often contradict itself when you ask follow-up questions

For example, I tried to get it to help me create a product summary, so I asked it if I could link to our sales page to give it all the information. 

Note: It said yes.

An image of a ChatGPT conversation were I ask ChatGPT, "Can you create a product summary based on a sales page I link to?" It responds, "Sure. Provide me with a link and I'll do my best to create a product summary for you."

I already knew it wouldn’t be able to read this web page as it was created in 2023,  but watch as ChatGPT tries to be helpful and “guesses” what this product is about… 

I asked it to tell me the specific number of templates mentioned on the sales page as a test. (Spoiler alert: there are 52 templates, not 50.) 

An image of a ChatGPT conversation. I send it a link to a sales page and ask it to tell me how many templates are included in our Blog Post Vault and it responds with the incorrect number.

When I prompted it to tell me where it got the inaccurate information it finally ‘fessed up… 

An image of ChatGPT apologizing for the mistake.

It wasn’t reading the sales page at all, it was just “faking it” in an attempt to be helpful. 

When in doubt about whether the responses are accurate, you can ask it to tell you its sources or where it got the information from so you can make sure it’s not leading you astray. 

But bottom line: all of these limitations and detours can create its own kind of time suck. 

It’s easy to wind up with content that sounds super helpful but actually isn’t and ChatGPT will tell you so itself: 

An image of a ChatGPT conversation where I ask it what kind of responses it will generate if it doesn't know something. It responds by explaining that it will generate a response based on patterns from the data it was trained on.

If you’re not super familiar with a topic you’re writing about, you may not even be aware that ChatGPT is just “best guessing” – ultimately, you’re responsible for making sure what it creates for you is on target. 

Way #2: Beware the “ChatGPT Rabbit Hole”

The first thing I learned when experimenting with ChatGPT is that it’s suuuuuper easy to go down a rabbit hole.

An image where I ask ChatGPT if it's common for users to go down a rabbit hole. It responds by saying that it's very common, and if you ask it to, it will try its best to stay focused on a topic.

Feeding ChatGPT with more and more “seed text,” context, and information about our customers in order to get more meaningful responses can quickly become overwhelming. 

As I was playing around with it to help me with various content tasks, I kept feeding it more inputs to see if it would…

  • Create something catchier
  • Make it more exciting to read
  • Change it up to be more engaging
  • Write it so I really want to buy it 
  • Put it in a friendlier tone
  • Less formal and more conversational
  • I don’t like any of these, try again 

And it does! What you can ask it to do is endless. You can keep asking and asking and it will keep answering and answering (turns out, that’s a blessing and a curse). 

Along the way, I’d ask it tangential questions because why not? You’re having a chat and it’s fun! 

  • “What are some target markets who would be interested in buying this product?”
  • “What is their biggest problem?”
  • “What are some blog post topics they’d be interested in reading?” 
  • “By the way, what are some ways ChatGPT can help me learn a language?” 
  • “What are some suggestions for easy vegetarian meals I can make tonight?” 

All of this is great but… well, you can probably guess where this is going. 

After hours and hours of this I realized that while it feels productive, my conversations with ChatGPT were not the same thing as actually finishing a piece of content and getting it out there. 

And even after you’ve spent lots and lots of time “training” it, ChatGPT will still use cheesy language patterns and marketing and sales copy cliches that you may not want to use for your brand. Expect to spend some time editing so you can put it in your voice. 

By the end of my first experiences using it, I was absolutely overwhelmed with the pages and pages of text it generated and all the options, revisions, alternatives, suggestions, and information it had given me that I didn’t know what to do with it all.

So I asked it what to do with it all… 

… we talked about that for a while too.

While using ChatGPT is incredibly useful for lots of different types of content projects, there’s no doubt in my mind it’ll create more work in the long run for others. 

Said another way…

If it takes you an hour to get ChatGPT to write an email you’re happy with but you could have written it in 30 minutes, it’s creating more work and eating up more time, not less. 

So, mind the rabbit hole. You’ve been warned. 😉 

The Advantages: 5 Ways We’re Using ChatGPT to Create Content

After my initiation with ChatGPT, I made some decisions about how to best use it to speed up my content creation tasks. 

Right now, I plan on considering it my “writing assistant” whose job it is to keep me on track and prevent me from getting stuck or getting distracted. 

My job is to stay focused and get into the “flow” so I can complete my tasks in the most efficient way possible. That means closing out ChatGPT at a reasonable point in the process. 

So here are some of my favorite ways so far that I’ll continue to make good use of ChatGPT to work more efficiently: 

Way #1: Get ideas or inspiration


ChatGPT is perfect for getting a nudge of help while staying in the “flow” of your tasks. Rather than going out on Google or social media looking for inspiration, you can just ask ChatGPT instead. 

  • Tell it your topic and ask it to generate some ideas for you
  • Ask it what the most common questions people have about this topic
  • Tell it a bit about your target audience and ask them what their biggest frustration are around a topic

Way #2: Improve your content 

Rather than scratching your head when editing your text, have ChatGPT help you out. Ask it to…

  • Proofread it for you (giving it small passages at a time works best!) 
  • Provide you with alternatives or variations on a section of your content 
  • Put it in a different tone of voice (friendlier, more exciting, conversational, etc.)

Pro-tip: learn from the AI whenever you ask it to make improvements by asking them a follow-up question like, “what specific ways did you improve this content?” 


Way #3. Ask it to summarize your long-form content for you 

When you’re done writing a blog post, for example, your next step is usually to optimize it for search with meta descriptions and so on, and summarize it so you can create a post for social media or Pinterest to promote it. 

Take this routine task off your plate by asking it to summarize your post and create a meta description for you. 

An image of ChatGPT summarizing a blog post and providing a meta description.

Way #3 Use it for research instead of Google

ChatGPT can answer just about any question you have about a topic, which puts it in direct competition with Google. Especially for answers to simple fact-based questions like “What are the 3 largest cities in New Mexico?” 


This way, you won’t be tempted to go out on the internet where you might get distracted. 

Way #4 Ask it to edit for clarity when you get stuck on a phrase

A lot of times when we’re writing content we spin around in circles trying to make a phrase work. This is a perfect task for your new “writing assistant” – just copy and paste the phrase and ask it to provide you with alternatives.

An image of a ChatGPT conversation where I take a phrase from my blog post I'm a bit stuck on and it responds with an alternative way of writing it.

Not bad, but I’ll stick to the original. While ChatGPT is great at creating clear and concise language, always remember it’s not a human.

Remember that your greatest competitive advantage is that there’s only one you. Don’t second guess yourself if you think what you come up with is better than ChatGPT. What you write may not be as “perfect” but that’s… okay. 🙂

Think about the way Autotune changed the music industry. Sure, artists can use it to hit pitch-perfect notes now, but there’s something even more wonderful when listening to authentic and imperfectly-perfect voices like Elvis, Aretha Franklin, Prince, Bowie, Freddie Mercury, Whitney Houston…

So even if your language is not as clear or concise as ChatGPT, remember that you are a unique and original being with your own voice and personality – and that’s something a robot will never have. 

I think. Maybe. I don’t know. You get it.

Way #5 Use ChatGPT in combination with content templates to stay focused

Right now, I’m using one of our Blog Post Vault templates in combination with ChatGPT. I’m finding that using a content template as a starting point provides me with the structure I need to stay focused on the task.

With the templates, all the formatting is done for me and the writing prompts guide me through all the ways I should be sharing my personal insights, lessons learned, and so on.

This way, I can focus without distractions, work faster with the help of ChatGPT, and create original content that’s not robotic (I hope you’ll agree!).

Having a structure to follow means I don’t have to worry about cobbling all responses from the chatbot together into something cohesive.

I must say, it really takes the stress out of the unpleasant side of content creation like all the stuck points and knowledge gaps you run into that slows you down. I just keep ChatGPT open in a new tab and it’s there to help me, but the templates guide me through from start to finish (which is the goal).

Yesterday, I used it in combination with our Content Calendar System for the first time to create social media posts, and it was the most fun I’ve had creating content in a good, long while.

I was able to spend my time telling personal stories and sharing my expertise and experience rather than struggling with coming up with ideas or wondering what to share.

I can’t remember the last time I felt this productive and it’s inspiring me to create more content!

The verdict? ChatGPT is incredibly helpful for creating just about any kind of content you can think of, and what’s even more exciting is that it’s just in its infancy. Expect it to get exponentially more powerful in the not-so-distant future.

But for right now, if your goal is to work faster, just be mindful of the time you spend interacting with it and make sure it’s not slowing you down by providing you with endless options and inaccurate information. 

Key Takeaways:
Yes, you should use ChatGPT to speed up content creation, and no, it will not replace human content creators 

ChatGPT is taking the world by storm right now and we’re all just beginning to grasp what we can achieve with it (and the potential downsides too).  

As things change – when a new disruptive technology comes on the scene – we need to be willing to change and adapt and try to find opportunities rather than feeling fearful about the things we can’t control. 

So we encourage you to play around with ChatGPT too. If you’re using the ConversionMinded Content Calendar System, Blog Post Vault, or any of our other content templates, try using it as a content sidekick and writing assistant!

Let it help you proofread your content, research questions your audience may have about your topics, and even generate ideas for you.

Just remember that it’s not a substitute for telling your story or sharing your human experiences. As we move into the future of content marketing, your unique voice will only become more and more valuable. 

Ready to get started with ChatGPT? 

Are you ready to drop what you’re doing and head on over to OpenAI to get started with ChatGPT?  

Be sure to take away these top tips (unless you have a couple of days to kill down a rabbit hole): 

  1. Work on one content task per chat session (don’t ask it all the things!) 
  2. Know what specific things you want it to help you with before you start a chat
  3. Set a timer
  4. Work on your actual content in a separate tab/document so you don’t get overwhelmed 
  5. Ask it follow-up questions so you can learn from the AI (e.g., “how did you improve this?”)
  6. Double-check accuracy before you publish
  7. Close out ChatGPT so you can finish your task! 

Please let us know how it goes by leaving us a comment! We want to know how everyone is using this exciting new tool.

And please let us know if you have any questions you have about ChatGPT, we’ll be sharing what we learn as we go.

Have fun!

by

Blogging can be a huge challenge when you’re juggling multiple priorities in your business. After years of trial and error, we discovered the secret to staying consistent and getting results is all about choosing the right type of blog post before sitting down to write.

Yup, there are different types of blog posts and when you understand what they are, it takes the guesswork out of what to write and when and makes it possible to dedicate a realistic amount of time for blogging.

This simple strategy we’re about to share with you will help you plan writing blog posts into your routine and create the type of posts that consistently attract and convert your ideal customers.  

But before we break it all down, you might be wondering… 

What Do We Mean by “Type of Blog Post”?

There are dozens of different types of blog posts with proven post structures that keep readers engaged. In fact, you’re probably already familiar with many of them even if you’ve never thought about it this way before!  

For example, there are… 

  • List posts (“Top 10 Ways to Make Extra Money”)
  • How-to Posts (“How to Plant a Rooftop Garden”)
  • Informational Posts (“What is a Brand Identity?”)… 
  • And so on…

We analyzed the different types of posts that delivered the most traffic and conversions and then broke them down into predictable formulas. We wanted to stop “winging it” with our strategy and be able to choose the right post type for our needs and the time we have available.


The 3-Bucket Blog Post Strategy

Once we had an exhaustive list of all the different post types, we then sorted them into 3 larger “buckets.” Each bucket includes post types that vary in length and detail including:

  1. a strong foundation of short posts that answer a specific question
  2. authority posts that go into more detail on a topic, and 
  3. domination posts that take a deep dive into broad, competitive topics.

Thinking about it this way helped us to first consider our goals…

  • Do we need to build credibility and authority around a new topic area?
  • Do we need to create awareness about a new product or service?
  • Do we need to drive more traffic from search?
  • Do we just need to create a post as quickly as possible to stay visible with our audience?

And then, looking at the goal for the post through the lens of these 3 buckets, we were able to remove the guesswork from the equation so we always knew exactly what we needed to write and why.

An unexpected benefit of following this strategy is that by pulling from each of the three categories, you end up with the perfect mix of specific, broad, and deep-dive blog posts that build authority with your ideal customers (and Google too). So…

The rule of thumb is that 1/3 of your content should come from each bucket.

(Keep in mind we’re talking about the number of words. You’ll be creating a lot more shorter posts than lengthier posts.) 

This is not a hard-and-fast rule, but approaching it this way will keep you from overworking yourself and keep you focused on your goals.

Now, let’s look at each of these categories in more detail with examples you can pull from to put this strategy into practice…

⚠️ Important note before we dive in: We use “target word counts” as a way to gauge how much time you should allow for writing the post. But, do not worry about hitting some arbitrary number. The goal isn’t a number of words, it’s to be helpful to your audience. If you need to write more or less in order to be helpful, that’s what you should do. 

Types 1-6: Foundation Posts

What is a Foundation post? A foundation post answers a specific question your target audience has, addresses a topic that has low competition in search, and should be in the 1000-1500 words range. 

When to write them and how long it will take? Foundation posts are great to write if you’re a new blogger or if you’re covering a new topic category. Ideally, you want to write lots and lots of foundation posts before you move on to more competitive topics. You can also write them at any stage of your blogging journey when you’re short on time because they just take an hour or two (tops) to crank out. 

While these are fast and easy to write, don’t underestimate foundation posts, they also play a crucial role in your blogging strategy… 

Writing lots of foundation posts on a particular topic will help your readers understand what your blog is about and helps Google understand your niche. This is important because “topical authority” is a key Google ranking factor every small blogger should be paying close attention to – it’s the one that allows you to compete with bigger sites in search.

The best way to explain this is with an example:  

Say you’re a professional baker specializing in “realistic cakes” and you blog a ton about realistic cake baking. Google will begin to see you as an expert on this topic. Then, say a big fashion blog decides to write a one-off post called “How to bake a realistic cake shaped like a designer purse” and you’ve written a post on the same subject. Which one will Google rank higher? Even though the fashion blog may be more established, and even if your domain authority is lower…because the topic is outside of their expertise and you’ve earned credibility with Google along the way, Google will consider your content to be more authoritative. 

Foundation Post Examples

Post Type #1: “WHAT IS”

Sometimes readers just need a quick answer to a specific question. Imagine them typing it into Google: “What is [X]? 

You’ll answer the question directly and then dig into more details so they get the full picture.

“What is?” posts can also answer other types of questions that require a quick response like: 

  • When is…?
  • Who is…?
  • Why is…?
  • What does…?

They all follow the same format, intent, and structure. 

“What is” posts are perfect when you want to:

  1. Define one simple niche term or concept (e.g. What is a long-tail keyword in SEO?) 
  2. Share your “recipe” for success (e.g. What is the most effective at-home workout for stay-at-home moms? What is the best content mix for a healthcare business?) 

The key with these posts is to get really specific and niche down who you’re writing it for. That way, you’ll have less SEO competition and be able to write the posts quickly.

Post Type #2: “MY TAKE”

With a “my take” post you want to choose something that’s currently being taught by pretty much everyone in your niche and find a flaw in it – there’s always a flaw. Or maybe you just have a better way to get the results your target audience is looking for. Either way, play off the existing flaw(s) in the strategy and tell your readers what they can do instead.

What you’re doing here is creating interest by going against the current wisdom. You’re also showing your readers that:

  • You know why conventional wisdom may not be getting them the results they expected
  • You’re an authority on the subject and not just repeating what others recommend
  • You’re giving them great value and a better way to help them get the result they want
  • You can help them achieve greater success by thinking outside the box

Post Type #3: “REASONS WHY”

Think about your target market, your niche, and your specialty offering. You know your ideal customer inside and out. You developed your technique, program, service or product because you know it will make a difference in their lives. Right?

You know you have what they need, but they don’t know it yet. So, they need a reason to apply what you teach, sign up for your email list, and ultimately, buy from you. 

In these blog posts, you’re going to give them the reasons that show them why they need what you offer and why you’re the best person or business to help them. 

Make sure you give specific examples from your experience (or your clients/customers) to show how your technique solved the problem. 

Post Type #4: “THE ONLY THING”

In these posts, you’re going to share your unique strategy to help your readers reach a big goal they have – one that you’ve already achieved. You’ll be framing it as the ONLY strategy they need to see success.

This is a perfect opportunity to “brand” your strategy with a unique name – e.g., The Runner’s Roadmap to 10K. 

In your posts, give them an overview of your strategy with just enough details to get them started. 

Then, include a more in-depth freebie they can download to get even more results. 

This can be a great jumping-off point for a new product or program about your strategy!

Post Type #5 “BREAKING NEWS”

These posts answer the question, “What’s changing in my niche?”

You’re going to write about a recent event or breaking news your readers need to know about. It doesn’t have to be “news” news, it just has to be current and BIG…something that will interrupt the way they’re doing things right now…something they can’t (or shouldn’t) ignore.

Good or bad, they’re probably confused about it and need to know more. So in these posts, you’re going to get them up to speed on the changes, help them make sense of it all, and share your takeaways & next steps.

Post Type #6: “MYTH SLAYER”

In these posts, you’re going to debunk common myths to help steer your readers back on track so they can get the results they want. 

These are common myths in your industry that are likely holding your readers back because they’re confused or simply going down the wrong path and wasting precious time.

You’ll share up to five myths, then tell them what the “truth” is and what they should focus on instead.

Not only will you be helping your readers get on track, but you’ll also stand out as an expert with a fresh approach. 


Once you have a number of Foundation posts on a topic, you’ll want to move on to broader questions and more competitive keyword phrases with… 

Types 7-15: Authority Posts

What is an Authority post? Authority posts allow you to go into more detail and depth on a subject and address more than one related subtopic. These typically fall into the 1500-4000 words range. 

When to write them and how long it will take: Authority posts can be written at any time in your blogging journey but have a better chance to rank with related Foundation posts ranking first. Plan to set aside 2-5 hours to write them. 

If you’re confused about the difference between Foundation and Authority posts, this should help: 

In Foundation posts you’re giving a quick, focused answer to a question and in Authority posts you’re answering the question by tying together multiple related ideas (think: How-to and List posts).

The great thing about Authority posts is they’re just long enough to show your audience you really know you’re stuff but they’re not so long that it takes you forever to write them. In fact, we think of Authority posts as the “bread and butter” of our blog content. Most of our posts fall under this category.

Authority Post Examples

Post Type #7: “HOW TO” 

Think about one really specific task your ideal client is trying to do and create an epic step-by-step ‘how to” tutorial for it.

The key here is to keep these posts simple and practical. Pick a problem they may be having, a technique they may be trying to master, or a strategy they’re trying to understand.

Whichever topic you choose, be as clear and detailed as you can. So you’re not just telling them, “Do this, then do this.” You’re “showing” them each step by using examples, graphics, charts, anything you can think of that will help them follow along. 

One trick we use when we’re stuck for words is to simply write:

For example…

Or

Here’s what I mean…

That usually triggers ideas for examples, visuals, etc. Give it a try!

Post Type #8: “LIST POSTS” 

List posts are a popular go-to staple for every blogger because they’re an easy way to organize educational content whenever you want to share a collection of tips, techniques, strategies, and ideas. 

Readers love them too because they provide options for different ways to go about achieving their goals and allow them to pick and choose what works best for them. 

Post Type #9: “TOP RESOURCES” 

In these posts, you’re going to share your ultimate list of # BEST products and resources to help your readers achieve a big goal.

Think about something they’re struggling to do right now, then list all your favorite tools to help them do it.

For example, if you’re a social media expert, you can share tools for creating + sharing content. If you’re a health coach you can share your favorite resources for eating better. And if you’re a travel expert, you can share the best places to skydive.

They can be free or paid tools: books, apps, templates, freebies, podcasts, guides, videos, blogs, ebooks, courses…anything that will save your readers time, money, frustration, stress, and so on.

If it makes sense to include your own resources, products, or affiliate products, go for it! Just make sure any tool you include is the “best of the best” and ultra-relevant to the specific topic you’re covering. 

Post Type #10: “WHAT’S NEXT”

The What’s Next post gives your readers an action plan of steps to take before they complete a task or right after they’ve just finished a critical milestone. 

There are two types of What’s Next posts:

  • What to Do Before
  • What to Do After

For your “before” post, you’ll talk about something your audience either needs to do or is already doing but could use improvement. For example, if your audience is bloggers, you might share the steps they should take before they write their posts. Should they research keywords? Create a list of topics to write about? Help them prepare so they have the best chance of success.

Your “after” posts are similar, but cover the steps they should take after completing an important activity. For example, if your audience regularly does push-ups, what should they do after completing them to get the most out of their workout? Should they rest? Eat? Stretch? That’s what you’re going to clarify to help them visualize finishing the push-ups the right way.

Post Type #11: “TOP MISTAKES”

None of us likes to make mistakes. We want to avoid failure at all costs, mostly because we’re busy and don’t have time for anything less than the fastest, shortest route.

So when you point out common mistakes, your readers are going to pay attention because they want to know what NOT to do. More importantly, they’ll want to know what they SHOULD do instead. And you’re going to tell them!

As an expert who’s “gone before them,” you’ve done it the wrong way and you’ve done it the right way. So you’re also positioning yourself as an expert who can help them fix the mistakes – even before they make them. 

And you may offer a course, program or service that can help! 😉

Post Type #12: “EXPERT ROUND-UP”

The goal of this post is to build backlinks, increase your authority and visibility, showcase your expertise, and empower and inspire your readers.

You’ll be reaching out to influencers in your niche and asking them to answer specific questions, then “rounding them up” in your post. Then, once you publish the post you’ll let them know so they can share it with their audience (hence, the backlinks!).

Just be prepared to spend more time on it than other posts. It will be worth it! Not only will it benefit your readers but will also do a lot for you.

Post Type #13: “PRODUCT REVIEW” 

This post is a peek-under-the-hood of two competing products, an in-depth review that’s jam-packed with value. 

When customers are ready to buy, they’ll need help choosing the right brand. And your Product Review post will help them decide.

They’re going to love you for this one! You’re going to save them tons of time (and money) on a product that may not work for them, and help them get going with the right product.

Post Type #14: “THE INFOGRAPHIC” 

It’s easier to grasp big ideas visually, which is why everyone loves infographics. Even in the context of long-form content, our brains are wired to focus on graphics first.

So with this infographic post, you’re going to make it super easy for readers to engage with your post. You’ll also help generate traffic because infographics are super shareable on social media. 

(Extra credit if you add an “embed code” below your infographic so others can add it to their website too. That way the links will point to your post and you’ll gain SEO superpowers.) 

There are 3 types of infographics we recommend:

  • List infographics – 8 tips for saving money, etc.
  • How-to infographics – 5 ways to cook potatoes, etc.
  • Statistical infographics – great for an overview or trends in your niche

To create your infographic, you can use Canva or other graphic tools like Venngage and Visme.

Post Type #15: “FAQ POST” 

Think about the most common questions you get asked by clients and others who are trying to learn about a specific topic you teach. Ever notice how the same questions pop up?

In this blog post, you’re going to tackle them all in an epic FAQ-style post. 

Spend some time brainstorming questions your readers may have, and don’t be afraid to include questions they haven’t necessarily asked but you know they’re secretly wondering. Think about the questions you had when you were first starting out. There’s a good chance your readers are asking them, too. 


Before we finish things up, be sure to grab this handy .pdf cheat sheet so you always have all 20 blog post types at your fingertips!


While there’s no “SEO trickery” you can do that compares to putting out very helpful content on topics people are searching for, once you get some Foundation and Authority posts ranking, you’re in the game, friend. That’s when you stand a much better chance at going after more competitive topics and you’re ready for the Mac Daddy of all blog posts… 

Types 16-20: Domination Posts


What are Domination posts? These are intended to become the voice of authority on your niche topic. The reader should never need to read another thing about this topic again; that’s how knowledgeable and complete it is. They’ll even want to bookmark it so they can refer to it again and again.

Think… 

  • The Beginner’s Guide
  • The Ultimate Guide
  • Everything you need to know about [topic]

When to write them and how long it will take: Get ready to make some time in your schedule for these because you’re going deep. 🙂 But, it’s worth it if they rank and can bring in a lot of organic traffic.

One way we approach writing Domination posts is to work on them little by little behind the scenes (posting Foundation and Authority posts in the meantime) as we have time.

Many posts for broad, competitive topics that rank high on Google are 6k-8k words! So the time it takes you is however much time you need to make it the most helpful content out there. We’ve spent as much as 20 hours on a single post but when something like this ranks it’s worth it – especially when you consider how much ads cost.

And even if you invest your time in a domination post and it doesn’t go anywhere, you’ve done the work to get clear about this topic and you can “spin off” many other pieces of content (webinars, long-form videos, paid trainings, email sequences, and of course lots and lots of social media posts, etc.) 

Domination Post Examples

Post Type #16: “BEGINNER’S GUIDE”

These posts are for beginners as well as experienced or advanced professionals, so don’t assume your reader knows anything about the subject. Insert examples where appropriate and be sure the terms and concepts you use in this guide are included in your table of contents, using keywords throughout.

Beginner’s guides are chock full of information and your chance to create an incredible and comprehensive reference for your readers, old and new!

Post Type #17: “ULTIMATE GUIDE”

These posts provide a comprehensive resource; an in-depth, complete reference that readers will want to bookmark and refer to again and again. You’re going to take your readers from the very beginning to the very end here. 

When you do these right, you have a greater chance of ranking high in Google and establishing yourself as an authority.

Post Type #18: “EXPANDED HOW-TO”

Expanded How-to posts are similar to the How-to posts you’ve written in the Authority bucket. The big difference is that these are much more in-depth, include more links to other posts and resources, and give more examples. 

When you write these, you want to be thinking, “What else do they need to know in order to implement what I’m showing them?”

Post Type #19: “EXPANDED WHAT-IS” POSTS

These versions of What Is posts are longer than the typical version you’ve seen in the Foundation templates. That’s because you’re going after broad questions that require complex answers. 

If you remember, the typical what-is post answers a very niche, specific question such as “What is a Brand Promise?” 

Expanded What Is posts answer bigger questions like “What is Branding?”

Your answer will include multiple subtopics, mini-sections, definitions, and so on. 

Post Type #20: “THE EVERYTHING POST”

The Everything Post is all about telling your readers everything they need to know about a specific topic. 

They’re similar to the Expanded What Is and Ultimate Guide posts with a subtle difference:

These are “hub” posts that link to other posts you’ve written that zero in on a specific keyword related to your main topic. 

So in these posts, you’re going to incorporate other keywords and terms related to your main topic to help you get “low-hanging fruit” SEO traffic. 

The idea is to break your post into subtopics (e.g., the 10 “things”, 10 “secrets”). Each thing will mention a specific keyword and talk about it, then link to another post you’ve written on it. 

So you’re mentioning specific keywords in each of the 10 things, then linking to another post. In this way you’re letting Google know that your main topic or term is a niche that you dominate so you have a better chance to rank for it. 

52 Blog Post Templates You Can Use to Implement this Strategy

If you’d like to give this strategy a try, we have good news! We’ve created plug-and-play templates for each of these blog post types to save you dozens of hours each month blogging.

The Blog Post Vault is 52 pre-written blog post templates completely organized into the Foundation, Authority, and Domination buckets:

20 Foundation Posts ✅ 20 Authority Posts and ✅ 12 Domination Posts

You’ll have over 500 pages of blog post templates ready for you to pull from — simply follow the prompts, plug in your expertise, and hit publish!

Every template follows our proven post structure so you don’t ever need to worry about forgetting important details that encourage your readers to stay engaged and take the next steps with you.

They’re also formatted for SEO with loads of tips and tricks for best practices with your posts.

Pro-tip: use the templates in combination with ChatGPT to supercharge your productivity!

You deserve a stress-free way to get your business visible and reach your financial goals and blogging is still the best way to build your email list and drive traffic back to your website.

So we hope this post has given you the inspiration to take control of your blogging strategy and we hope you’ll join us in The Blog Post Vault, too!

by

Have you found gorgeous styled stock photography to use in your blog? Need some inspiration to create branded blogging pictures? You’re in luck! I’ve got an amazing Picmonkey tutorial that shows you how to edit free stock photography to fit your brand so you really stand out on social media. It even includes a free downloadable set of ULTRA beautiful, creative photography you can start using today. stock photo resources / stock photography ideas / feminine stock photosBy Aminta Demadura

Have you ever come across styled stock photos you absolutely love, and then wondered how you could make them fit with your brand?

I wondered the exact same thing.

And as it turns out, adding your own branding to modern stock photos is really easy!

Branding and customizing stock photos is a super important step in creating a unique business that your readers and customers absolutely love. This type of branding helps your followers relate to you, form a connection with you, and in the end, purchase from you.

So it’s important that your visuals represent who you are and what you do.

In this post, I’m going to show you how to create social media graphics that stand out above the rest using styled stock photos (and my favorite tips to customize them and make them your own).

Before we get started, let me show you the original styled stock photo we’ll be working with below:

super high resolution stock photos

If you’re curious, styled stock photos are created with entrepreneurs, bloggers, and business owners in mind. I like to think of them as “startup stock photos.” They’re incredibly handy when you’re starting out and don’t have the time, expertise, or space to take your own photos.

Styled stock photography makes use of props (office supplies, household items, plants, stationery, flowers, mugs, and so on), and can range from flat lays, to mock-ups, close-ups, and still lifes. And with the rise of free feminine styled stock photos, there are new sources popping up every day.

Let’s have some fun and see how you can make this image fit your brand.

1) Use Fun Filters to Brand Your Photos

My favorite free image editor is Picmonkey. If you’re a Canva fan, that’s fine too (I won’t hold it against you!), but I find Picmonkey to be more intuitive, easier to work with, and I love that it comes with SO MANY features.

In the images below, I added a simple filter to each of the photos. Specifically, the Yester-year filter and the HDR filter.

how to create social media graphics free

As you can see, a filter can really change the mood and vibe of a photo, which is perfect if you’re trying to add your own style to a stock photo. Picmonkey has many, many filter and effect options, so spend a little time going through them and find out what works best for your style and the photos you have to work with.

(If Photoshop is more your style, you’re gonna love this tutorial.)

2) Use Effects to Make a Photo Instantly Unique

Have you checked out Picmonkey’s effects yet? If not, you’re seriously missing out. Effects are the fastest way to make bold changes to a photo that really makes it your own. In this image, I used the sunglow effect to add a radiant center with a vintage tint to the original image.

startup stock photos

I love using these types of effects for social media, especially Instagram. Trust me, there’s nothing worse than finding a ton of other accounts using the same feminine stock photos as you in their feeds (hint: It’s not good for branding!)

And if you want to get really wild? Try layering two or three effects and see what you get. Many combinations look really cool together.

Effects are the fastest way to make bold changes to a photo and really make it your own.Click To Tweet

3) Gradient Overlays Are In

Here’s a fun one. If you want a super fast way to add your brand colors to an image in a unique way, try adding a gradient overlay, like this:

free open source stock photos


I always hear bloggers complain about how hard it is to find styled stock images that fit their brand colors. But the truth is, it doesn’t have to be!

With a little creativity you can take almost any image you love and customize it to suit your brand style. Make the gradient as light or dark as you want to get the right look, and know that if using a lighter photo, it may work best if you’re not going for that Lisa Frank look.

4) Take Horizontal and Vertical Crops of the Image

Depending on how detailed the original image is, you can easily squeeze another 10-20 images from it by cropping it in different parts of the photo:

feminine stock photos

Vertical crops are great for Pinterest and square crops are best for Instagram. You can also take horizontal crops like the one shown above to use in your blog posts and tweets.

On top of that, you can also create header images for Facebook, Twitter, and your blog by taking super wide but short crops of your image. How cool is that?

And if you want even more options beyond just cropping, try flipping, rotating, or changing the angle of your cropped versions.

5) Create Pinterest Pins that Stand Out from the Crowd

If we’re being honest, we all know it takes some amazing looking pins to really “make it” on Pinterest. They need to be bold, beautiful, and easy to read. They need to entice people to click through to your blog.

This is where making some savvy edits to free styled stock images can really help you make attention-grabbing pins.

how to create a pin in Pinterest

In the pin above, you can see that I added a filter to the cropped image to make it a little more artistic. Then I added a transparent white box, my brand fonts, and my logo to complete the pin.

BAM. You’re done.

6) Make Inspirational Graphics to Connect With Your Audience

Inspiring your audience and encouraging them to return to your blog over and over is a big part of any blogger’s job. You need to motivate and inspire your readers to really form that connection, and inspirational graphics can be a great way to do just that.

Thankfully, making inspirational graphics is easy and quick.

In the photo below, I simply added a darkening filter to the vertically cropped image that I extracted from the original. Then, I added a large white script font over the top of the darker areas to create a unique and attractive, inspiring image.

how to use PicMonkey for free

If you aren’t already, I highly recommend you try out this tactic on Pinterest and Instagram. Both platforms are super visual and people loooove inspirational images on them. Give it a shot – I promise you’ll see a little boost in traffic and engagement.

7) Feed the ‘Gram with Some Branded Squares

Does the thought of having to come up with yet another amazing photo for Insta ever give you a little anxiety? Yeah, me too. It takes so many photos to really grow a large Instagram following, and most of us just don’t have the time to plan, shoot, and edit that many photos.

If that’s your predicament, this tip will help. I recommend taking a bunch of square crops from different parts of your original styled stock photo (step #4, above).

Then, make them even more unique by flipping or rotating them in new directions, and adding filters and effects to really amp up the style. There are seriously hundreds of different possibilities you could make here, so spend about 30 minutes tinkering in a free image editor. You’ll be creating your own Instagram styled stock photos in no time!

8) Create Promotional Graphics that Make People Click

Once you have a product for sale, you’ll need to start spreading the word. Promotional graphics (used sparingly) on Pinterest, Twitter, Instagram, and other social media accounts will let your followers discover your new products and will help give you some social cred.

amateur stock photos


You can see from the image above that not only did I crop it, I also rotated it to a completely new angle. After that I added a pretty script font on top of an overlay to help promote the sale.

9) Make Twitter Images that Stop the Scroll

If you’ve been on Twitter more than once or twice, you know that tweets with pictures are waaay more noticeable than text-only tweets.

Standing out is an important part of gaining Twitter followers and encouraging your current followers to actually click through and read your blog posts. Images play a huge part in catching the eye and enticing the reader to click through. Not only that, but they also help to establish your brand and your professional image.

Lucky for us, making Twitter images is a cinch. I use Picmonkey’s Hub to save templates for each of my graphic types.

instagram styled stock photos

Once the template is there, all I have to do for each new image is go in and change the text and background image. Three minutes, tops.

Where Will You Go from Here?

Is your brain overflowing with ideas on how to doll up your own free styled stock photos? Once you’ve gone through the editing process a few times, you’ll quickly find that it’s really easy and makes a huge difference to the visual appeal of your business.

I highly recommend creating branded templates for Pinterest, Instagram, and Twitter using an editor like Canva or Picmonkey. Templates will save you so much time, and they’ll also help keep your branding on track. Good luck!

Before you go…

Don’t forget to grab your free styled stock photos pack right here! This pack is perfect for blog posts, Pinterest pins, Instagram posts, tweet images, and more. And of course, you can customize the photos as much as you’d like using my digital photo editing tutorial above.

Click the image below for your free high-resolution stock photos download:

free high resolution stock photos download

by

How to Write a Blog Post that SellsDo you want more customers?

Want to know how to format your blog posts for more subscribers and sales?

Blogging is a powerful way to build your business when you have a strategy in place that goes beyond putting words on a page and getting people to read them.

Today, I’m sharing how to excel at blogging as a way to grow your audience, increase sales, and convert readers into customers.

BONUS: Before we dig in, I created this high-converting blog post cheat sheet to help you put what you learn into action.

Grab the high-converting blog post cheat sheet!

Step #1: Research blog topics that perform well

The first step to converting more customers through blogging is to write about topics that your audience wants to read.

If you’re struggling with this step, use these tools to discover topics with a high number of social media shares and Google searches.

BuzzSumo

BuzzSumo is a powerful content research tool that will help you gather information on what has performed well on social media in any industry. Both paid and free versions are available, and you can use it to discover viral content with a high number of retweets, likes, repins, and shares.

Enter a keyword into the search bar and you’ll see which content has the highest number of shares on Pinterest, Twitter, Facebook, and LinkedIn.

how to become a blogger with an incredible online community using BuzzSumo.

Keyword Planner

The Google Keyword Planner is my first stop when I’m out of blog ideas. It’s a free tool that will show you the important terms people are searching for on Google.

To get started with the keyword planner, enter your keyword. Then, enter your targeting and use the keywords filters to refine your search. I recommend filtering your results for low competition.

You’ll see search results for your original keyword plus a list of related keywords.

blog writing tips using the Google Keyword Planner

When you have all the keywords you want, click Review Plan. On the next screen, click the Keyword tab, choose a date range, and enter a high bid to make sure you see all the results.

Now, you can see the actual monthly search volume in the Impressions column, which will give you an accurate view of how many people are searching for your blog topic. I aim for at least 1,500 searches.

Want to know how to create a blog that people want to read? Use Keyword Planner to find out what people are searching for around your blog topic first.

Facebook Groups

I’m in a number of Facebook Groups related to blogging and entrepreneurship and have discovered interesting blog ideas from questions members ask. When I see a question that has been asked many times, it goes on my worksheet as a potential blog topic.

To get started with Facebook Groups, select Groups on the left-hand side of your dashboard. Then select Discover from the top menu to see a list of suggested groups based on the pages, posts, and groups that you’ve already liked, shared, or joined. You can also use the top search bar to find groups relevant to any keyword or niche.

If you manage your own Facebook group, why not ask your group members what they’re struggling with related to your niche? Then use their answers as inspiration for future blog posts.

Psst…I would love for you join my Facebook group! You’ll have multiple opportunities to promote your business and be part of an inclusive network of encouraging, supportive people.

Quora

Quora is the hub of questions and answers and an excellent way to find out what people are asking around your niche.

To get started with Quora, log in with your Gmail.

Enter terms or keywords related to your niche and you’ll see discussions and questions appear in your feed. Note the questions where you can provide value, look at what others have answered and make notes on how you can improve upon their answers.

#2: Pick the Winning Blog Ideas

It’s time to document your research and decide which blog topics will make it on to your editorial calendar.

I use a simple Google doc spreadsheet to track the topics and questions that seem to be popular:

  • Original blog idea
  • Target keyword
  • Number of monthly shares
  • Number of repins and FB shares
  • Some notes about the problem the topic solves for my audience
  • Some notes about a product the topic idea could lead to: Does it lead to a sales funnel opt-in? Will it help me make more sales?

Use the blog ideas worksheet to create a powerful blog writing format.

The goal at this stage is to narrow down your ideas to those that are both popular with your audience and align with your business goals. There’s no shame in sharing something supervaluable that helps your readers and grows your business. In fact, that’s why you’re blogging in the first place!

Once I’ve picked topics that I think are winners, I’ll make additional notes about content pieces that I think are particularly interesting so that I can start to frame an angle for my own content. For each piece I’ll note the following:

  • Title/headline
  • Blog post URL
  • Some notes about the piece itself: why it’s helpful and what I like about it
  • Any gaps in the content: where I can improve upon it

Step #3: Format your post for easy reading

When I first started blogging, I’d jump right in and start writing. Before I knew it, I’d go rambling on and on and forget the original points I wanted to make.

The solution to this problem is to create an outline to help you stay on track and to give your post an easy-to-follow structure. When people read your blog post, you want them to be able to spot sections that interest them right away.

Follow these steps to format your blog posts:

Make your post highly valuable. Look through your notes and pinpoint where you can provide more value for your readers. Can you make your article more visually descriptive? More detailed? Longer? How will you fill in the gaps in other people’s content? Be sure to aim for more than 1,000 words for each blog post.

Divide your post into smaller chunks. Long paragraphs and blocks of text can make your post seem like hard work and scare people away. Instead, divide your blog content into smaller sections to make it easy for people to spot what they want to read. Use headings, bullets, short paragraphs, and even short words (“hard” vs. “difficult”).

Show people how to do something. Instead of telling people what to do, show them how they can do it. Dive deep and give people easy-to-follow and actionable steps. Include screenshots and other images to help your audience understand what you’re saying.

Step #4: Add a content upgrade with a clear call to action

Now that you’ve set the foundation for your post, it’s time to build your audience and get more subscribers.

Remember that having someone simply read your blog post is not your end goal with blogging. You want your blog content to be the first step in his or her journey to becoming a customer.

That’s where content upgrades come in.

What is a content upgrade?

A content upgrade is bonus content that your readers can receive in exchange for their email address.

Content upgrades are similar to lead magnets in that you encourage people to opt in. What makes them so powerful is their contextual relevance both to your article and to the intent of your readers.

Here’s an example:

In my social media strategy blog post, I include a button that readers can click to download a blueprint so that they can put what they learn into action.

A box will then appear that asks them to opt in to receive the blueprint:

How to write a blog and make money

By using unique content upgrades for every blog post, I’ve been able to build my email list to more than 11,000 subscribers and sell my digital products. In fact, content upgrades are the main focus of my list building right now.

Think of it like this:

Visitors land on your blog post because they have a problem, your post educates them about the solution and your content upgrade helps them take the next step.

Can you see how content upgrades can convert at amazingly high rates?

The way I see it is that the more content upgrades we can create the faster we’ll increase conversions and grow our email list.

Here’s how to create your content upgrade.

You can create any type of content upgrade with Canva. For the purposes of this article, I’m going to assume that you’re offering a free Ebook.

First, create an account with Canva. Next, use the Blog Graphic as a template and resize it to US letter size, which you can do here:

Use Canva to learn how to blog using visual content.

This first page will be your Ebook cover. We’ll create the interior pages later.

To customize your cover design, select a background color from the left-hand menu or choose a free photo through Elements –> Photos.

The free version will give you access to everything you need to create and download your Ebook. If you want access to premium images and vector elements at a discount, the paid subscription starts at $12.95 a month.

To find free images specific to your industry or blog topic, enter a keyword into the search bar. Be prepared to scroll through dozens of premium images that you can purchase for $10 (free accounts) or $1 (paid accounts). Purchasing the image will also remove the Canva watermark.

Blogging for beginners using Canva to increase traffic.

You can also upload stock photos or images from your own library using the Uploads tab.

Once you’ve selected your background image, drag the corner edges, and resize it to fill the canvas. I like to add an overlay to my background to help my title text stand out.

To do this, select Elements –> Shapes and click on the top left square to place the shape onto your canvas. This will automatically position the graphic on top of your background image. You can rearrange the order if you need to by clicking on Arrange in the top menu.

It's easy to arrange your graphic elements and create powerful blog posts examples.

Next, select the text tool, add your title, and choose the styles you want to use. With a paid account, you have the option of saving brand elements, colors, and fonts to streamline your image creation process.

The last thing to add is your logo, which you can do by selecting Uploads –> Logo and uploading a png or jpg version.

Once you’re happy with the cover, it’s time to populate your pages with copy.

Add a new blank page, paste your copy into a text box and customize the design of your interior page.

Create a simple ebook using Canva.

When you’re finished, save your Ebook design and download it twice:

  • as a PDF
  • as a PNG

You’re done!

Now it’s time to add the content upgrade to your post.

We’re back in Canva to create a graphic button that grabs people’s attention and inspires them to click.

Create a new design using any template. Then resize it as a Twitter Post, and upload the PNG of your Ebook cover.

Next, change the background color so that your graphic button stands out in your post. Add lead-in copy and a square shape to use as the background for your call to action copy (“Yes, Please Send!”).

Your new graphic button will look something like this:

how to create a blog

We’re almost there! The last step is to download the button as a PNG and upload it to your WordPress Media Library.

Finally, add the opt-in form.

The opt-in form is what people will see when they click on your button.

Follow these steps to create a leadbox with LeadPages (you can also use Sumo or Thrive Leads for the opt-in form).

Log in to LeadPages, select Leadbox, and give your new leadbox a name. Next, replace the template image with the image of your Ebook cover. Add a heading, and customize the design of your text and button.

Content upgrades are a powerful way to learn how to write a blog and make money.

The standard template includes a phone field, which you can easily remove by selecting the integration button in the left sidebar. While you’re there, make sure you integrate the form with your email marketing service and test that it’s working correctly.

When you’re ready, publish your leadbox, and copy the image link code.

Publish you landing page on your website to increase conversions.

Next, in your blog post, switch to the text editor, and paste the code where you want your graphic button to appear. The last step is to replace the image source in the code (src=”=s0″) with your button image. To do this, copy the URL from the image in your Media Library, and paste it in between the quotation marks.

Call to action example

That’s it! Now when people click on your button, they will see your pop-up and can opt in.

Where should you place your content upgrade?

Ideally, you want to give readers several reminders to download your content upgrade. I recommend placing it directly after your introduction, in the middle of your post, and again at the end of your post.

Remember that the more you scale this process, the more email subscribers you can get. You can even include different content upgrades to give people many different options, assuming that each free offer is relevant to your post.

Once you have ten or more content upgrades, you can combine them into a resource library or welcome pack to give people an even bigger bonus. The benefit to subscribers is that they will have all your free content in one place rather than having to download each free resource individually.

Resource libraries are easier to create than you may think. You can use the WordPress Portfolio Plugin or a similar portfolio plugin. Make sure you password-protect your resource page so that only your most engaged readers have access to it.

Password protect the resources page so that only people who opt in can access.

The free resource library is one of my highest converting opt-ins. I add a CTA button at the top of my homepage and blog pages as well as at the end of every post.

Step #5: Create the Right Type of Offer

While there’s no right or wrong content upgrade, not all content upgrades are equal.

The trick lies in knowing which ones to create. When you offer your readers something that’s a perfect fit for why they visited your website, they’re much more likely to opt in.

The best content upgrades are:

  • Targeted—Speak to one specific audience, addressing their most pressing pain point.
  • Relevant to your post—You’ll see the highest conversion rates when your content upgrades fulfill the intent your readers had when they came to your blog post.
  • Time-saving—Give people the option to save long-form articles for later if they’re too busy to read them right now.
  • Actionable—Provide your readers with easy-to-follow next steps that they can implement to see results right away.
  • Open-ended—Create a path to future products by inspiring curiosity without giving away the farm.
  • High value—It goes without saying that your content upgrade should provide real value. It’s important to reward the people who have opted in to your email list with something that casual readers don’t get. If your content upgrade is something that people would actually consider paying for, you’re on the right track.

What type of content upgrade should you use?

The first step in choosing the right type of offer is to identify a resource that will extend the value of your blog content.

Here’s a list of content upgrades and the types of content they work well with.

Checklists. Checklists are usually one-pagers that are perfect for how-to and long-form articles. You can outline specific steps people need to take to achieve something. For instance, I know that search engine optimization has a lot of moving parts and that my readers, like me, will have a hard time keeping track of them all. So I offer an SEO checklist upgrade that they can keep on hand for every blog post.

Templates. Examples of templates include social media templates, business plan templates…even productivity templates. In many of my posts related to productivity, I offer readers a time-blocking template they can use to schedule their week effectively.

Download my Time Blocking Template to help you increase productivity and get even more stuff done each week!

Cheat sheets and blueprints. Cheat sheets are like a shortcut to the finish line. They work well for detailed articles and give your readers a high-level view of the milestones involved in getting from point A to point Z.

Ebooks. If your blog posts are part of a series or related to a theme that takes readers on a journey, an Ebook is an easy way to create a content upgrade. For instance, I have a three-part Grow Your Audience series where I show readers how to accelerate their online business growth. Because the blog post are related, each one can serve as a separate chapter in an Ebook and lead seamlessly to the next.

Spreadsheets. Spreadsheets provide a level of organization that makes it easy for people to research, brainstorm, plan, or manage systems and processes. I create Google Doc spreadsheets for many of my blog posts related to planning and workflows so that my readers have something to refer back to and share with their team.

Workbooks. Workbooks help your audience go beyond learning a concept and start putting what they learn into action.

The Blog Post as PDF. A straight PDF of your article may be the easiest route to take. With that said, offering long-form blog posts as a PDF (3,000 words and up) can provide great value for readers who are pressed for time and want to read your content later.

That’s a wrap!

If you’re thinking that content upgrades seem like a lot of work, I get it! Creating high-converting content upgrades takes time and effort, but that time is well spent. Content upgrades can have exponential effects on building your email list and should be seen as an investment in acquiring future customers.

From here, it’s all about engaging with your new subscribers, providing value, value, value, and creating sales funnels that lead people to your products and services.

If you’ve taken the steps above and created your free content around topics popular with your audience and the products and services that you offer, leading people to a sale will be a natural, organic process because you’ll know that your audience truly wants your products.

by

Want to increase blog traffic? I've got 5 easy-peasy blog traffic tips to do it! Click through to see all the website traffic tips. #bloggingtipsYou know what blogging is like?

Running a marathon.

Every blogger starts at the beginning. And even if we can’t see our exact finish line, one thing’s for sure:

We want to get somewhere beyond our first 100 followers, pageviews and shares. We want to increase blog traffic, quick like.

Pouring your heart and soul into your blog and seeing the same pageviews month after month, or even year after year, can wear on your spirit. And seeing fewer pageviews than the month before can make you feel like throwing in the towel altogether. I’ve experienced this firsthand, and it’s a terrible feeling.

Especially when you’re doing everything right and so want to reach your finish line:

  • You’ve got an awesome blog design
  • You’re blogging on the regular
  • Opt-in forms in all the right places
  • You’re researching keywords like crazy
  • Sharing your posts on social media

Today, I want to help clear things up. I’m sharing five quick wins for getting more traffic to your blog so that you can reach your finish line and fulfill your dreams of building a business that you love.

Psst…Need help building your blog audience and traffic? I answer your most pressing questions about traffic, list building, affiliate marketing, social media and more in my Facebook Group. Join over 600 Superheroes.

1) First, change your blog title.

Ain’t no easy way to say this, guys. Blog titles can make or break your traffic.

Your posts are competing with tons of other brands who, like you, want to get more readers to their blog. In order to grab their attention, your blog titles have to scream Yoohoo, over here! I’m the one you want! Read me!

The easiest way to do that is to turn them into mini value propositions that answer these three questions:

  • What is this post about?
  • Who is it for?
  • How will it help them?

If you can frame your titles around the formula below, you’ll be on the right track:

This post will discuss [what] and will help [who] achieve, feel, or think [how you help].

Here’s an example of a title that answers the first prompt: “5 Travel Apps”

This is a great start but we can’t leave it there. Without knowing the who and the how, there’s not enough juice to make people take action.

Here’s a better example: “5 Amazing Apps That Make Traveling Abroad So Much Easier”

Beautiful. Now we know that the post is targeted at people planning an overseas trip. We also know that after reading the post, travel itineraries will be a breeze.

Click to the click.

2) Check social media profiles on your phone.

Ever wonder how much traffic you get from iPhones and Androids?

Head over to Google Analytics >> Audience and you’ll see: Over 50% of traffic these days comes from mobile.

Whoa.

To be fair, I’m a straight-up desktop girl and often forget to check my social media accounts on my iPhone. But with stats like these, we need to cover all bases. If our blog post images don’t pop, people will keep on scrollin’.

Lucky for us, this one’s an easy solve! Pop open your Pinterest, Instagram, and Facebook apps and scroll through your posts. Do they stand out or is the text too small and obscure? If the latter, you’ve got work to do!

3) Design an infographic.

I created my first infographic-style pin months ago, and holy purple cow, the shares on that pin were CRAZY. Waaay more than other pins I’d shared.

It’s still a huge source of traffic and email subscribers. And a big eye-opener for me.

Now I create one for just about every post. Nothing elaborate either – sometimes I’ll use plain text to highlight the steps in a “how to” post. If I have more time, I’ll add fancy icons and graphics.

Sound daunting? I thought so too at first, but you can create infographics pretty quickly using pre-made templates from Canva.

Create infographics with Canva to get more traffic to your blog!

Note: I’ve created both complicated, elaborate graphics and simple, bold graphics. Hands down – simple drives more blog traffic. Make sure people can understand your graphic quickly without having to give it a second read.

The beauty of repurposing content this way is that your infographic can be used over and over again:

  • Submit it to infographic sites
  • Reach out to bloggers and invite them to share it with their audience
  • Embed the code of your infographic in your blog post. When people share on their website, it will link back to your site.

4) Review your keywords.

After you hit publish on a new post, there are still pleeenty of ways you can optimize it for search.

For starters, make sure you review keywords once a month, especially for posts that you really want to perform well.

I don’t know how many times I’ve checked the box on SEO, then later realized that my original keyword was too broad or competitive. Or, I was getting too hung up on an exact target keyword instead of looking at the context of my post.

Think beyond your target keyword.

Nowadays, Google is looking for semantic relevance, which is a fancy pants way of saying “other words in your post to help determine the intent of a search query.”

Whew! Even that’s a mouthful. Let’s bottom-line it:

Semantic relevance is a by-product of writing insanely thorough blog posts. In the process, you will likely include terms that Google will rank you for other than your target keyword.

For instance, I’m targeting the keyword “increase blog traffic” for this post. I imagine that in the future I will rank for long-tail keywords such as “get more readers for my blog” and “increase your blog readers” because I’m including them in a lengthy, well-cited article.

#MORALOFTHESTORY Make your post a comprehensive resource, and there’s a good change you’ll rank for more than one keyword.

Go for quick wins

Some of my posts are on page 8 of Google, sluggishly inching their way up to page 7. And I’m working my buns off to rank them.

Then there are other posts.

Ones I’m NOT paying attention to and not trying to rank. Those posts are on page 2. If I shift my attention to those posts with less competitive keywords, I bet I can get them to page 1 with ease. Here’s an example:

How to get more website traffic with keywords


#TAKEAWAY If you review keywords regularly, you can shift gears to posts that are gaining traction and revisit harder-to-rank keywords later on.

5) Link to a high-quality post

You know the saying Who you spend time with the most is who you will become?

In the blogosphere, who you link to is how your posts will rank.

When you include links to high-quality sites in your posts, Google will see your website as being high quality by association and will likely increase your ranking presence.

How do you find high-quality websites?

I’m so glad you asked! Grab a sheet of paper and write down ten popular blogs and websites in your niche. Then head over to Open Site Explorer and enter the URLs for each.

Open Site Explorer is a tool that displays the domain authority of websites, which is a search engine ranking score that predicts how well a website will rank. The scores range from 0-100, with higher numbers indicating higher quality.

Here’s an example:

How to get more website traffic by adding external links to high quality blogs.


With a DA score of 87, Social Media Examiner is a craaazy high-quality website. If I link to it in my Social Media Strategy post, there’s a good chance my post will get a boost in rankings.

That’s a wrap, friends. I hope this post was helpful for you. I’ll be turning it into part 1 of my Traffic Series, so stay tuned for more traffic-busting tips!

What’s your best strategy for driving blog traffic? Let’s add it to the list!

by